

This chile con queso recipe is hands-down the easiest, most craveable appetizer you’ll make all season. Ready in just 15 minutes, it’s creamy, cheesy, and packed with authentic Tex-Mex flavor that’ll have everyone coming back for more.
I grew up watching my grandmother make chile con queso at every family gathering, and honestly? Her secret was keeping it simple. No complicated steps, no fancy ingredients you can’t pronounce. Just quality cheese, roasted chiles, and a few smart additions that transform a basic dip into something restaurant-worthy. The beauty of this recipe is that it tastes like you spent hours on it, when really you’re looking at under 20 minutes from start to finish.
Jump To Section
Whether you’re hosting a game day party, bringing something to a potluck, or just craving that warm, gooey comfort food, this chile con queso recipe delivers every single time. It’s the kind of dip that makes people ask for your recipe, and you’ll love telling them how ridiculously simple it actually is.
Why This Recipe Works
The secret to exceptional chile con queso lies in balancing textures and flavors. We’re using a combination of white American cheese and sharp cheddar, which creates that signature creamy texture while the cheddar adds depth and complexity. The white American cheese melts like a dream, while the cheddar prevents the dip from becoming bland or one-dimensional.
Roasted poblano or Hatch chiles bring authentic flavor without overwhelming heat. These chiles have a mild, slightly sweet undertone that pairs beautifully with cheese instead of the sharp bite you’d get from jalapeños. Meanwhile, the cream provides richness and helps achieve that silky consistency that separates good chile con queso from mediocre versions.
Additionally, we’re building layers of flavor with onions, garlic, and spices rather than relying on processed cheese sauce packets. This approach gives you complete control over the final taste and quality. You’ll notice the difference immediately when you taste how fresh and vibrant this dip is compared to store-bought alternatives.
Ingredient Tips & Substitutions
Finding the right cheese makes all the difference in this recipe. White American cheese from the deli counter (not pre-packaged slices) is your MVP here—it contains emulsifiers that help everything stay smooth and creamy. If you can’t locate it, Velveeta actually works wonderfully as a substitute because of its similar melting properties. However, pairing it with sharp cheddar ensures you won’t lose that authentic cheese flavor.
For the chiles, fresh roasted poblanos are ideal if you can find them, but frozen roasted poblano strips work beautifully too. During off-season, canned roasted green chiles are perfectly acceptable. The key is removing seeds and any tough skin to achieve the right texture. If you’re heat-sensitive, this recipe is forgiving—use fewer chiles or swap them for mild green chiles entirely.
The cream component is flexible as well. Heavy cream creates the richest version, but half-and-half works nicely for a lighter touch. Some folks prefer a splash of evaporated milk for a slightly different texture. For a dairy-free version, try full-fat coconut milk or cashew cream, though the flavor profile will shift slightly.
Consider pairing this with our best pork tacos recipe for a complete Mexican-inspired meal. Or serve alongside best shredded chicken taco recipe for taco night at home.
Serving Suggestions & Pairings
Warm chile con queso is phenomenal with warm flour tortillas, crispy tortilla chips, or fresh vegetable sticks. The creamy dip also works beautifully spooned over nachos, baked potatoes, or grilled chicken. For a heartier appetizer situation, ladle it over seasoned ground beef or chorizo for loaded nachos that feel more substantial.
Temperature matters here—this dip should always be served warm to maintain that silky texture. A fondue pot or slow cooker set to low works perfectly for keeping it warm during gatherings. If you’re serving at a party, transfer it to a warm skillet just before guests arrive and keep it gently bubbling throughout the event.
For a complete spread, pair this with best Mexican corn salad recipe and quick easy taco pasta recipe for an impressive Tex-Mex feast. The contrast between warm dip and fresh, cool salads creates a balanced menu that feels special.
Storage & Reheating Tips
Chile con queso keeps beautifully in the refrigerator for up to four days when stored in an airtight container. However, I’ll be honest—it’s best enjoyed fresh. The texture changes slightly upon sitting, becoming thicker as the cheese sets. That said, reheating is straightforward and brings it back to nearly original condition.
To reheat, transfer your chile con queso to a saucepan over medium-low heat, stirring frequently until warm and creamy again. If it seems too thick, add a splash of milk or cream to reach your desired consistency. A slow cooker also works wonderfully for reheating—set it to low and let it warm gently for about 20 minutes while you finish other preparations.
You can absolutely freeze this dip, though the texture becomes slightly grainier upon thawing. It’s still delicious, just not quite as silky as the fresh version. Freeze in ice cube trays for portion control, then pop out cubes and reheat as needed. This hack works great for those times you want just a small amount without thawing a whole container.
Making It Your Own
The beauty of chile con queso is its versatility. Want more heat? Add diced jalapeños or a pinch of cayenne pepper. Prefer a protein boost? Stir in cooked chorizo, ground beef, or shredded chicken. For something different, try adding roasted corn, black beans, or crispy bacon bits for texture and depth.
Some cooks swear by adding a bit of lime juice for brightness or fresh cilantro for herbaceous notes. Others incorporate roasted garlic for a sweeter, mellower flavor. The foundation of this chile con queso recipe is rock-solid, so feel free to experiment based on your preferences and what you have on hand.
Additionally, you might enjoy exploring quick tasty spring salad recipe options to round out your appetizer spread with something fresh and light.
This recipe proves that authentic Mexican-style appetizers don’t require complicated techniques or hard-to-find ingredients. With basic pantry staples and quality cheese, you’ll create something that tastes like it came from a restaurant kitchen. That’s the magic of chile con queso—it’s approachable, forgiving, and absolutely delicious every single time.
Ingredients
- 1 pound white American cheese, sliced (from deli counter)
- 8 ounces sharp cheddar cheese, shredded
- 1 cup heavy cream
- 1 can (7 ounces) roasted poblano peppers, or 2-3 fresh roasted poblanos, diced
- 1 medium white onion, finely diced
- 3 cloves garlic, minced
- 2 tablespoons butter
- 1/2 teaspoon ground cumin
- 1/4 teaspoon chili powder
- 1/4 teaspoon paprika
- Salt and pepper to taste
- 2 tablespoons fresh cilantro, chopped (optional garnish)
- 1 jalapeño, sliced (optional garnish)
Instructions
- Melt butter in a large saucepan over medium heat. Add diced onion and cook for 3-4 minutes, stirring occasionally, until softened and fragrant.
- Add minced garlic to the pan and cook for another 30 seconds, stirring constantly, until you smell that wonderful garlic aroma.
- Reduce heat to medium-low and slowly add the heavy cream, stirring gently to combine. This prevents any curdling and ensures a smooth base.
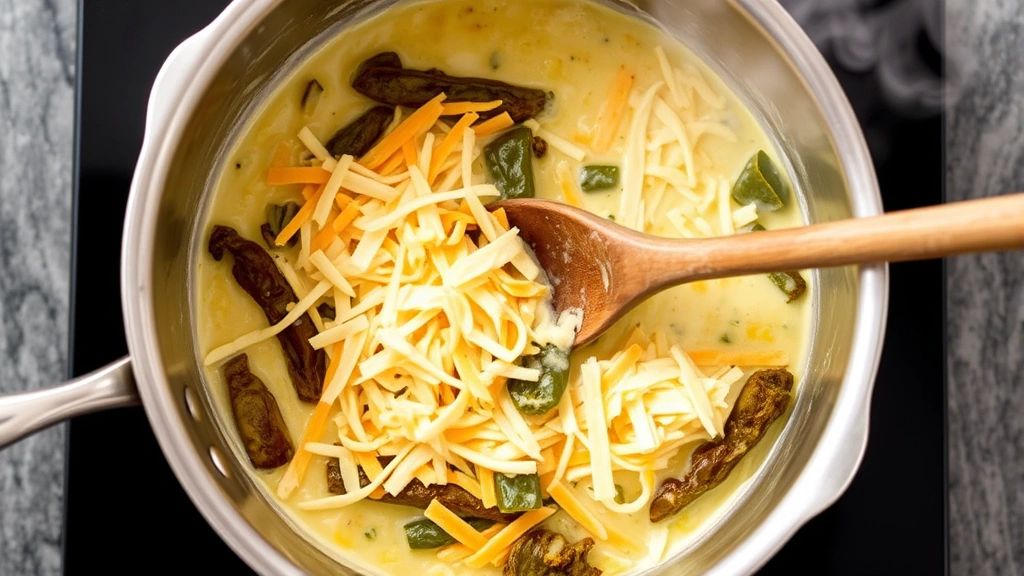
- Begin adding white American cheese in small batches, stirring constantly with a wooden spoon until each addition melts completely before adding more.
- Once all white American cheese is melted and smooth, gradually add the shredded cheddar cheese, stirring constantly until fully incorporated.
- Add the diced roasted poblanos to the cheese mixture and stir well to distribute evenly throughout.
- Season with ground cumin, chili powder, paprika, salt, and pepper. Stir thoroughly and taste, adjusting seasonings as needed.
- Continue stirring gently for 2-3 minutes, allowing flavors to meld together while ensuring the mixture stays creamy and doesn’t stick to the pan.
- Transfer to a serving bowl or keep warm in a slow cooker on low setting. Garnish with fresh cilantro and jalapeño slices if desired.
- Serve immediately with warm tortillas, tortilla chips, or your favorite accompaniments.

Pro Tips
The key to perfect chile con queso is patience with the melting process. Don’t rush by cranking up the heat—medium to medium-low ensures smooth, creamy results instead of separated, grainy texture.
Using white American cheese from the deli counter (not individually wrapped slices) makes an enormous difference. The emulsifiers in quality deli cheese help everything stay silky and smooth. If your grocery store doesn’t carry it, ask the deli counter—most will slice it fresh for you.
Meanwhile, roasted poblanos are the authentic choice for this recipe because they offer mild heat and subtle sweetness that complements cheese beautifully. However, if you absolutely cannot find them, mild green chiles work fine, though the flavor will be slightly different.
For the best flavor, dice your onion finely so it distributes throughout the dip rather than creating obvious chunks. Similarly, mincing garlic rather than using a garlic press creates a more refined texture and prevents any bitter, overpowering garlic flavor.
If your chile con queso seems too thick after cooking, thin it with additional cream, milk, or even a splash of chicken broth stirred in gradually. If it’s too thin, you can let it simmer gently for a few minutes longer, but avoid boiling as this can cause separation.
This dip reheats beautifully in a slow cooker set to low, making it perfect for parties or potlucks. Just transfer to the slow cooker 30 minutes before serving and stir occasionally. The gentle heat maintains that creamy texture without scorching the bottom.
For make-ahead convenience, prepare the dip up to 4 days in advance and store in the refrigerator. Reheat gently on the stovetop or in a slow cooker until warm and creamy. You might need to add a splash of cream during reheating if the mixture has thickened.
Additionally, this recipe scales beautifully for smaller or larger gatherings. For a crowd of 20 people, simply double everything. The cooking time remains the same since you’re still working with medium heat and allowing proper melting time.