

This cottage cheese chips recipe is hands-down one of the easiest, most satisfying low-carb snacks you can make at home. I discovered these crispy, golden chips about a year ago when I was desperately searching for healthier snack options that didn’t taste like cardboard, and honestly, they’ve completely changed my snacking game.
The magic here is surprisingly simple: cottage cheese transforms into these incredibly crunchy, addictive chips in just 15 minutes. They’re protein-packed, virtually carb-free, and taste absolutely nothing like diet food. If you’ve been skeptical about cottage cheese desserts or other trendy cottage cheese recipes, trust me—these are different.
Jump To Section
Why This Recipe Works
The secret sauce is all about the dehydration process. When you spread cottage cheese mixed with seasonings and cheese on a baking sheet, something magical happens in the oven. The moisture evaporates, the proteins concentrate, and you’re left with these shatteringly crisp chips that taste savory and satisfying.
Unlike many low-carb snacks that leave you wanting more, these actually fill you up. The cottage cheese provides serious protein content—about 6-8 grams per serving—which means your body registers satisfaction way faster than with traditional potato chips. Meanwhile, the sharp cheddar and seasonings deliver bold flavor without any weird aftertaste.
What makes this approach brilliant is the versatility. You can customize the flavors endlessly. Going Italian? Add Italian seasoning and parmesan. Craving heat? Cayenne and jalapeño powder are your friends. Want something ranch-y? Dill, chives, and garlic powder create magic.
Ingredient Tips & Substitutions
The foundation of this cottage cheese chips recipe relies on just a few quality ingredients. I strongly recommend using full-fat cottage cheese—it creates the best texture and crisps up beautifully. Low-fat versions tend to remain slightly soggy, which defeats the entire purpose.
For the cheese component, sharp cheddar is my go-to because it has robust flavor that shines through. However, you can absolutely swap in gruyere for a more sophisticated taste, or even mix cheddar with parmesan for added depth. The key is using real cheese, not the pre-shredded stuff, because the anti-caking agents can interfere with the crisping process.
Regarding seasonings, this is where you truly make these chips your own. I use a combination of garlic powder, onion powder, paprika, and sea salt as my baseline. Additionally, a pinch of cayenne adds complexity without overwhelming heat. For something completely different, try everything bagel seasoning, which has become my family’s favorite variation.
If you’re making these for game day or a party, consider creating multiple flavor variations in one baking session. You could do a classic cheddar batch alongside a dill-and-chive version and perhaps a spicy sriracha-seasoned option. Your guests will be absolutely amazed at how good these taste and shocked when you tell them the main ingredient.
Preparation & Technique
Getting the texture right is crucial, so let me walk you through the process. Start by draining your cottage cheese thoroughly—I actually line a fine-mesh strainer with paper towels and let it sit for about 10 minutes. This removes excess liquid that would otherwise create steam and prevent proper crisping.
Once drained, mix the cottage cheese with your chosen seasonings and finely shredded cheese. The mixture should be well combined but not over-worked. You’re aiming for a consistency that’s thick enough to hold together but spreadable enough to create an even layer on your baking sheet.
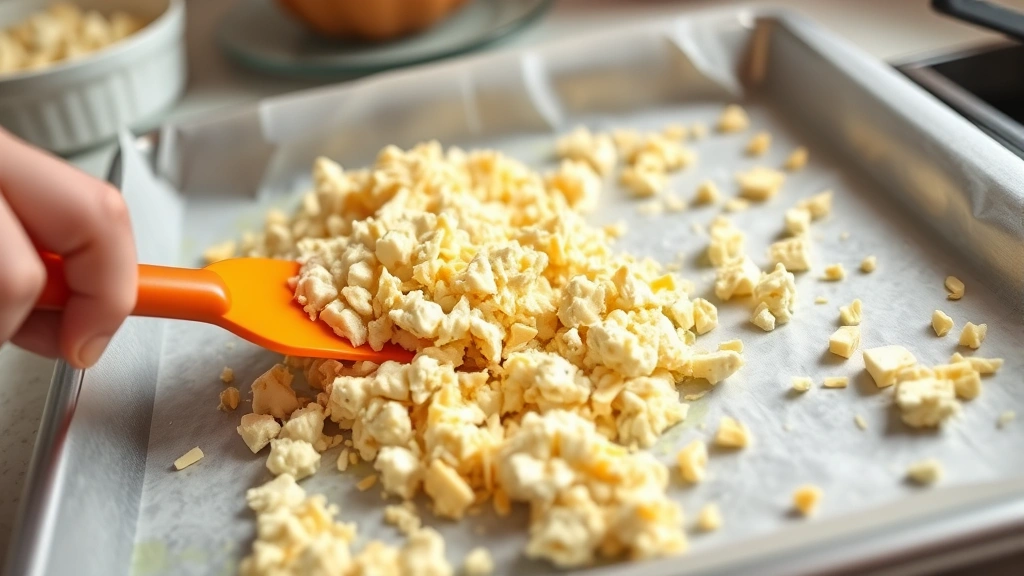
The baking sheet preparation matters more than you might think. Line it with parchment paper for easy cleanup, then use a rubber spatula to spread your cottage cheese mixture into a thin, even layer. Aim for about ¼-inch thickness—this is the sweet spot for maximum crispiness. If you go thicker, they’ll be more chewy; thinner, and they might burn.
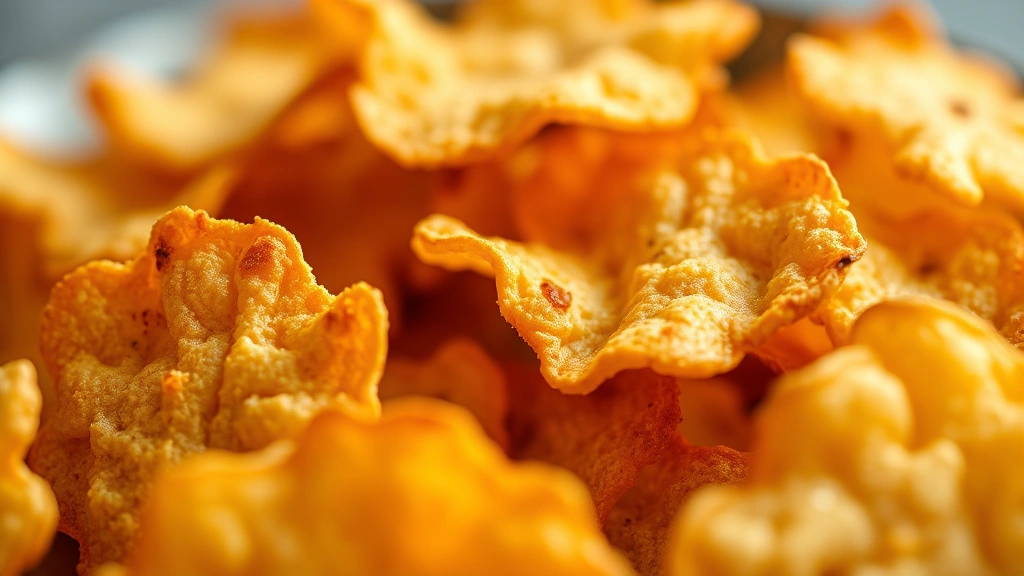
Bake at 425°F for exactly 12-15 minutes, depending on your oven’s personality. You’re looking for a golden-brown color and the edges to be darker and visibly crispy. The moment you pull them out, they’ll continue crisping as they cool, so don’t judge them while they’re still hot.
Serving Suggestions
These chips are incredible straight from the oven with nothing but themselves, but they’re also surprisingly versatile for snacking. Break them into chip-sized pieces and serve alongside a good guacamole, salsa verde, or even a creamy tzatziki sauce. They work beautifully as a dip vehicle without the carb guilt of traditional chips.
I love pairing these with charcuterie boards, especially when I’m trying to keep things keto-friendly. They add textural interest and genuine flavor, which means guests actually reach for them instead of just the cured meats. Additionally, they’re phenomenal alongside soups or salads for some satisfying crunch.
For a more complete meal situation, I’ve even used these to accompany egg salad or tuna salad for a low-carb lunch. They pair beautifully with anything from Perfect Easter Salad to lighter options like Best Pistachio Salad. At dinner time, serve them as a crunchy side with grilled chicken or fish, or alongside Tasty Steak Taco for a fun twist.
Storage & Reheating
Once cooled completely, store these in an airtight container at room temperature for up to 4 days. However, I’ll be honest—they rarely last that long in my house. The crispiness is best enjoyed within the first 24 hours, though they remain perfectly edible beyond that point.
If you notice them softening over time, you can restore crispiness by placing them on a baking sheet and warming them at 350°F for about 5 minutes. This evaporates any residual moisture they’ve absorbed from the air. Alternatively, eat them straight from the oven for maximum crispy-crunch perfection.
For meal prep situations, you can make a double or triple batch and store them in portions. Just ensure they’re completely cooled before storing, and separate layers with parchment paper to prevent sticking. They reheat beautifully and are perfect for grab-and-go snacking throughout your week.
Pro tip: Don’t refrigerate these. The cold actually accelerates the softening process. Room temperature storage keeps them in peak condition far longer. If you want to make them ahead for an event, prepare them the morning of—they’ll maintain their crispiness perfectly for a party later that day.
If you’re intrigued by cottage cheese applications beyond snacking, explore how cottage cheese transforms into satisfying sides like Best Velveeta Mac and Cheese Recipe or rich pasta dishes like Best Penne Rosa Recipe. This ingredient is genuinely more versatile than most people realize.
The beauty of this cottage cheese chips recipe is its complete simplicity combined with impressive results. You’re literally just dehydrating cottage cheese with cheese and seasonings, yet the outcome tastes like something from a specialty snack company. For anyone following low-carb, keto, or high-protein diets, this recipe is absolutely non-negotiable. Make a batch this week and discover why these crispy, golden chips are becoming a favorite healthy snack hack across the internet.
According to Bon Appétit’s snack innovations, simple dehydration techniques like this are revolutionizing how we approach protein-rich snacking. Meanwhile, Serious Eats explores cottage cheese applications in depth, and New York Times cooking methods validate this approach as a legitimate cooking technique.
Ingredients
- 2 cups full-fat cottage cheese, drained thoroughly
- 1 cup sharp cheddar cheese, finely shredded
- 1 teaspoon garlic powder
- 1 teaspoon onion powder
- ½ teaspoon paprika
- ½ teaspoon sea salt
- ¼ teaspoon black pepper
- ¼ teaspoon cayenne pepper (optional, for heat)
- Parchment paper for lining baking sheet
Instructions
- Line a large baking sheet with parchment paper and set aside.
- Place cottage cheese in a fine-mesh strainer lined with paper towels and let drain for 10 minutes to remove excess moisture.
- Transfer drained cottage cheese to a medium mixing bowl and add finely shredded cheddar cheese, garlic powder, onion powder, paprika, sea salt, black pepper, and cayenne pepper if using.
- Mix all ingredients together with a rubber spatula until well combined and uniform in color.
- Spread the cottage cheese mixture evenly across the prepared baking sheet in a thin, even layer, about ¼-inch thick.
- Preheat oven to 425°F and place the baking sheet in the oven.
- Bake for 12-15 minutes, until the mixture is golden brown and the edges appear dark and crispy.
- Remove from oven and let cool completely on the baking sheet for 5 minutes (they will continue to crisp as they cool).
- Once cooled, break into chip-sized pieces with your hands.
- Transfer to an airtight container and serve immediately or store at room temperature for up to 4 days.
Pro Tips
Drainage is absolutely critical for success with this cottage cheese chips recipe. Don’t skip this step or rush it—the extra moisture in standard cottage cheese will create steam during baking, which prevents proper crisping. If you’re short on time, you can drain the cottage cheese while you preheat the oven.
The thickness of your spread directly impacts the final texture. Aim for consistency by using an offset spatula or the back of a measuring cup to create an even layer. Thicker sections will remain slightly chewy while thinner sections become ultra-crispy, so uniform thickness ensures uniform results across your entire batch.
Oven temperatures vary significantly, so watch your chips during the final few minutes of baking. Some ovens run hot and may finish these in 12 minutes, while others need the full 15. You’re looking for a golden-brown color, not pale or burnt. The edges should be noticeably darker and crispy to the touch.
Flavor variations are endless with this base recipe. Try everything bagel seasoning for a trendy twist, Italian seasoning with extra parmesan for a Mediterranean vibe, or Old Bay seasoning for a seafood-inspired flavor. Some people add crumbled bacon bits or jalapeño powder for extra personality.
For those with dietary restrictions, this recipe is naturally keto-friendly, low-carb, and high-protein. Each serving contains approximately 150 calories, 2 grams carbohydrates, and 8 grams of protein—making these an excellent choice for people managing blood sugar or following specific macronutrient targets.
Storage matters significantly for maintaining crispiness. Room temperature in an airtight container is ideal—refrigeration actually accelerates softening due to moisture absorption. If chips soften over a few days, simply reheat them at 350°F for 5 minutes to restore their original crunch.
Make-ahead tips: Prepare these in the morning for evening snacking, or batch-make several variations on Sunday for week-long snacking. They’re perfect for meal prep because they require zero reheating and stay shelf-stable at room temperature. Pack individual portions in small containers for grab-and-go convenience throughout your week.