
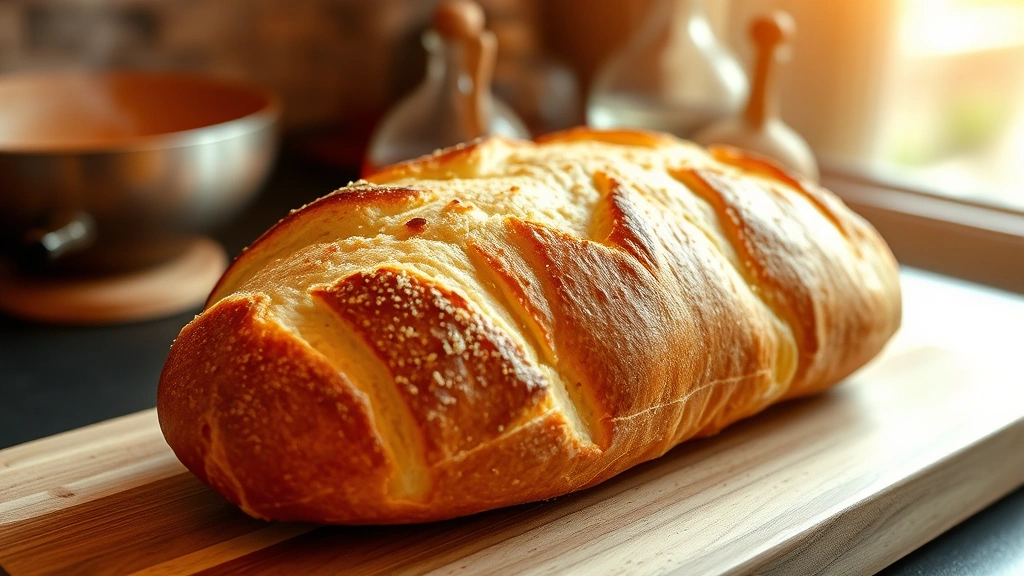
This crusty Italian bread recipe is the kind of homemade masterpiece that’ll have your family gathered around the kitchen before it even cools down. There’s something absolutely magical about pulling a golden, crackling loaf from your oven—that shattering crust giving way to a soft, airy crumb inside. I’m sharing my go-to method that’s been perfected over years of baking, and honestly, it’s easier than you might think.
What makes this recipe special isn’t some complicated technique or exotic ingredient list. It’s all about understanding a few fundamental principles: time, temperature, and steam. When you give your dough plenty of time to ferment, use the right oven temperature, and create steam during baking, you get that authentic Italian bakery crust that shatters beautifully under your teeth.
Jump To Section
I remember my first attempt at making crusty Italian bread at home. I was intimidated, thinking I needed special equipment or years of baking experience. Turns out, all you really need is patience and a basic understanding of how yeast works. Now, I bake this bread at least twice a month, and my kitchen smells absolutely divine every time.
Why This Recipe Works
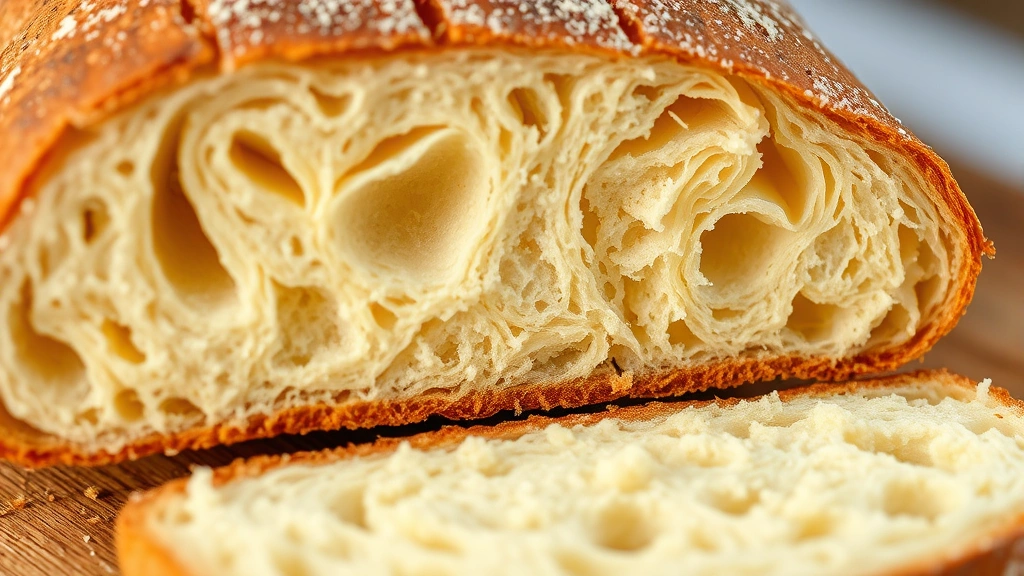
The secret to achieving that perfect crust lies in the long, cool fermentation. By letting your dough rise slowly in the refrigerator overnight, you develop incredible flavor and create the perfect texture. This slow fermentation also makes the gluten structure more extensible, allowing for better oven spring—that dramatic rise that happens when bread first hits the hot oven.
Steam is absolutely crucial for that shattered, crackling crust you see on authentic Italian bread. As the dough heats up in a steamy environment, the exterior stays moist longer, allowing it to expand fully before the crust sets. Once the crust firms up, that moisture caramelizes into a beautiful golden shell. Meanwhile, the interior stays tender and open-crumbed because of the careful hydration and handling throughout the process.
Additionally, the high oven temperature creates Maillard reactions—those complex flavor and color compounds that make bread taste bakery-quality. The combination of 500°F heat and steam transforms simple flour, water, salt, and yeast into something genuinely extraordinary. This is why your homemade loaf rivals anything from an Italian bakery.
Ingredient Tips & Substitutions
You’ll want to use bread flour rather than all-purpose flour if possible. The higher protein content (around 12-14% versus 10-12%) gives you better gluten development and that chewy texture we’re after. However, all-purpose flour absolutely works if that’s what you have on hand—your bread will be slightly more tender but still delicious.
For the yeast, instant yeast is my preference because it’s more reliable and consistent than active dry yeast. The particles are smaller, allowing them to hydrate more evenly. If you only have active dry yeast, use about 25% more since it’s less concentrated. Never use the rapid-rise variety, as it doesn’t develop flavor as well during the long fermentation.
The water quality matters more than you’d think. If your tap water is heavily chlorinated, let it sit for a few hours or use filtered water. Chlorine can interfere with fermentation and inhibit yeast activity. Sea salt is lovely here, but kosher salt works perfectly fine too—just avoid iodized salt, which can affect fermentation.
Serving Suggestions
Fresh from the oven, this bread is magical with just good butter and flaky sea salt. The warm, steaming interior practically melts on your tongue. This crusty Italian bread also pairs beautifully as the base for best panini recipes, where the crust adds incredible textural contrast.
Use thick slices for perfect pesto pasta nights—toasted and rubbed with garlic, the bread becomes a perfect vehicle for collecting every bit of that herbaceous sauce. It’s also the ideal companion for soups like minestrone or pasta e fagioli. The bread’s structure holds up beautifully when dipped into warm, flavorful broths.
For a simple appetizer spread, slice and brush with olive oil, then top with fresh tomatoes, basil, and a drizzle of aged balsamic. Serve alongside your best Italian dressing pasta salad for an authentic Italian-inspired meal. This bread also makes outstanding croutons when you cube and toast the leftovers.
Storage & Reheating
Properly stored crusty Italian bread stays fresh for about two days at room temperature, wrapped loosely in a kitchen towel or paper bag. The key is allowing air circulation so the crust doesn’t soften from trapped steam. Never store it in a plastic bag, which creates a humid environment that ruins your beautiful crust in hours.
For longer storage, wrap cooled bread tightly in plastic wrap, then aluminum foil, and freeze for up to three weeks. When you’re ready to enjoy it, thaw at room temperature still wrapped, which takes about three hours. Then refresh it in a 375°F oven for 8-10 minutes to restore the crust’s crispness.
To revive day-old bread, spritz it lightly with water and place it in a 400°F oven for about 5-7 minutes. This rehydrates the crust and re-crisps it beautifully. You’ll be amazed at how close it tastes to fresh-baked. Sliced bread can be refreshed in a toaster oven using the same method.
Stale bread isn’t something to discard. Cube it for croutons, or pulse it in a food processor for homemade breadcrumbs. Torn pieces make excellent panzanella salad, particularly when paired with summer tomatoes. Italians have perfected the art of using every bit of their bread, and you should too.
Perfect Pairings
This bread is the foundation for so many Italian classics. Serve it alongside best Italian lasagna recipe dishes, where it soaks up the rich tomato sauce beautifully. You could also pair it with easy Tuscan chicken pasta recipe for an absolutely complete Italian dinner experience.
For a lighter meal, pair thick slices with quick Olive Garden salad recipe and a simple vinaigrette. The bread’s heartiness complements fresh greens wonderfully. According to Serious Eats bread baking guide, pairing crusty bread with high-quality olive oil and aged vinegar creates an authentic Italian experience.
For entertaining, this bread impresses guests far more than you’d expect. The aroma alone signals that you’ve put care into your meal. Professional bakers at top Italian restaurants use similar techniques, as detailed in Bon Appétit’s bread recipes. Your homemade version rivals anything you’d buy.
The beauty of this crusty Italian bread recipe is that once you master the basic technique, you can adapt it endlessly. Add olives, sun-dried tomatoes, fresh herbs, or cheese to the dough. Experiment with different scoring patterns for visual interest. Each variation teaches you something new about how dough behaves and transforms in the oven.
Baking bread at home is deeply rewarding in ways that go beyond taste. You’re connecting with centuries of tradition, creating something nourishing with your own hands, and filling your home with warmth and aroma. This crusty Italian bread recipe is your ticket to becoming the kind of baker who makes it look effortless—even though there’s genuine skill involved.
Ingredients
- 3 cups (390g) bread flour
- 1½ teaspoons (9g) kosher salt
- ½ teaspoon (3g) instant yeast
- 1½ cups (360ml) filtered water, room temperature
Instructions
- Combine the bread flour, salt, and instant yeast in a large mixing bowl, stirring to distribute the yeast evenly throughout the flour.
- Add the room temperature water to the dry ingredients and stir with a wooden spoon or dough whisk until all flour is hydrated and you have a shaggy, wet dough with no dry flour visible.
- Cover the bowl with plastic wrap or a damp kitchen towel and let the dough rest at room temperature for 12-14 hours, or until it’s roughly doubled in size and shows visible bubbles on the surface.
- Prepare your work surface by sprinkling flour generously over a clean counter or cutting board.
- Turn the dough out onto the floured surface, being gentle to preserve the air bubbles you’ve developed during fermentation.
- Gently shape the dough into a round boule by folding the edges toward the center, rotating the dough as you work, creating surface tension without deflating it completely.
- Place the shaped dough seam-side up into a well-floured banneton basket or a bowl lined with a well-floured kitchen towel.
- Cover the shaped dough with plastic wrap and refrigerate for 8-16 hours to develop flavor and make scoring easier.
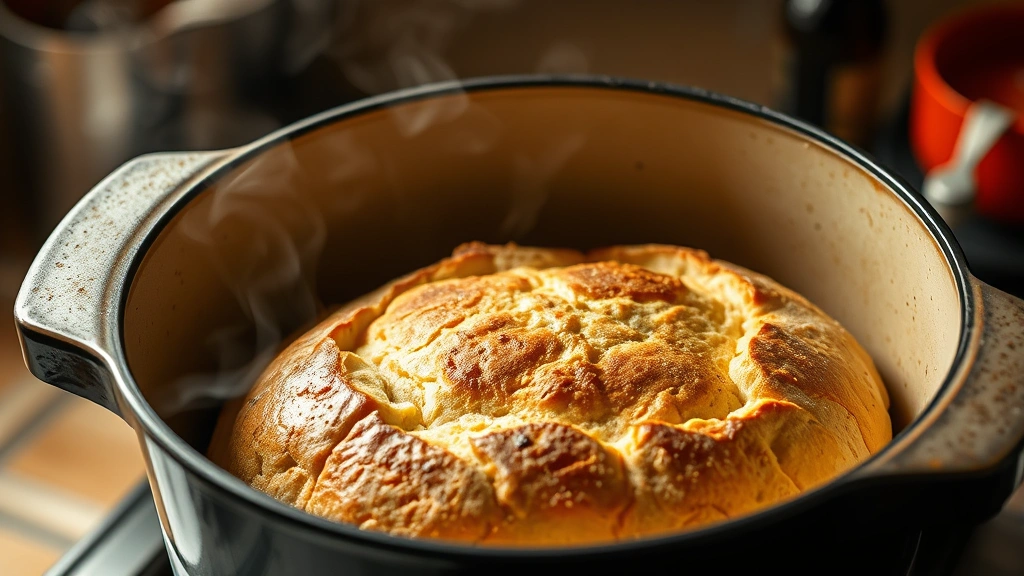
- About 1 hour before baking, preheat your oven to 500°F and place a Dutch oven inside to heat thoroughly.
- Carefully turn the cold dough out onto parchment paper, seam-side down, and score the top with a sharp bread lame or razor blade in your desired pattern.
- Slowly and carefully remove the hot Dutch oven from the oven and place the dough (on parchment) inside, then cover with the lid.
- Bake covered for 20 minutes to trap steam and encourage oven spring, then remove the lid and bake for an additional 5-10 minutes until the crust is deep golden brown.
- Remove the bread from the Dutch oven and place directly on the oven rack for the final 2-3 minutes if your crust isn’t dark enough, then transfer to a wire cooling rack.
- Allow the bread to cool for at least 30 minutes before slicing, as the interior continues to set during this time.
Pro Tips
The long fermentation in this crusty Italian bread recipe is non-negotiable for developing authentic flavor and texture. That overnight rest allows wild yeast and bacteria to do much of the work, creating complex flavors that quick breads simply can’t achieve. The minimal yeast amount (just ½ teaspoon) means the fermentation is slow and controlled, perfect for home bakers.
Water temperature matters throughout this process. Room temperature water (around 70°F) ensures consistent fermentation timing. However, if your kitchen is very warm or cold, you can adjust slightly—warmer water speeds fermentation, cooler water slows it down. The goal is having your dough ready to shape at a convenient time.
The Dutch oven is essential for creating steam, which directly impacts your crust quality. If you don’t have one, you can create steam by placing a cast iron skillet on the bottom oven rack and tossing ice cubes into it as soon as you put the bread in. This works reasonably well, though a Dutch oven provides more consistent results. Some bakers use a covered baking stone with a pan of boiling water underneath—experiment to find what works in your kitchen.
Scoring your bread isn’t just decorative; it controls where the bread expands during baking. A sharp blade is crucial—dull blades drag the dough, releasing gas rather than creating a clean cut. The score should be about ¼-inch deep at a 45-degree angle for a traditional pattern. More dramatic scoring creates a “ear” that signals a professionally baked loaf.
Cooling time is genuinely important, not just something bakers say. The interior crumb structure continues setting as the bread cools, and slicing too early results in gummy texture. Use this time to make a simple olive oil and herb dipping sauce or prepare other components of your meal. The aroma during cooling is an added bonus!
For substitutions, you can experiment with different flour blends. A 90% bread flour to 10% whole wheat blend adds nuttiness while maintaining the open crumb structure. Stone-ground flours create more rustic flavors but may require slightly more hydration. Keep notes on what you try so you can replicate your favorite variations.
If your dough rises too quickly or too slowly, adjust your kitchen temperature or yeast amount next time. In summer, you might reduce fermentation time by 2-3 hours. In winter, you might need to extend it. This recipe is forgiving once you understand these variables.
Leftover bread makes incredible pan bagnat sandwiches, or you can slice and freeze it for quick meals. Toast slices and rub with garlic cloves for authentic bruschetta. The possibilities are genuinely endless once you master this fundamental bread.