
Making a deer jerky recipe at home is one of those rewarding projects that transforms your venison into an absolutely addictive snack. I still remember the first batch my uncle made in his garage—the smell alone had the whole family hovering nearby, waiting for those first tender strips to cool. If you’ve got access to fresh venison or you’re a hunter looking to make the most of your harvest, this guide will walk you through creating restaurant-quality jerky in your own kitchen.
Venison jerky is leaner and more flavorful than beef jerky, with a natural richness that makes it incredibly satisfying. The key to perfect jerky lies in understanding your meat, mastering the marinade, and nailing the drying process. Whether you’re using a dehydrator, oven, or smoker, this method works beautifully every single time.
Jump To Section
Why This Recipe Works
The magic of this homemade jerky starts with selecting the right cut of venison. You’ll want meat that’s well-trimmed and relatively lean—typically the backstrap or hindquarters work best. The marinade I’m sharing combines savory, sweet, and smoky elements that complement venison’s natural gaminess without overpowering it.
Additionally, the drying temperature and time are crucial. Too hot, and your jerky becomes brittle and tough. Too cool, and it won’t dry properly. This recipe hits that sweet spot with a low-and-slow approach that preserves moisture and flavor while creating that perfect chew. The result is jerky that’s tender enough to enjoy straight from the dehydrator but still has that satisfying tug.
Meanwhile, the curing process does something remarkable to the meat’s texture and shelf stability. The salt and spices work together to break down muscle fibers slightly, creating that signature jerky tenderness. I’ve found that giving the meat a full 12 to 24 hours in the marinade makes an enormous difference in the final product.
Ingredient Tips & Substitutions
Your venison should be as fresh as possible—ideally frozen right after processing and thawed in the refrigerator before use. The leaner the cut, the better your jerky will turn out. If you’re working with particularly thick pieces, freezing them for a couple hours before slicing makes them much easier to cut into uniform strips.
For the marinade, I use a combination of soy sauce, Worcestershire sauce, and liquid smoke that creates an incredible depth of flavor. The brown sugar adds a subtle sweetness that balances the savory elements, while garlic powder and onion powder round everything out. However, if you prefer less smoke flavor, simply reduce the liquid smoke to a teaspoon.
The salt amount might seem high, but remember that it’s doing the work of curing and preserving. You can adjust it slightly based on your taste preferences, but don’t reduce it too much or your jerky won’t have that authentic, snappy quality. For instance, some folks like to add a pinch of cayenne pepper or smoked paprika for extra heat and complexity.
Preparation & Slicing Technique
Proper slicing is absolutely essential for even drying and consistent texture throughout your batch. I recommend partially freezing your venison for about two to three hours—it should be firm but not rock-solid. This makes slicing dramatically easier and gives you more control over thickness.
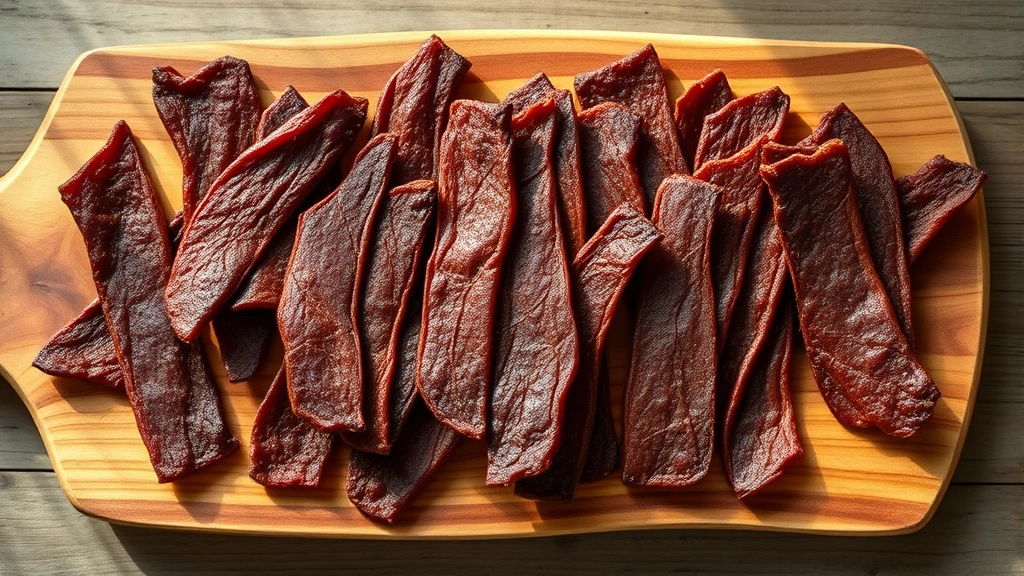
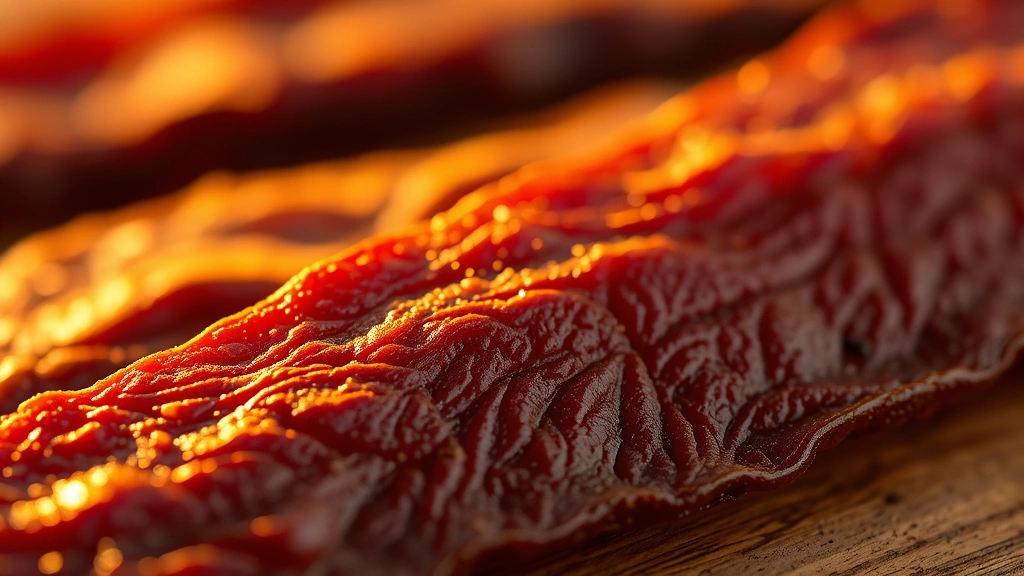
Slice against the grain if you prefer more tender jerky, or with the grain for chewier results. For this recipe, I slice about a quarter-inch thick, which creates that ideal balance between quick drying and pleasant texture. A sharp knife or better yet, a meat slicer, will change your life when you’re working through a large batch.
Once sliced, pat your venison completely dry with paper towels before placing it in the marinade. Any excess surface moisture will dilute your marinade and extend drying time. Think of this as preparing a blank canvas for all those delicious flavors.
Drying Methods & Timing
You have several excellent options for drying your jerky, each with distinct advantages. A food dehydrator is my go-to choice because it offers precise temperature control and even airflow. Set your dehydrator to 160°F and plan for four to six hours of drying time, depending on thickness and humidity levels.
Alternatively, your oven works wonderfully if you prop the door open slightly with a wooden spoon to allow moisture to escape. Keep the temperature at 160°F and check your jerky every hour, rotating the trays as needed. The drying time will be similar to a dehydrator, though oven-dried jerky sometimes develops a slightly different texture.
If you’re a smoking enthusiast, consider using your smoker at 160°F with a mild smoke wood like apple or cherry. This creates an absolutely phenomenal flavor profile that’s hard to beat. The smoking process takes about four to eight hours depending on your setup, but the results are truly spectacular.
Storage & Serving Suggestions
Proper storage is key to maintaining your jerky’s quality and shelf life. Once completely cooled, store your venison jerky in an airtight container at room temperature. It will keep beautifully for two to three weeks, though honestly, it rarely lasts that long in my house.
For longer storage, vacuum-sealing or freezing works wonderfully. Frozen jerky maintains its quality for several months. Simply thaw it at room temperature before opening the package to prevent condensation from forming on the jerky.
Consider pairing your homemade jerky with complementary sides for an impressive charcuterie board. A ground beef taco meat recipe makes an excellent protein pairing for game night, while a Mexican cucumber salad recipe provides refreshing contrast. You might also enjoy serving jerky alongside a taco sauce recipe for dipping, or incorporating it into leftover taco meat nachos recipe for added smokiness.
Beyond traditional snacking, your venison jerky shines in so many applications. Crumble it into a Mexican soup recipe for incredible depth, add it to trail mix with nuts and dried fruit, or pack it for hiking and camping adventures. The umami-rich flavor makes it perfect for anyone seeking a high-protein, nutrient-dense snack.
I also love giving homemade jerky as gifts during the holidays. Package it in attractive jars with custom labels, and you’ve got a present that shows real thoughtfulness and effort. Most folks are absolutely thrilled to receive handmade jerky—it’s something truly special that you simply can’t buy mass-produced with the same quality.
For detailed guidance on marinating techniques and advanced smoking methods, check out resources like Serious Eats and New York Times Cooking. You’ll find incredible inspiration for flavor variations and techniques that can elevate your jerky-making game. Additionally, Bon Appétit offers excellent articles on preserving techniques and recipe innovations.
The beauty of making your own venison jerky is the complete control over ingredients and flavors. You know exactly what’s going into every batch—no mysterious preservatives or excessive sodium. Plus, there’s genuine satisfaction in transforming raw meat into something shelf-stable and absolutely delicious. Once you’ve mastered this basic method, you’ll find yourself experimenting with different marinades and wood combinations, creating your signature jerky that friends and family will eagerly anticipate.
Ingredients
- 2.5 pounds venison backstrap or hindquarters, trimmed
- ¼ cup soy sauce
- 3 tablespoons Worcestershire sauce
- 2 tablespoons liquid smoke
- 2 tablespoons brown sugar
- 1 tablespoon kosher salt
- 1 teaspoon garlic powder
- 1 teaspoon onion powder
- ½ teaspoon black pepper
- ¼ teaspoon cayenne pepper (optional)
- ½ teaspoon smoked paprika
Instructions
- Trim any visible fat and silver skin from your venison using a sharp knife—this prevents the jerky from going rancid during storage.
- Partially freeze the meat for 2-3 hours until it’s firm but not completely frozen, making it much easier to slice uniformly.
- Slice the venison against the grain into ¼-inch thick strips for more tender jerky, or with the grain for chewier texture.
- Pat the sliced venison completely dry with paper towels, removing any excess moisture from the surface.
- In a medium bowl, whisk together soy sauce, Worcestershire sauce, liquid smoke, brown sugar, kosher salt, garlic powder, onion powder, black pepper, and smoked paprika until the sugar dissolves completely.
- Place the venison strips into a large zip-top bag or glass container and pour the marinade over them, ensuring every piece is well coated.
- Refrigerate for 12-24 hours, stirring occasionally to ensure even marinating and flavor distribution throughout the meat.
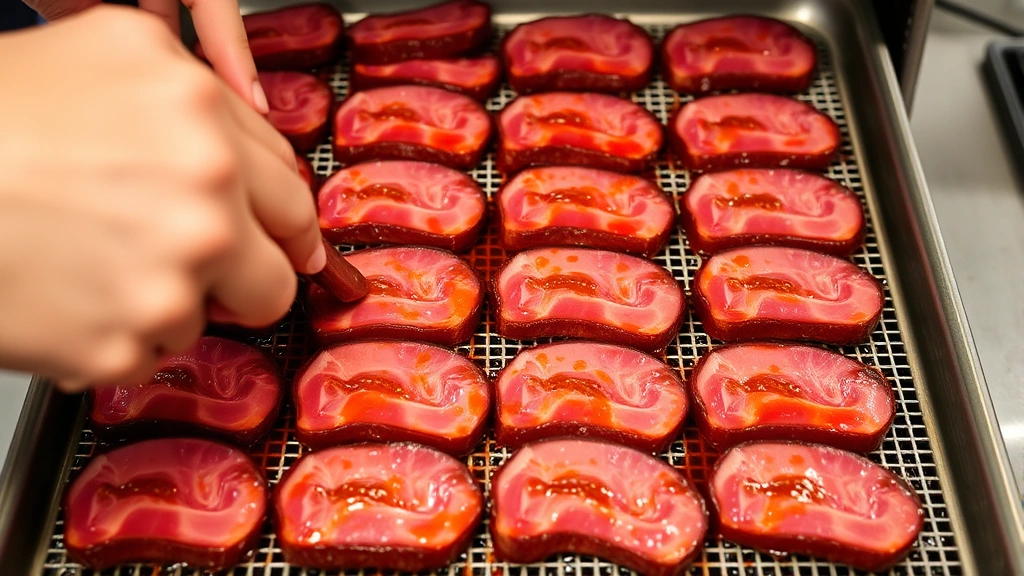
- Remove the venison from the marinade and arrange the strips on dehydrator trays in a single layer without overlapping.
- If using a food dehydrator: Set temperature to 160°F and dry for 4-6 hours until the jerky bends but doesn’t crack completely when folded.
- If using an oven: Place strips on wire racks over baking sheets, prop the door open with a wooden spoon, set temperature to 160°F, and check every hour for 4-6 hours.
- Check for doneness by bending a piece—it should flex without breaking, with no moisture beading on the surface when pressed.
- Remove from heat and allow the jerky to cool completely at room temperature for at least 1 hour before storing.
- Store in an airtight container at room temperature for up to 3 weeks, or freeze in vacuum-sealed bags for longer storage.
Pro Tips
The quality of your venison dramatically affects the final jerky. Fresh, properly processed meat from a skilled hunter or butcher creates noticeably superior results. If your venison has a particularly strong gamey flavor, consider soaking the sliced meat in cold saltwater for 30 minutes before marinating—this mellows the intensity while preserving that distinctive venison character.
Marinating time is flexible based on your schedule. Overnight is ideal, but even 8 hours produces excellent jerky. However, I’ve found that going beyond 24 hours can make the texture slightly mushy, so I don’t recommend extending beyond that timeframe.
For temperature control, an oven thermometer is invaluable—many ovens run hotter or cooler than their dial suggests. Accuracy matters tremendously when drying jerky. If your oven tends to run hot, set it 5-10 degrees lower than the target temperature to maintain consistent drying.
Moisture content is the final arbiter of doneness. Your finished jerky should have absolutely no moisture beading when you press it firmly, but it shouldn’t be brittle enough to snap completely. The ideal piece flexes slightly and tears when bent, indicating perfect moisture content for storage and longevity.
Flavor variations are endless once you master the basic technique. Try adding sriracha or hot sauce for spicy jerky, substitute maple syrup for brown sugar for a sweeter profile, or experiment with different wood smoke flavors if you’re using a smoker. Smoked paprika can be increased for deeper smokiness, or substituted entirely with chipotle powder for a southwestern twist.
If you’re making large batches, consider investing in a meat slicer—it transforms the slicing process from tedious to quick and consistent. Additionally, freezing your finished jerky in individual vacuum-sealed portions makes it convenient to grab portions without exposing the entire batch to air and potential moisture loss.
For gifts, allow the jerky to rest in an airtight container for 24 hours after drying. This allows any remaining moisture to distribute evenly throughout the batch, creating more consistent texture. Fresh-dried jerky can seem slightly soft, but it firms up beautifully after resting.