
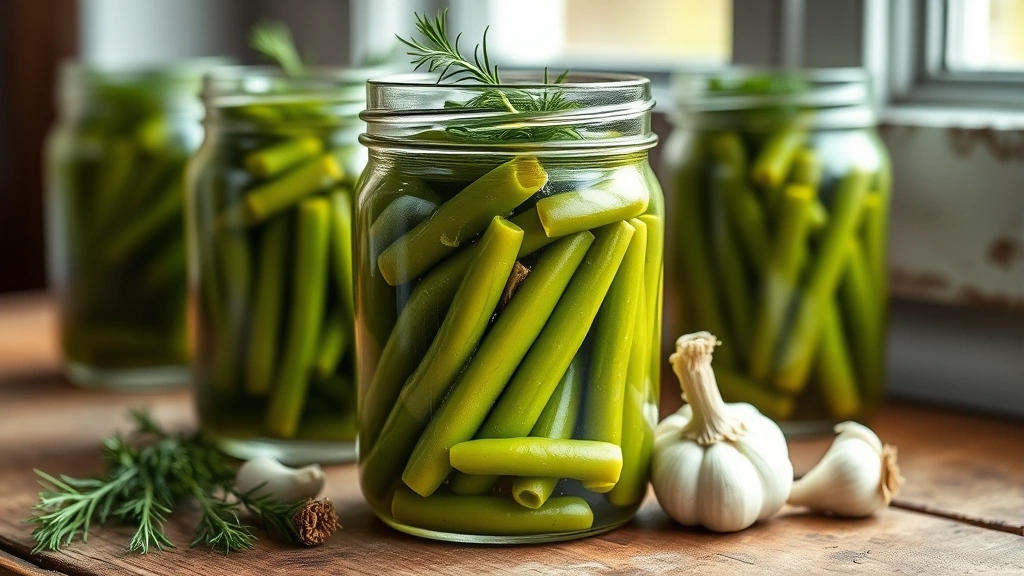
A dilly beans recipe is one of those magical projects that transforms humble green beans into something absolutely crave-worthy. These tangy, herbaceous pickled green beans are the perfect pantry staple—crispy, garlicky, and bursting with fresh dill flavor that’ll have everyone asking for your secret.
I first discovered dilly beans at a farmer’s market years ago, and honestly, I’ve been obsessed ever since. There’s something so satisfying about the snap when you bite into one, followed by that bright vinegar punch and the unmistakable taste of fresh dill. Plus, once you realize how easy they are to make at home, you’ll wonder why you ever bought them from a jar.
Jump To Section
Why This Recipe Works
This dilly beans recipe succeeds because it respects the simplicity of the ingredient list while maximizing flavor at every turn. The key is using fresh dill—not dried—and adding it directly to the jars so it infuses every single bean with herbaceous goodness.
The pickling brine is straightforward: vinegar, water, salt, and sugar balanced in just the right proportions. This creates that perfect sweet-tart profile that makes these beans impossible to stop eating. Additionally, the hot-water canning process means your dilly beans will keep for months, making them ideal for gifting or stashing away for unexpected guests.
What makes this approach different from other pickled green bean recipes is the emphasis on crispness. We’ll use fresh, tender beans picked at their peak and ensure the jars stay hot throughout the process. This prevents the beans from becoming mushy—a common complaint with homemade pickled vegetables.
Ingredient Tips & Substitutions
Green beans are the star here, so choose ones that are bright, firm, and about the same thickness. Thinner beans will cook faster and pack more neatly into jars, but slightly thicker ones offer a more substantial bite. If you can’t find fresh dill, fresh tarragon or a combination of dill and thyme works beautifully as a substitute.
For the vinegar, use white vinegar or apple cider vinegar depending on your preference. White vinegar gives a cleaner, sharper tang, while apple cider vinegar adds a subtle sweetness and complexity. However, avoid distilled vinegar—it’s too harsh for this delicate preparation.
The garlic cloves should be fresh and peeled just before use. If you prefer milder garlic flavor, use fewer cloves or slice them lengthwise so they’re easier to remove after the beans have pickled. For those who love heat, red pepper flakes sprinkled into each jar add a welcome kick that complements the dill beautifully.
Meanwhile, the pickling spices—mustard seeds, peppercorns, and coriander seeds—are entirely optional but highly recommended. They add subtle background notes that elevate these from basic pickles to something genuinely special. You might also enjoy exploring how Thai cucumber salad recipe techniques could inspire variations on your dilly beans.
The Canning Process Made Simple
Don’t let the mention of “canning” intimidate you—this is genuinely beginner-friendly. You’ll need sterilized jars, which you can prepare by running them through the dishwasher or submerging them in boiling water for 10 minutes. Have the lids and bands ready in a small bowl of hot (not boiling) water.
Pack the beans vertically into jars, alternating the direction of the tips and stems so they fit snugly. This isn’t just about efficiency—it ensures the beans stay submerged in the brine and cook evenly. Add a dill frond, a few garlic cloves, and your chosen spices to each jar before pouring the hot brine over top, leaving about half an inch of headspace.
Once the brine is poured, wipe the jar rims clean, place the lids on top, and screw the bands on until they’re snug but not overly tight. Process the jars in a boiling water bath for 5 minutes. You’ll hear those satisfying “pop” sounds as the lids seal—that’s the signal that your dilly beans are ready for long-term storage.
Serving Suggestions & Storage
These dilly beans are endlessly versatile. Serve them alongside a charcuterie board as a palate-cleansing element, chop them into relish for hot dogs, or add them to salads for unexpected crunch and flavor. They’re particularly stunning arranged on a salad in a jar recipe for layered visual appeal.
For the best flavor, allow your dilly beans to sit for at least 2-3 days before opening a jar. This resting period lets the flavors meld and deepen. Once opened, store the jar in the refrigerator and consume within 3-4 weeks for optimal quality and crispness.
Unopened jars will keep in a cool, dark cupboard for up to one year. However, once you taste them, they rarely last that long. Many people find themselves opening jars just weeks after canning because they’re simply too good to wait.
If you’re looking for more vinegar-based vegetable projects, the principles here translate beautifully to other pickled vegetables. Consider trying spicy cucumber salad recipe techniques or exploring Oriental dressing recipe for salads for fresh inspiration.
Why Homemade Beats Store-Bought
Making your own dilly beans recipe at home means you control every single ingredient and flavor variable. Store-bought versions often contain preservatives, have mushy texture, or use dried herbs that can’t compete with the brightness of fresh dill.
Additionally, homemade pickled green beans make incredible gifts. Pack a jar with a handwritten label, tie a pretty ribbon around it, and suddenly you have a thoughtful present that shows genuine effort. Friends and family will be genuinely impressed—and honestly, a bit jealous that they don’t have your canning skills.
For more inspiration on creating jar-based dishes, check out Italian dressing pasta salad recipe ideas that work wonderfully alongside homemade pickles.
The beauty of this dilly beans recipe is its perfect balance of simplicity and sophistication. Whether you’re a seasoned canner or picking up a jar of this type for the first time, you’ll find that homemade pickled green beans offer a satisfaction that goes far beyond taste. There’s something deeply rewarding about creating shelf-stable food with your own hands, knowing exactly what went into every jar. Start with this foolproof recipe, and you might just discover your new favorite kitchen project.
Ingredients
- 2 pounds fresh green beans, trimmed
- 6 cups white vinegar or apple cider vinegar
- 4 cups water
- 3 tablespoons salt
- 2 tablespoons sugar
- 12 cloves fresh garlic, peeled and halved
- 6 fresh dill fronds (or 3 tablespoons fresh dill sprigs)
- 1½ teaspoons mustard seeds
- 1½ teaspoons black peppercorns
- 1 teaspoon red pepper flakes (optional, for heat)
- 6 wide-mouth pint jars with lids and bands
Instructions
- Sterilize your jars by running them through the dishwasher on the hottest setting or submerging them in boiling water for 10 minutes. Place the lids and bands in a small bowl of hot water to keep them ready for use.
- Wash the green beans thoroughly under cold water and trim off the stem ends. Pat them dry with a clean kitchen towel.
- Combine vinegar, water, salt, and sugar in a large stainless steel pot. Bring the mixture to a rolling boil over medium-high heat, stirring occasionally until the salt and sugar dissolve completely.
- While the brine heats, distribute one dill frond, 2 garlic clove halves, ¼ teaspoon mustard seeds, ¼ teaspoon peppercorns, and a small pinch of red pepper flakes (if using) into each sterilized jar.
- Pack the green beans vertically into each jar, alternating the direction of the tips and stems to ensure they fit snugly and stay submerged. Fill the jars until about 2 inches of space remains at the top.
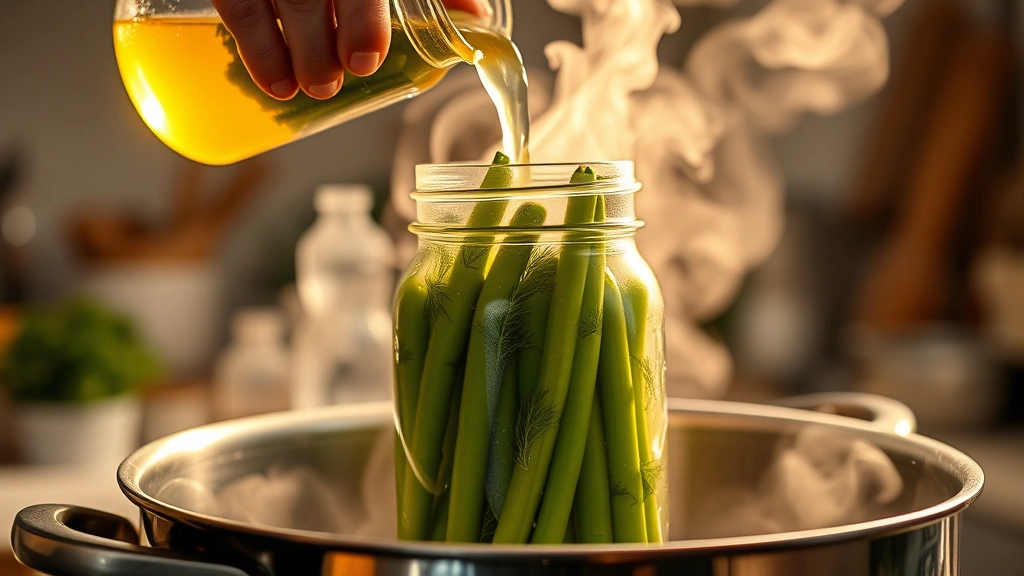
- Carefully pour the hot brine over the green beans, leaving about ½ inch of headspace at the top of each jar. Ensure all beans are fully covered with the pickling liquid.
- Using a clean, damp cloth, wipe the rims of each jar to remove any brine drips or residue that might prevent proper sealing.
- Place the hot lids on top of each jar and screw the bands on until they’re snug but not overly tight. Tighten them just enough that they won’t slip off during processing.
- Prepare a large pot with enough water to cover the jars by 1-2 inches and bring it to a rolling boil. Carefully place the filled jars into the boiling water using a jar lifter.
- Process the jars in the boiling water bath for 5 minutes, maintaining a steady boil throughout. After 5 minutes, carefully remove the jars using a jar lifter and place them on a clean kitchen towel to cool.
- Listen for the satisfying “pop” sound as each jar cools—this indicates the lids have sealed properly. Once completely cooled (about 12-24 hours), store in a cool, dark cupboard.
- Allow the dilly beans to rest for at least 2-3 days before opening a jar, giving the flavors time to meld and develop their full complexity.

Pro Tips
These dilly beans are incredibly forgiving once you understand the basic principles. However, a few details make the difference between good pickles and unforgettable ones.
First, freshness matters enormously. Use green beans that were harvested recently—ideally within the past day or two. Older beans tend to be tougher and less flavorful. Similarly, fresh dill is non-negotiable; dried dill simply won’t provide the bright, herbaceous notes that make this recipe sing.
The packing technique affects both aesthetics and quality. When you alternate the direction of the bean tips and stems as you pack them vertically, they stay submerged in the brine more effectively. This prevents the tops from floating above the liquid and potentially spoiling.
Temperature is another crucial factor throughout the canning process. Your brine must be hot when poured into the jars, and the water bath must maintain a rolling boil. These temperatures are what ensure proper preservation and the satisfying seal.
If any jars fail to seal (you’ll know because the lid will flex when pressed), simply refrigerate that jar and use the contents within 3-4 weeks. This doesn’t mean you failed—it’s actually an opportunity to enjoy fresh dilly beans immediately.
For substitutions, tarragon can replace dill if that’s what you have on hand, though the flavor profile will shift slightly toward anise notes. Thyme creates a more Mediterranean-inspired pickle. You could also experiment with adding a bay leaf or a few coriander seeds for additional complexity.
Storage is straightforward: unopened jars keep in a cool, dark place for up to a year. Once opened, transfer to the refrigerator and consume within 3-4 weeks. The beans gradually soften over time, so earlier consumption yields crispier results.
These dilly beans pair beautifully with charcuterie boards, cheese platters, or as a palate-cleansing condiment. They’re also wonderful finely chopped and added to potato salads or relish trays. Some adventurous cooks even use them in cocktails—a spicy dilly bean garnish in a Bloody Mary is genuinely transcendent.