
Dutch oven bread recipes are the secret weapon every home baker needs in their kitchen arsenal. If you’ve ever wondered how to achieve that gorgeous, crispy crust and perfectly tender crumb that looks like it came from a professional bakery, wonder no more—a Dutch oven is your answer.
I still remember the first time I baked bread in a Dutch oven. The transformation was honestly magical. My regular loaf, which had always come out a bit flat and pale, suddenly emerged with a crackling, golden-brown exterior and an open, airy interior that made my family stop mid-bite to ask what I’d done differently. The secret? That simple cast iron pot with a lid creates the perfect steamy environment for bread to rise and develop flavor in ways that other baking methods simply can’t replicate.
Jump To Section
Why This Recipe Works
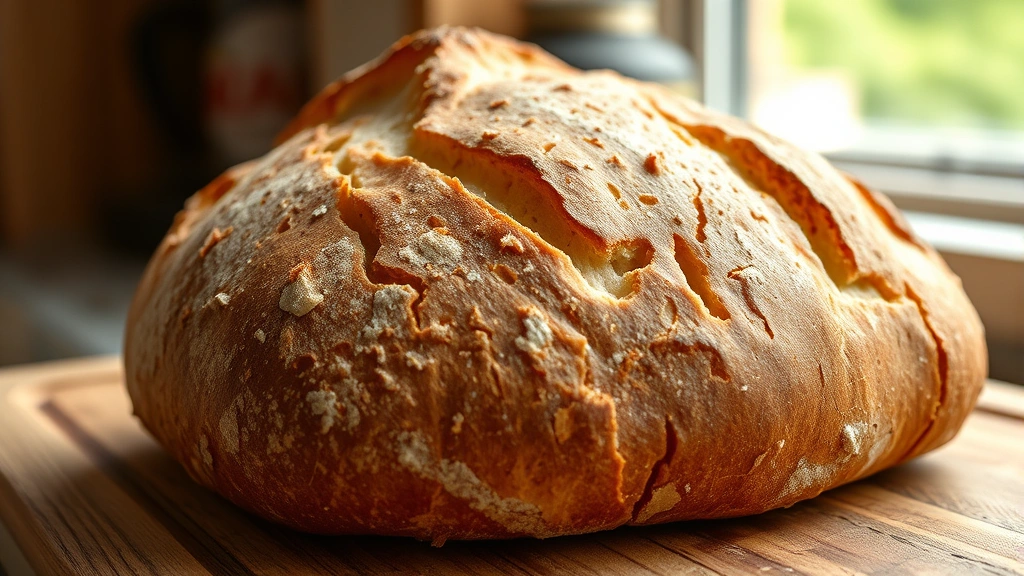
Dutch ovens work their magic by trapping steam during the first part of baking. This steam keeps the dough’s exterior soft and pliable, allowing it to expand fully before the crust sets. Without that steam, bread tends to crust over too quickly, limiting rise and creating a dense, tough crumb. The Dutch oven solves this problem elegantly.
Additionally, the even heat distribution from cast iron ensures your loaf bakes uniformly. The bottom won’t burn, the sides won’t stay pale, and the top develops that coveted deep golden-brown color that makes people reach for a second slice before you’ve even finished plating. For artisan-style loaves, this is non-negotiable.
Most Dutch oven bread recipes follow similar principles: mix simple ingredients (flour, water, salt, yeast), let time do the heavy lifting through long fermentation, shape gently, and bake in your preheated Dutch oven. The result? Restaurant-quality bread at home. I’ve found that sourdough sandwich bread made in a Dutch oven has incredible depth of flavor and structure that makes sandwiches taste infinitely better.
Essential Equipment & Ingredient Tips
You’ll need a Dutch oven that’s at least 4-5 quarts—this gives your dough enough room to rise without hitting the lid. Enameled cast iron works beautifully and won’t rust, though traditional cast iron works too if you’re careful with maintenance. Preheat it thoroughly (we’re talking 30 minutes at 500°F) so the dough hits a screaming-hot surface for maximum oven spring.
Bread flour is your best friend here because of its higher protein content, which develops stronger gluten networks. However, all-purpose flour works in a pinch—just expect slightly less dramatic rise. Meanwhile, water quality matters more than people realize. If your tap water is heavily chlorinated, let it sit overnight or use filtered water for the best fermentation.
Salt is non-negotiable; don’t skip it thinking you’re being healthier. Salt controls fermentation speed, strengthens gluten, and enhances flavor in ways that make you wonder why store-bought bread tastes so bland. Use kosher salt or sea salt, and measure by weight if possible for consistency.
Mastering the Technique
The magic of Dutch oven bread recipes lies in long, cold fermentation. Instead of rushing your dough to rise at room temperature, let it ferment slowly in the refrigerator overnight or even for 24-48 hours. This develops complex flavors and makes handling the dough easier because cold dough doesn’t stick and tear as easily.
When you’re ready to bake, score the top of your dough with a sharp blade—this isn’t just for looks. Those slashes guide where the bread expands, creating that distinctive ear and opening up the crumb structure. For instance, a simple cross or long slash down the middle both look beautiful and perform functionally.
The Dutch oven lid comes off halfway through baking. Start with it on (lid traps steam), then remove it so the crust can brown properly. This two-stage approach gives you the best of both worlds: maximum rise from steam, plus that gorgeous caramelized exterior.
Pairing & Serving Suggestions
Homemade artisan bread deserves equally thoughtful accompaniments. A crusty Dutch oven loaf pairs magnificently with fresh tomato soup for a lunch that feels like a restaurant experience. The bread’s slight tang and chewy texture balance soup’s brightness perfectly.
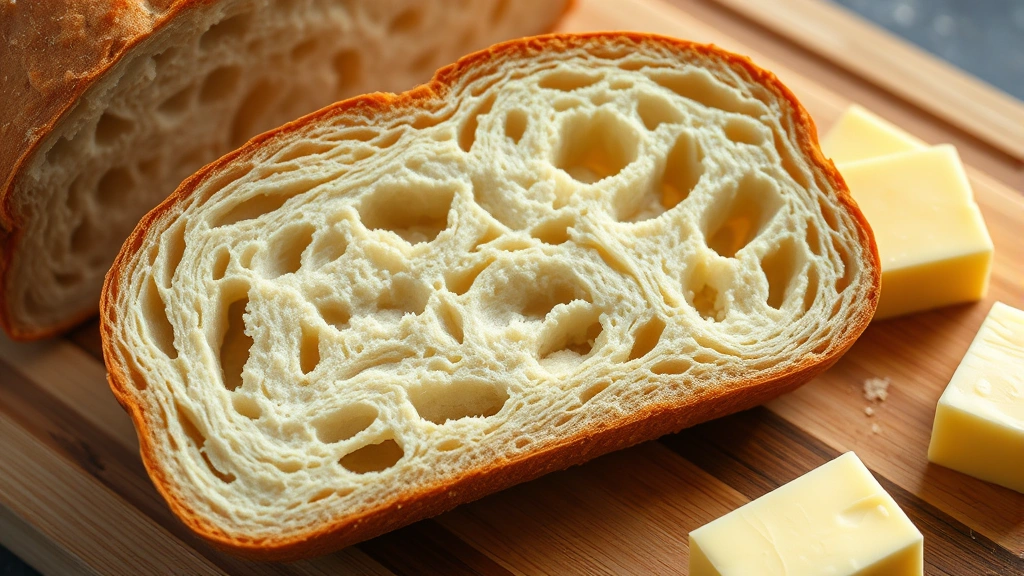
For dinner, serve thick slices with good butter and fleur de sel, or make it the foundation of an incredible sandwich. I’m also obsessed with using day-old bread for panzanella salad or bread pudding—nothing goes to waste. Additionally, consider pairing your loaf with tomato soup for that classic combination, or even butternut squash soup when you want something richer and more autumnal.
Storage & Troubleshooting Tips
Properly cooled bread (and this matters—don’t slice into warm bread or you’ll end up with a gummy crumb) lasts 3-4 days at room temperature in a paper bag or bread box. The crust will soften, but that’s normal and not a failure. If you prefer crispier crust, refresh it in a 300°F oven for 10 minutes wrapped in foil.
For longer storage, freeze whole loaves wrapped tightly in plastic wrap and foil for up to three months. Thaw at room temperature for several hours, then refresh in a hot oven. However, if your bread turned out dense, here are common culprits: underproofing (dough didn’t rise long enough), not enough steam (Dutch oven wasn’t hot enough), or too much salt. Each adjustment teaches you something for next time.
If your crust cracked unevenly or the scoring didn’t open nicely, your dough might have been slightly overproofed or your Dutch oven wasn’t quite hot enough. Keep notes—seriously, jot down temperatures and timing—and you’ll develop intuition quickly. Meanwhile, if the crumb is too dense, your dough likely needed more fermentation time or gentler handling.
One more thing: don’t be intimidated by the simplicity of Dutch oven bread recipes. The ingredient list is short on purpose. Flour, water, salt, yeast, and time—that’s all you need. The Dutch oven does the heavy lifting, creating conditions that make even beginner bakers look like seasoned professionals. Your first loaf might not be perfect, but I promise it’ll be delicious. And by your third or fourth attempt, you’ll understand why people become obsessed with home bread baking.
For inspiration on flavor variations, check out homemade sauce recipes that complement artisan bread beautifully. The combination of crusty, tangy bread with rich, slow-simmered sauce is honestly unbeatable.
Ready to start your Dutch oven bread journey? Gather your ingredients, preheat that oven, and prepare to be amazed at what you can create.
Ingredients
- 3 cups (360g) bread flour
- 1¼ cups (300ml) room temperature water
- ½ teaspoon (3g) instant yeast or ¼ teaspoon active dry yeast
- 1½ teaspoons (9g) kosher salt
- Extra flour for dusting
Instructions
- Mix flour, water, and yeast in a large bowl until a shaggy dough forms. You don’t need a mixer—just combine everything until no dry flour remains. The dough will look rough and a bit sticky, which is exactly right.
- Let the dough rest for 30 minutes (this is called autolyse). This allows the flour to fully hydrate and begins developing gluten naturally without kneading.
- Add salt and mix thoroughly by hand, squeezing and folding the dough until salt is fully incorporated. This takes about 3-5 minutes of gentle but thorough mixing.
- Transfer dough to a lightly oiled bowl and cover with plastic wrap or a damp kitchen towel. Let it rise at room temperature for 2-4 hours, folding it gently in half every 30 minutes for the first 2 hours. You’re building strength and structure through these folds.
- After the bulk fermentation, transfer the dough to a floured surface and gently pre-shape it into a round. Let it rest for 20 minutes (this is the bench rest).
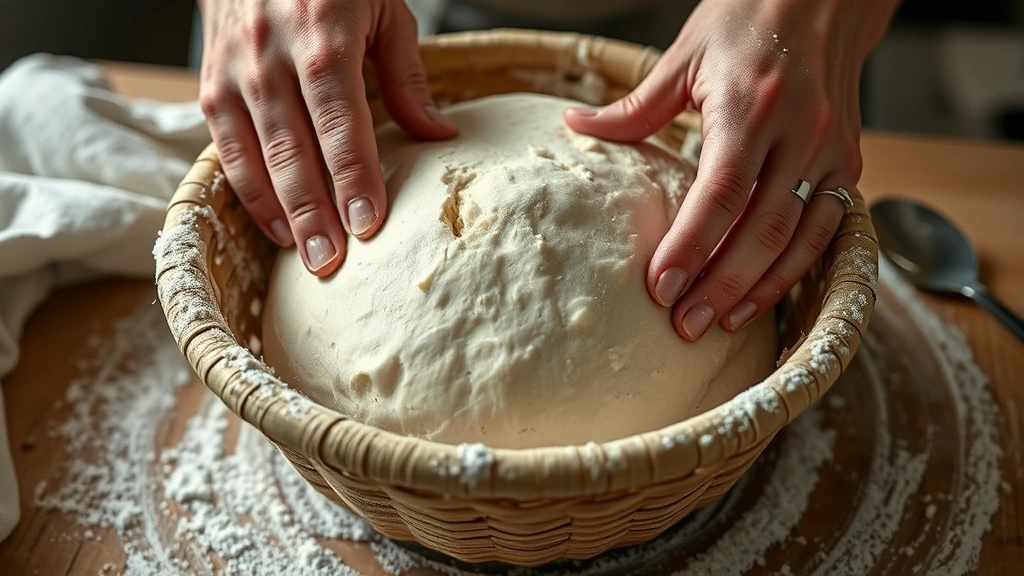
- Final shape: flip the dough seam-side down, then fold the edges toward the center, working your way around in a circle to create tension on the surface. Flip it seam-side up into a floured banneton basket or bowl lined with a floured kitchen towel.
- Cover and refrigerate for 12-24 hours. This cold fermentation develops amazing flavor and makes the dough much easier to handle.
- Place your Dutch oven in the oven and preheat to 500°F for at least 30 minutes. The pot must be screaming hot—this is crucial for oven spring.
- Carefully remove the hot Dutch oven (use thick oven mitts!), place parchment paper on the bottom, then tip your dough from the banneton onto the parchment. Quickly score the top with a sharp knife or bread lame in your desired pattern—a simple cross or long slash works beautifully.
- Return the Dutch oven to the oven with the lid on and immediately reduce temperature to 450°F. Bake covered for 20 minutes to trap steam.
- Remove the lid and bake for an additional 25-30 minutes until the loaf is deep golden brown. The internal temperature should reach 205-210°F at the center.
- Carefully remove the bread and let it cool completely on a wire rack—at least 1 hour. This allows the crumb structure to set. I know it’s tempting to slice into it immediately, but trust the process.
- Once cooled, slice and enjoy. Store in a paper bag at room temperature for 3-4 days, or freeze for up to 3 months.
Pro Tips
Flour amounts can vary slightly based on humidity. If your dough feels extremely sticky after mixing, add a tablespoon of flour at a time until it’s manageable. Conversely, if it’s very stiff, add water by the teaspoon. The dough should be slightly tacky but not wet.
Water temperature matters more than you’d think. Room temperature water (around 70°F) gives you a nice fermentation timeline. Cold water slows fermentation, while warm water speeds it up. If your kitchen is particularly cold, use slightly warmer water to compensate.
This recipe uses minimal yeast because we’re relying on long fermentation for flavor development. Don’t increase the yeast thinking it’ll make better bread—it won’t. More yeast actually produces less flavorful bread. The slow fermentation is what creates that complex, tangy taste that makes people ask for your recipe.
Your Dutch oven’s material matters. Enameled cast iron is easiest because nothing sticks and cleanup is simple. Traditional seasoned cast iron works too but requires more care. Whatever you choose, make sure it has a metal or oven-safe lid—plastic handles will melt. Additionally, ensure your Dutch oven is at least 4-5 quarts so the dough has room to expand.
If you don’t have a banneton basket (those proofing baskets), use a bowl lined with a well-floured kitchen towel. The flour prevents sticking and helps create structure. A colander works in a pinch too.
Scoring isn’t just decorative—it guides where your bread expands. A hesitant, shallow score won’t open nicely. Use a sharp blade and make confident cuts about ¼-inch deep at a slight angle. This creates that beautiful ear that’s the hallmark of artisan bread.
Parchment paper protects the bottom of your bread from burning. However, if you’re comfortable working with hot cast iron and have a good Dutch oven seasoning, you can skip it. Just dust the bottom with cornmeal for extra insurance against sticking.
If your bread consistently bakes unevenly, your oven temperature might be off. Invest in an oven thermometer—many home ovens run 25+ degrees hotter or cooler than their display suggests. This single investment will improve all your baking.
Leftover bread keeps for several days and toasts beautifully. Day-old bread makes the best sandwiches because it has structure that won’t collapse under fillings. You can also cube it for croutons, panzanella salad, or bread pudding. Nothing goes to waste when you’re making quality bread.