

Dutch oven camping recipes are absolute game-changers when you’re cooking outdoors, and honestly, once you discover how versatile these heavy-duty pots are, you’ll wonder how you ever camped without one. Whether you’re nestled by a mountain lake or gathered around a crackling campfire with friends, a cast iron Dutch oven transforms simple ingredients into restaurant-quality meals that taste even better under the stars.
The magic of cooking with a Dutch oven in the wilderness lies in its incredible heat retention and even cooking properties. Unlike thin camping cookware that creates hot spots and uneven browning, a Dutch oven distributes heat beautifully, whether you’re simmering a hearty stew, baking fresh bread, or slow-cooking a tender pot roast. Plus, the lid traps steam and moisture, which means your food stays juicy and flavorful—no dry, disappointing meals at the campsite.
Jump To Section
Why Dutch Ovens Are Perfect for Camping
There’s something deeply satisfying about preparing Dutch oven camping recipes over an open flame. The heavy cast iron construction means it can go directly on hot coals, hang from a tripod, or sit on a camping stove without worry. One pot handles multiple cooking methods: braising, simmering, baking, frying, and even bread-making.
What really sets Dutch oven cooking apart is the minimal cleanup. You cook, serve, and store everything in the same vessel. Additionally, cast iron actually improves with use—your seasoning builds over time, creating a naturally non-stick surface that gets better with every camping trip. It’s an investment that lasts decades, becoming a cherished piece of your outdoor gear.
For instance, a perfect oven-ready lasagna recipe translates beautifully to camp cooking, layering pasta and sauce right in your Dutch oven for a crowd-pleasing dinner. Meanwhile, soups like crock pot lasagna soup become even more aromatic when simmered over coals, filling the campsite with incredible smells that build anticipation for the meal.
Essential Tips for Successful Outdoor Cooking
Before you head into the wilderness with your Dutch oven, understanding a few key techniques makes all the difference. Temperature control is crucial—you’ll want to learn how to manage coals by stacking them above and below the oven for even heat distribution, similar to using a conventional oven at home.
Seasoning your cast iron before the trip ensures it’s in prime condition. A well-seasoned Dutch oven requires minimal oil during cooking and develops a beautiful patina that campfire conditions actually enhance. However, always bring extra oil or butter for cooking, as the outdoor elements can be drying.
Prep work matters tremendously when you’re cooking at a campsite. Chop vegetables, measure spices, and portion proteins before you leave home—this transforms cooking time into relaxation rather than stress. Consider investing in quality camping utensils: a long-handled wooden spoon, metal tongs, and a sturdy lid lifter make handling hot cast iron significantly easier and safer.
Temperature fluctuations at elevation or during cold nights can affect cooking times, so always build in extra time and check your food earlier than you expect. For example, best turtle soup recipe techniques—low and slow cooking—apply perfectly to outdoor camping stews and braises that develop deeper flavors over time.
Ingredient Selection & Substitution Ideas
The beauty of Dutch oven camping recipes is their flexibility with ingredients. You can adapt based on what’s available at local markets near your campsite or what you’ve packed from home. Root vegetables like potatoes, carrots, and onions are camping staples because they store well without refrigeration and hold their texture through extended cooking.
Protein choices deserve careful consideration—vacuum-sealed or canned options travel better than fresh meat, though you can bring coolers with ice for shorter trips. Beans and lentils are camping MVPs: they’re shelf-stable, packed with protein, and transform simple dishes into satisfying meals. Cured meats like bacon and sausage add incredible flavor and actually improve with the smoky camping environment.
Additionally, dried herbs and spice blends are lighter and longer-lasting than fresh herbs, making them ideal for extended camping trips. A simple blend of garlic powder, paprika, cumin, and black pepper can elevate a basic vegetable soup into something memorable. Don’t overlook pantry staples like tomato paste, coconut milk, or chicken broth in shelf-stable containers—these flavor builders transform basic ingredients into gourmet camping meals.
If fresh vegetables aren’t available, frozen options work beautifully in Dutch oven cooking and often have superior nutrition since they’re frozen at peak ripeness. Furthermore, quick zucchini soup recipe inspiration shows how versatile vegetables can be, while perfect Tom Yum soup recipe demonstrates how bold spices create restaurant-quality depth in outdoor cooking.
Cooking Methods & Fire Management
Understanding different heating techniques unlocks the full potential of your Dutch oven at camp. Direct heat cooking—placing your pot directly on hot coals or a camping stove—works wonderfully for quick sautéing, boiling pasta, or making bread. This method gives you immediate control and is perfect for recipes requiring higher temperatures.
Indirect heat, where coals surround but don’t directly touch the bottom of your Dutch oven, creates an oven-like environment ideal for baking bread, roasting vegetables, or slow-cooking stews. Many experienced campers use the “coal method”—arranging hot coals on top of the lid and underneath the pot to mimic conventional oven heat distribution.
For longer cooking times, burying your Dutch oven partially in coals or hot ash creates a slow-cooking effect similar to low-heat oven cooking. This hands-off approach is perfect for camping—set your meal going, then enjoy campfire activities while dinner cooks gently. However, always check on your food periodically and adjust coal placement as needed.
Experimentation is part of the adventure. Every campfire burns differently, every elevation cooks differently, and learning to read your specific conditions makes you a better outdoor cook. Keep notes about what worked and what didn’t—over time, you’ll develop intuition that makes Dutch oven camping recipes feel effortless.
Serving & Making Memories Around the Fire
There’s something profoundly connecting about sharing a meal cooked over an open fire. Dutch oven camping recipes naturally become communal experiences—everyone gathers as aromas drift through the campsite, anticipation builds, and conversation flows freely. The food tastes better because of the setting, the company, and the effort invested in preparing it.
Serve directly from the Dutch oven for authentic camping style, or transfer to serving bowls if you prefer. The beauty of one-pot meals is minimal cleanup, leaving more time for stargazing, storytelling, and enjoying nature. Consider bringing simple sides like fresh bread, a basic salad, or crusty rolls to round out your camping menu.
Don’t forget beverages—hot coffee or tea pairs beautifully with hearty camping meals, while cold water and perhaps some wine or craft beverages complement the outdoor experience. Additionally, easy split pea soup recipe wisdom reminds us that simple, satisfying meals create the best camping memories.
The Dutch oven becomes more than cookware—it’s a tradition builder. Families develop signature camping meals that get requested year after year. Friends bond over the ritual of meal preparation and the shared experience of eating outdoors. These moments, more than any individual dish, are what makes Dutch oven camping recipes truly special.
For inspiration on technique and flavor development, check out resources like Serious Eats cooking guides or New York Times Cooking for additional camping meal ideas. Whether you’re a seasoned outdoor cook or planning your first camping adventure, Dutch oven cooking offers endless possibilities for creating unforgettable meals in nature’s kitchen.
Ingredients
- 2 tablespoons olive oil or butter
- 2 pounds beef chuck roast, cut into 1.5-inch cubes
- 1 large onion, diced
- 4 cloves garlic, minced
- 4 medium potatoes, peeled and cubed
- 3 medium carrots, sliced into 1-inch pieces
- 2 celery stalks, chopped
- 3 cups beef broth or stock
- 1 can (14.5 oz) diced tomatoes
- 2 teaspoons dried thyme
- 2 teaspoons dried rosemary
- 1 teaspoon paprika
- 1 bay leaf
- Salt and black pepper to taste
- 2 tablespoons tomato paste
- 1 cup frozen peas (optional)
- Fresh parsley for garnish
Instructions
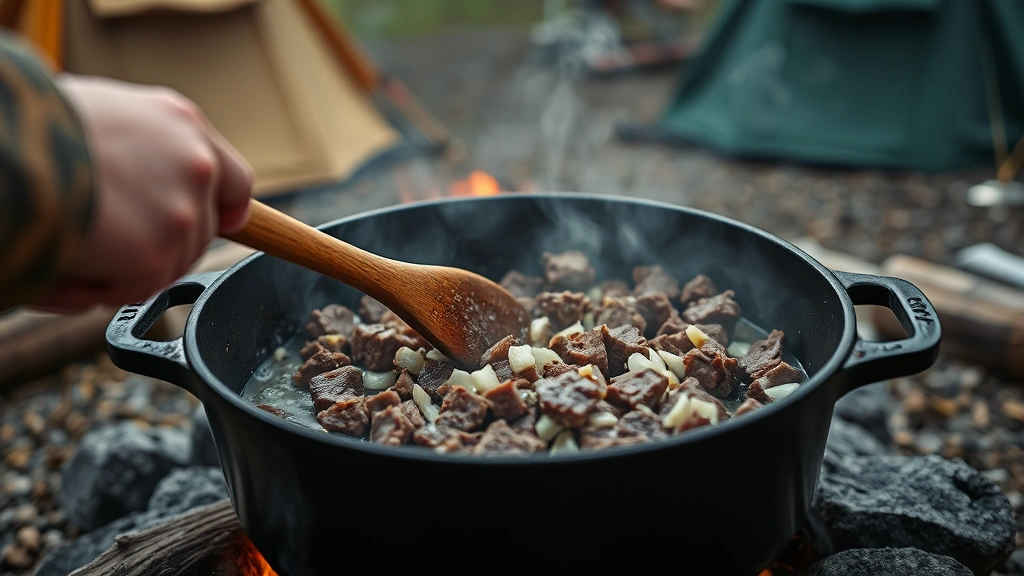
- Heat your Dutch oven over medium-high heat (or directly over hot coals if camping) and add olive oil or butter. Once the oil shimmers, working in batches, brown the beef cubes on all sides, about 3-4 minutes per batch. This develops deep, savory flavors that make the stew unforgettable. Don’t skip this step—it’s worth the extra time.
- Remove the browned beef and set aside, then add the diced onion to the same pot. Sauté for 3-4 minutes until softened and fragrant, scraping up any browned bits stuck to the bottom (called fond—this is pure flavor). Add minced garlic and cook for another minute until aromatic.
- Stir in the tomato paste and cook for 2 minutes, allowing it to caramelize slightly and deepen in color. This concentrated tomato flavor becomes the backbone of your stew’s richness.
- Pour in the beef broth and diced tomatoes with their juice, scraping the pot bottom to incorporate all those flavorful browned bits. Return the beef to the pot along with dried thyme, rosemary, paprika, and the bay leaf. Stir well to combine.
- Bring the mixture to a gentle boil, then reduce heat to low. Cover with the lid and either transfer to your oven (if cooking at home) or position over lower heat on your campfire. The goal is a gentle simmer, not an aggressive boil. Cook for 45 minutes.
- After 45 minutes, add the potatoes, carrots, and celery. Stir everything together, ensuring vegetables are submerged in the broth. Cover again and continue cooking for another 30-40 minutes, until the beef is fork-tender and vegetables are completely soft.
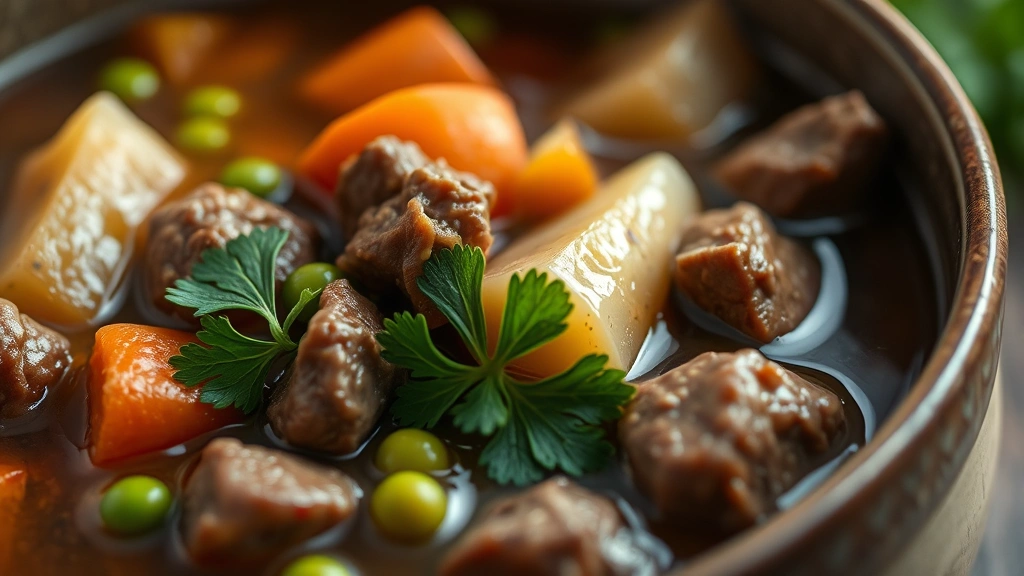
- Taste the stew and adjust seasonings with salt and pepper as needed. Remove the bay leaf. If using frozen peas, add them in the final 5 minutes of cooking—they’ll warm through and add bright color and sweetness.
- Serve the stew hot, ladled into bowls, with fresh parsley scattered on top. The aroma alone will bring everyone to the campfire table. This dish tastes even better the next day as flavors develop, making it perfect for camping trips where you can prepare a double batch and enjoy leftovers.
Pro Tips
This Dutch oven camping recipe is incredibly forgiving and adapts beautifully to different ingredients and cooking conditions. If you can’t find beef chuck, any tough cut becomes tender through slow cooking—think beef stew meat, brisket, or even venison if you’re cooking with wild game. The key is patient, low-heat cooking that breaks down connective tissue and creates melt-in-your-mouth meat.
Vegetable substitutions work wonderfully depending on what’s available. Root vegetables are your best camping friends because they store without refrigeration and hold their shape during extended cooking. However, you can swap potatoes for parsnips, add turnips for earthiness, or include mushrooms for umami depth. Even canned or frozen vegetables work beautifully—the Dutch oven’s moist environment keeps everything tender and flavorful.
For vegetarian versions, replace beef with hearty mushrooms, extra beans, or tofu cubed and browned until golden. The cooking technique remains identical, and you’ll achieve equally satisfying results. Additionally, using vegetable broth instead of beef creates a lighter but still deeply flavored stew that satisfies every appetite at the campfire.
Storage at camp depends on your setup—if you have a cooler, this stew keeps refrigerated for 3-4 days. Without refrigeration, consume within a few hours of cooking. However, the beauty of this recipe is that it reheats beautifully. Simply warm gently over coals the next morning for a hearty breakfast or lunch. The flavors actually improve as they meld overnight, making day-two servings even more delicious.
For faster cooking at high elevations or in cold weather, cut vegetables smaller and beef into bite-sized pieces rather than chunks. This increases surface area and reduces cooking time by 15-20 minutes. Meanwhile, if you’re cooking for a crowd, this recipe doubles easily—just ensure your Dutch oven is large enough and adjust cooking times slightly for larger batches.
Pro tip: Bring your Dutch oven to camp already seasoned and in excellent condition. Before your trip, scrub it with hot soapy water (yes, you can wash cast iron!), dry thoroughly, and rub with a light coating of neutral oil. This ensures optimal non-stick properties and prevents rust from campfire moisture. After each use at camp, wipe clean with a damp cloth and store with the lid slightly ajar to allow air circulation.