
Riblets are the ultimate crowd-pleaser that brings restaurant-quality results straight to your kitchen! These tender, fall-apart-in-your-mouth morsels are smaller than traditional ribs but packed with incredible flavor. Whether you’re hosting a casual backyard gathering, planning a weeknight family dinner, or looking for an impressive appetizer, this easy riblets recipe delivers perfection every single time.
What makes riblets so special is their versatility and the fact that they cook faster than full-size ribs while maintaining that coveted tender texture and smoky taste. I’ve perfected this recipe over years of testing, and I’m thrilled to share my foolproof method with you. The secret lies in a combination of low-and-slow cooking, a perfectly balanced dry rub, and a glossy finishing sauce that will have everyone reaching for seconds.
This recipe is completely beginner-friendly, requiring minimal prep work and mostly hands-off cooking time. You don’t need any fancy equipment—just your oven and a baking sheet. The dry rub uses pantry staples you likely already have on hand, and the optional sauce can be made while the riblets cook.
I absolutely love serving these for game day parties, family reunions, and even elegant dinner parties. They’re impressive enough to serve to guests but simple enough for a regular Tuesday night. Plus, they’re more affordable than full racks of ribs, making them perfect for feeding a crowd without breaking the bank.
The beauty of this recipe is its flexibility. You can adjust the spice level to your preference, experiment with different sauce flavors, and even prepare the riblets ahead of time. They reheat beautifully, making them ideal for meal prep or entertaining.
I’ve included detailed instructions to ensure your success, along with helpful tips and variations. Whether you prefer your riblets dry-rubbed, sauced, or glazed, this recipe adapts beautifully. Check out my grilled chicken recipe for other crowd-pleasing mains, or explore my easy appetizers collection for more entertaining ideas. For sauce inspiration, you might also enjoy my homemade BBQ sauce post.
For additional techniques and flavor ideas, I recommend checking out this Bon Appétit guide to glazed ribs and this Serious Eats article on tender ribs. The New York Times approach to barbecued ribs also offers great insights for this type of recipe.
Ingredients
- 3-4 pounds beef riblets (or pork riblets)
- 3 tablespoons brown sugar
- 2 tablespoons smoked paprika
- 1 tablespoon garlic powder
- 1 tablespoon onion powder
- 1 tablespoon kosher salt
- 1 teaspoon black pepper
- 1 teaspoon cayenne pepper (optional, for heat)
- 1 teaspoon dry mustard
- ½ teaspoon ground cumin
- 2 tablespoons olive oil
- 1 cup BBQ sauce (store-bought or homemade)
- 2 tablespoons honey
- 1 tablespoon apple cider vinegar
- Fresh parsley or chives for garnish (optional)
Instructions
- Preheat your oven to 275°F. Line a large baking sheet with aluminum foil for easy cleanup, then place a wire rack on top. If you don’t have a rack, you can skip it, but the rack helps air circulate for better browning.
- Remove the riblets from the refrigerator and pat them completely dry with paper towels. Moisture is the enemy of a good crust, so don’t skip this step.
- In a small bowl, combine the brown sugar, smoked paprika, garlic powder, onion powder, kosher salt, black pepper, cayenne pepper, dry mustard, and ground cumin. Mix thoroughly until well combined.
- Rub the olive oil all over the riblets, coating them evenly on all sides. This helps the dry rub adhere and promotes browning.
- Generously apply the dry rub to all sides of the riblets, pressing gently so it sticks to the meat. Don’t be shy—you want a good coating that will create a flavorful crust.
- Arrange the riblets bone-side down on the prepared wire rack, making sure they’re in a single layer and not touching each other. If needed, use two baking sheets.
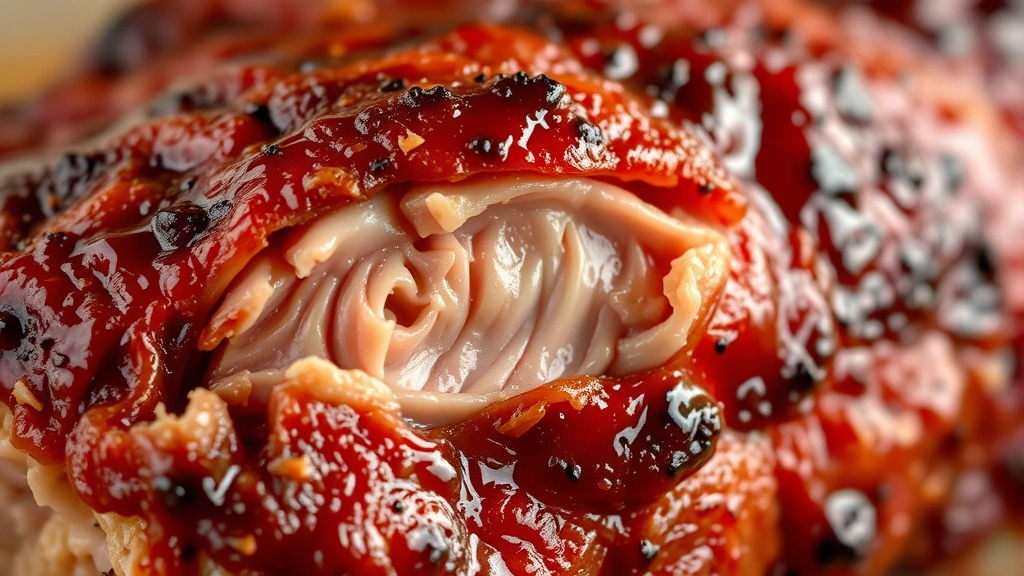
- Place in the preheated oven and bake for 2 to 2 hours 15 minutes, depending on the size of your riblets. They should be very tender and the meat should pull away slightly from the bones.
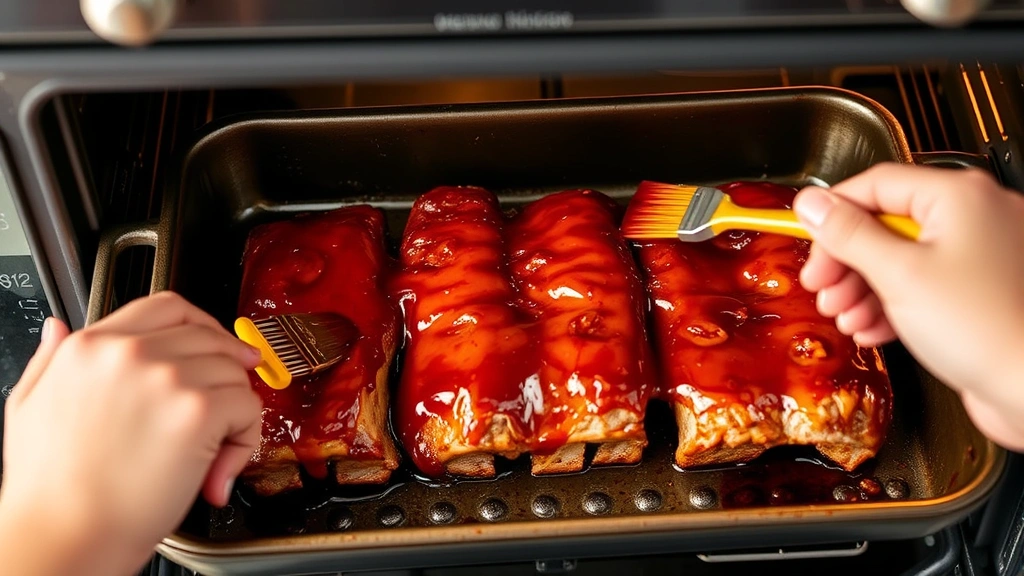
- While the riblets are cooking, prepare the glaze by whisking together the BBQ sauce, honey, and apple cider vinegar in a small bowl. Set aside.
- After the riblets have cooked for 2 hours, remove them from the oven and brush generously with the glaze on both sides.
- Return the glazed riblets to the oven and bake for an additional 15-20 minutes, until the glaze is sticky and slightly caramelized. The edges should look a bit charred.
- Remove from the oven and let rest for 5 minutes before serving. This allows the juices to redistribute throughout the meat.
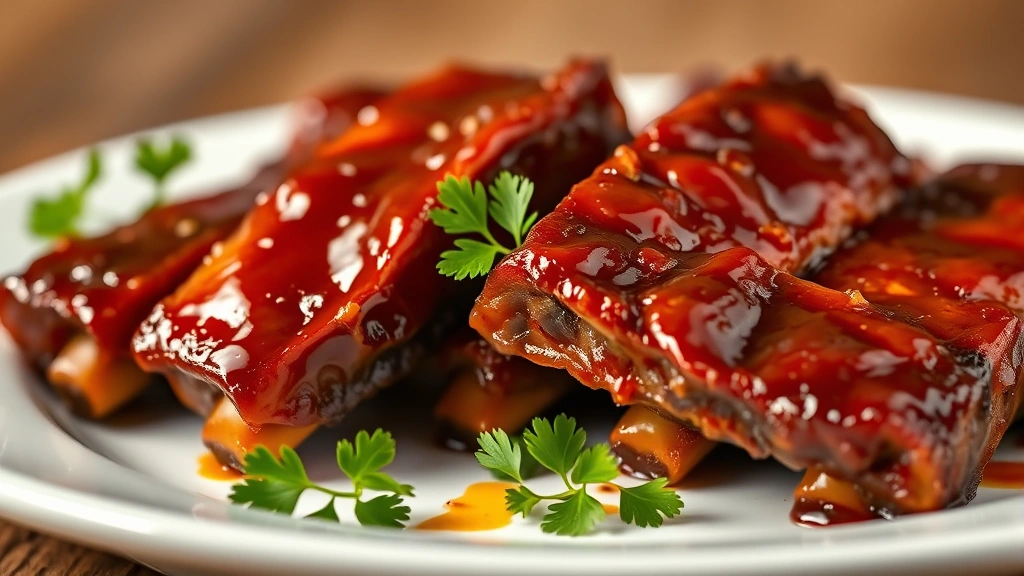
- Transfer to a serving platter, garnish with fresh parsley or chives if desired, and serve immediately while hot with extra glaze on the side for dipping.
Pro Tips
- **Choosing Your Riblets**: Both beef and pork riblets work beautifully with this recipe. Beef riblets tend to be meatier, while pork riblets are slightly more tender. Choose based on your preference and what’s available at your local butcher.
- **Dry Rub Make-Ahead**: You can prepare the dry rub up to one week in advance and store it in an airtight container. This is perfect for meal planning or entertaining.
- **Riblets Prep**: Remove riblets from the refrigerator 30 minutes before cooking for more even cooking. This allows them to come closer to room temperature.
- **Membrane Removal**: If your riblets have a thin membrane on the bone side, gently peel it off before applying the dry rub. This helps flavors penetrate better and improves texture.
- **Glaze Variations**: Feel free to customize the glaze based on your preferences. Try adding Worcestershire sauce, soy sauce, hot sauce, or Dijon mustard for different flavor profiles.
- **Oven Temperature**: Cooking at low temperature ensures the riblets become incredibly tender without drying out. Don’t be tempted to increase the heat—low and slow is key.
- **Storage**: Leftover riblets keep well in an airtight container in the refrigerator for up to 4 days. Reheat gently in a 300°F oven for about 15-20 minutes.
- **Freezing**: These freeze beautifully! Wrap cooled riblets individually in plastic wrap, then place in freezer bags. They’ll keep for up to 3 months. Thaw overnight in the refrigerator before reheating.
- **Serving Suggestions**: Serve with coleslaw, cornbread, baked beans, or a fresh green salad for a complete meal. These also work wonderfully as appetizers for parties.
- **Wine Pairing**: Pair with a robust red wine like Zinfandel or Cabernet Sauvignon, or go casual with cold beer.
- **Spice Adjustment**: If you prefer milder riblets, reduce or omit the cayenne pepper. For extra heat, increase it to 1½ teaspoons or add a dash of hot sauce to the glaze.
- **Grill Option**: For a smoky flavor, you can cook these on the grill instead. Use indirect heat at 300°F and follow the same cooking time, checking for doneness.