
Quick and easy fast pickling is one of my favorite kitchen tricks! Whether you’re preserving crisp vegetables or creating a tangy condiment, this beginner-friendly pickling method takes just minutes of prep and yields restaurant-quality results in hours, not weeks.
Traditional pickling can seem intimidating with all its canning equipment and lengthy processing times, but fast pickling—also called quick pickling or refrigerator pickling—is an entirely different beast. This modern technique skips the hot water bath and sterilization process, instead relying on the preservative power of vinegar, salt, and sugar to create shelf-stable pickles that taste fresher and brighter than their canned cousins. I absolutely love this method because it’s perfect for experimenting with flavors, and you’ll have delicious pickles ready to eat in just 24 hours.
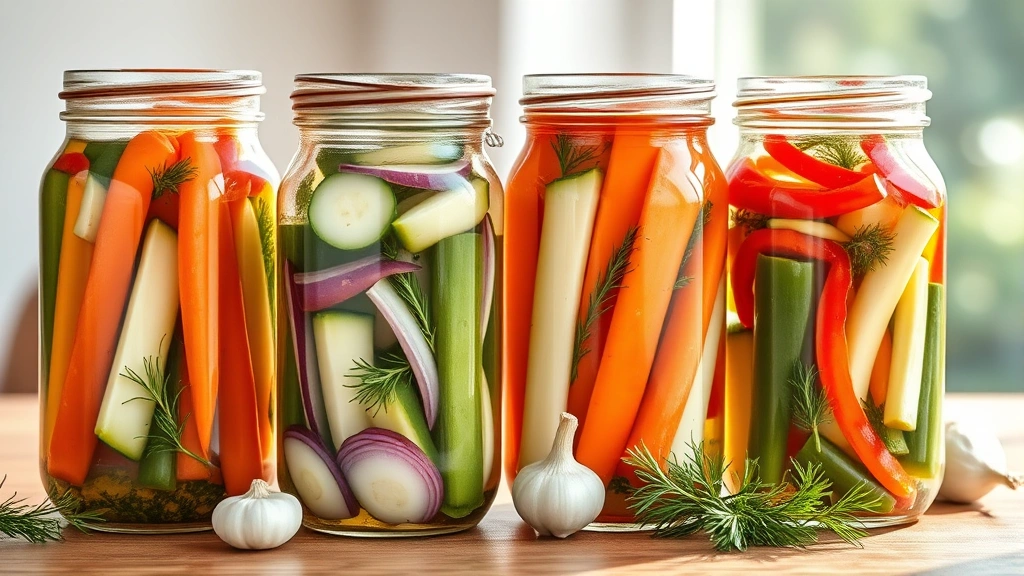
The beauty of fast pickling lies in its simplicity and versatility. You can pickle almost anything—cucumbers, onions, carrots, bell peppers, radishes, green beans, or even fruits like watermelon rind and peaches. The basic formula remains the same: equal parts vinegar and water, plus salt and sugar to taste, heated just until the sugar dissolves, then poured over your prepared vegetables. That’s it! No special equipment required, just glass jars and your pantry staples.
What I love most about this fast pickling approach is how quickly you can have homemade pickles ready. Unlike traditional canning that requires hours of work and special equipment, fast pickling pickles are ready to eat within 24 hours and taste phenomenal for weeks when stored in the refrigerator. They’re perfect for topping tacos, adding to charcuterie boards, serving alongside grilled meats, or simply snacking straight from the jar.
I’ve included my favorite flavor combinations and pro tips below, but the real magic is in understanding the basic formula. Once you master that, you can create endless variations based on what’s in your produce drawer and your personal taste preferences. This comprehensive guide to pickling spices will help you customize every batch.
For those new to preserving, fast pickling is the perfect entry point. There’s virtually no risk of food safety issues since the high acid content prevents bacterial growth, and you’ll see results almost immediately. Whether you’re preparing for a summer gathering, stocking your pantry, or simply wanting crisp, tangy vegetables on hand, this fast pickling recipe delivers every single time. Check out Serious Eats’ pickle guide and Bon Appétit’s quick pickle recipes for more inspiration, and don’t miss The New York Times’ quick pickle collection for additional flavor ideas.
Ingredients
- 2 cups white vinegar or apple cider vinegar
- 2 cups water
- 2 tablespoons kosher salt
- 2 tablespoons sugar
- 4 pounds fresh vegetables (cucumbers, onions, carrots, peppers, or combination)
- 4 cloves garlic, sliced
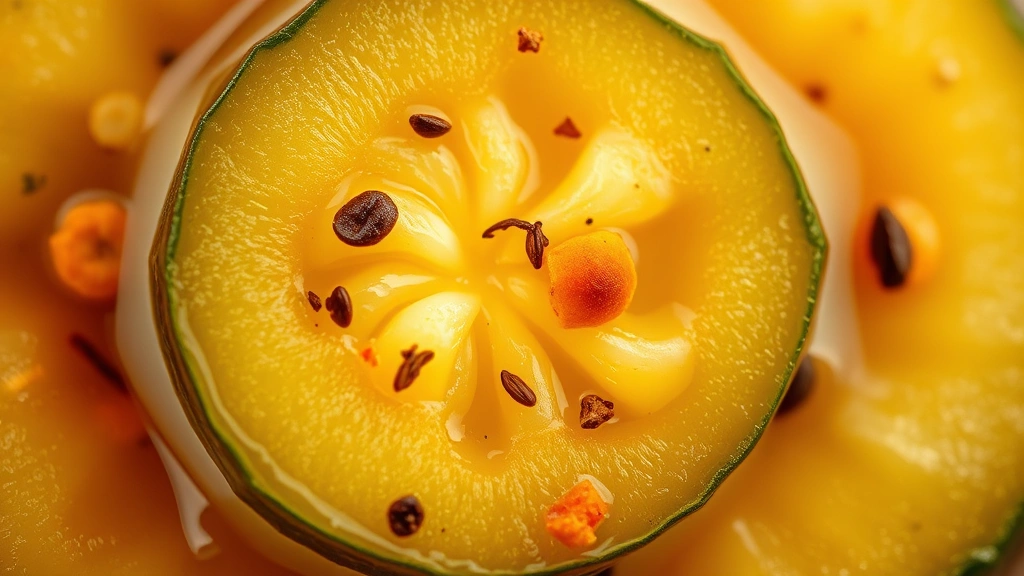
- 2 teaspoons pickling spice or your favorite whole spices (mustard seeds, coriander seeds, peppercorns, dill seeds)
- 2 dried red chilies or pinch of red pepper flakes (optional)
- 2-3 fresh dill sprigs or 1 teaspoon dried dill (optional)
- 1 teaspoon turmeric (optional, for color)
Instructions
- Prepare your vegetables by washing them thoroughly under cool running water. Pat dry with paper towels and trim as needed—cucumbers should have their blossom ends removed, carrots can be cut into sticks or coins, onions should be sliced into rings or half-moons, and peppers should be cut into strips or bite-sized pieces.
- Divide your prepared vegetables evenly between two clean 1-quart glass jars. You can pack them fairly tightly since they’ll soften slightly as they pickle.
- Distribute the sliced garlic cloves, pickling spices, dried chilies if using, and fresh dill among the jars, dividing evenly between the two containers.
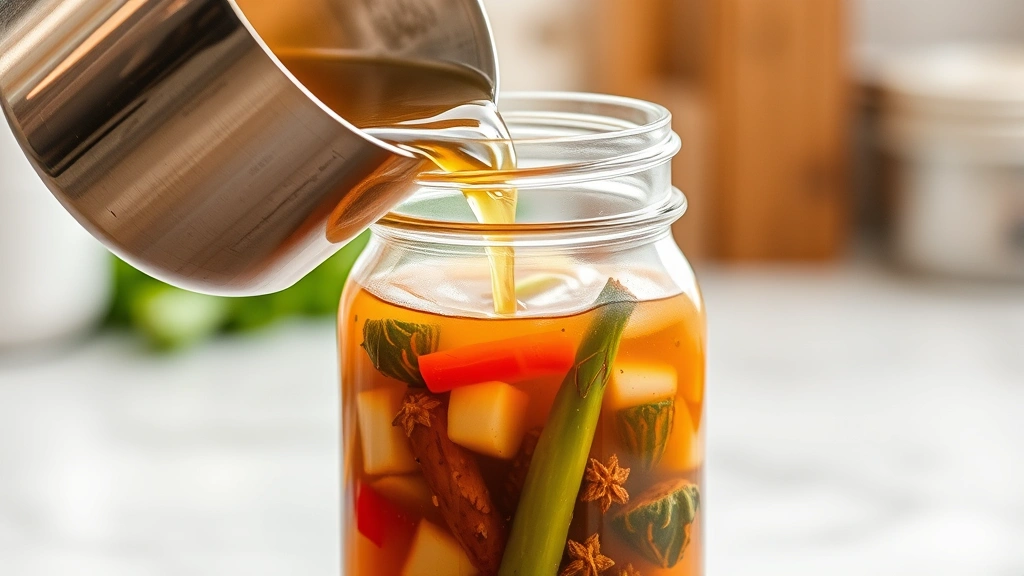
- In a medium saucepan, combine the vinegar, water, kosher salt, and sugar. Bring the mixture to a boil over medium-high heat, stirring occasionally until the salt and sugar are completely dissolved, about 5 minutes.
- Remove the brine from heat and let it cool for about 2-3 minutes—you want it hot but not boiling when you pour it over your vegetables.
- Carefully pour the hot brine over the vegetables in each jar, making sure to distribute the spices evenly and cover all the vegetables completely. Leave about 1/2 inch of headspace at the top of each jar.
- Allow the jars to cool to room temperature on your counter, about 30 minutes. Once cooled, cover the jars with their lids and refrigerate.
- Your fast pickles will be ready to eat in approximately 24 hours, though the flavor will continue to develop over the next few days. They’ll keep refrigerated for up to 3-4 weeks, though they’re best enjoyed within the first 2-3 weeks for optimal crunch and flavor.
- Taste and adjust seasoning if needed—if you prefer them spicier, add more red pepper flakes; if you prefer them sweeter, add a touch more sugar; if you prefer them more sour, add a bit more vinegar.
Pro Tips
- **Vegetable Selection**: The best vegetables for fast pickling are those with natural crunch and low water content. Cucumbers (especially small kirby varieties), carrots, radishes, green beans, cauliflower, and pearl onions are my top choices. Avoid very soft vegetables like ripe tomatoes or mushrooms unless you prefer a softer texture.
- **Vinegar Variations**: White vinegar creates a clean, bright pickle, but apple cider vinegar adds depth and slight sweetness. Rice vinegar produces milder pickles, while white wine vinegar offers sophistication. Never use distilled vinegar with less than 5% acidity, as it won’t provide adequate preservation.
- **Salt Matters**: Always use kosher salt or pickling salt, never iodized table salt, which will make your brine cloudy and bitter. The difference is dramatic and worth seeking out proper salt.
- **Flavor Customization**: Once you master the basic formula, experiment freely. Try adding fresh ginger, garlic scapes, star anise, bay leaves, cinnamon sticks, or fresh herbs like tarragon, thyme, or cilantro. Different combinations yield completely different flavor profiles—sweet and tangy, spicy and complex, herby and bright.
- **Spice Levels**: Start conservatively with heat-inducing ingredients. You can always add more red pepper flakes or fresh chilies to future batches, but you can’t remove them once they’re in the brine. I typically use 1-2 dried chilies per quart and adjust from there.
- **Crunch Factor**: If maintaining maximum crunch is your priority, use cucumbers with the blossom end removed (which contains enzymes that soften pickles), and add a grape leaf or oak leaf to each jar—the tannins help maintain crispness. Some people swear by adding fresh horseradish root for the same effect.
- **Temperature Control**: Keep your refrigerated pickles at a consistent cold temperature. Warm storage temperatures will cause the vegetables to soften more quickly and may compromise the pickling process. The cold not only preserves the pickles but also helps maintain their crisp texture.
- **Make-Ahead Strategy**: Prepare your vegetable-filled jars the night before, then make the brine in the morning and pour it over. This way you can have pickles ready by the following evening with minimal fuss on any given day.
- **Storage Tips**: These pickles are best stored in the refrigerator and will keep for 3-4 weeks, though most home cooks find they’re consumed well before then. The flavor actually peaks around day 3-4, so plan accordingly for events or gift-giving.
- **Reusing Brine**: Many people ask if they can reuse the brine—I don’t recommend it for food safety reasons, as the brine will have absorbed bacteria from the vegetables even in the refrigerator. Always make fresh brine for each batch.
- **Perfect Pairings**: Serve these quick pickles alongside charcuterie boards, atop tacos and sandwiches, with cheese and cured meats, alongside grilled fish or chicken, in grain bowls, or simply as a refreshing snack. They’re also excellent chopped and added to potato salad, coleslaw, or relish trays.