
There’s something absolutely magical about pulling a rack of fall-off-the-bone ribs out of the oven. This oven-baked ribs recipe is my go-to method for achieving restaurant-quality results without the fuss of grilling or smoking. Whether you’re planning a casual weeknight dinner or impressing guests at your next gathering, these perfectly tender, juicy ribs will steal the show every single time.
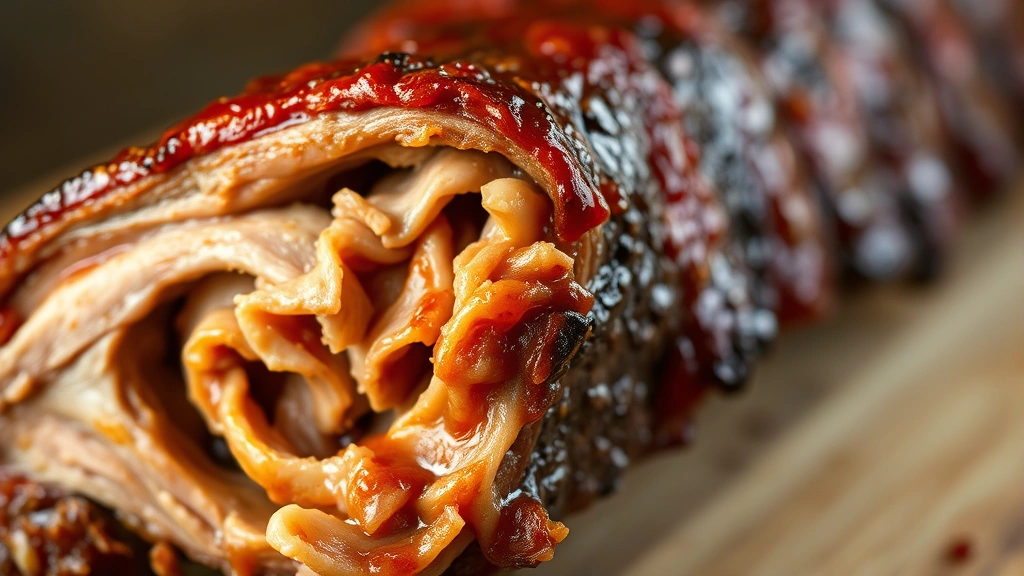
I absolutely love this method because it’s so incredibly forgiving and requires minimal hands-on time. The oven does most of the work while you relax, and the results are consistently phenomenal. The key to success is using a low temperature over an extended period, which allows the collagen in the ribs to break down slowly and transform into gelatin, creating that coveted tender texture we all crave.
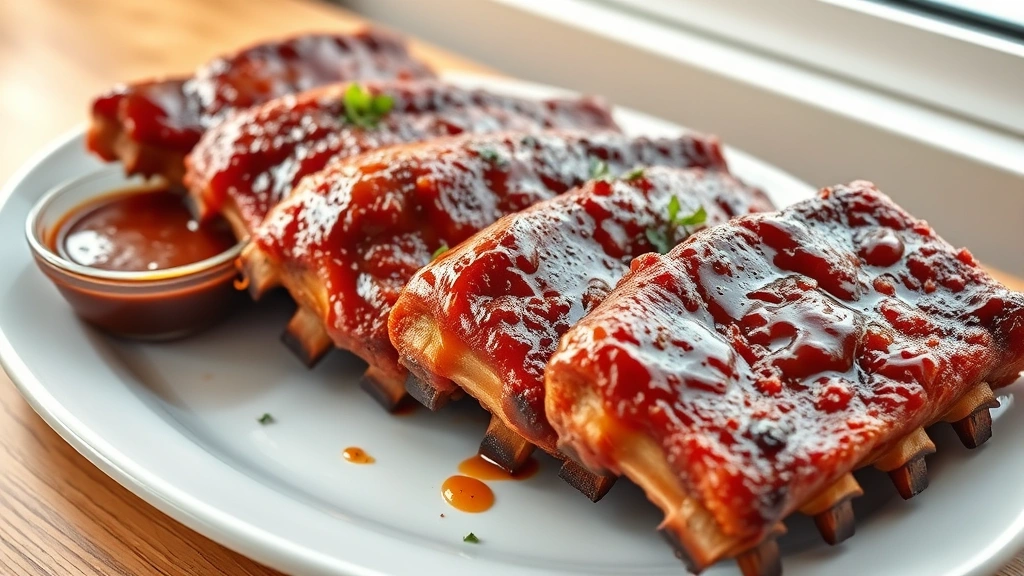
What makes this recipe special is the combination of a flavorful dry rub and a homemade sauce that caramelizes beautifully during the final stages of cooking. I’ve perfected this technique over years of experimentation, and I’m thrilled to share it with you today. The beauty of baking ribs in the oven is that you can prepare them in the morning, pop them in before dinner time, and have a showstopping meal ready when you need it.
The dry rub is where the magic begins. I use a blend of brown sugar, paprika, garlic powder, and other warm spices that create a delicious crust while the ribs bake low and slow. During the final thirty minutes, we brush on a tangy-sweet sauce that caramelizes perfectly in the oven’s heat, creating layers of complex flavor that taste like you’ve been tending these ribs all day long.
This method is also incredibly versatile. You can adjust the spice level to your preference, experiment with different sauce varieties, or even try different flavor combinations based on what you have on hand. I often serve these ribs with classic sides like coleslaw or baked beans, but they pair beautifully with everything from pickled red onions for brightness to creamy potato dishes for comfort.
For those looking to understand more about the science behind slow-cooking meats, Serious Eats has some excellent resources on low-and-slow cooking methods. If you want to explore variations on this recipe or pair it with complementary sides, Bon Appétit offers creative serving suggestions that will elevate your presentation.
The beauty of this oven-baked approach is that it’s perfect for any season. In summer, you can skip the grill altogether and enjoy air-conditioned comfort while your ribs bake. In winter, you’re already heating your oven, so why not make use of that warmth? The aroma alone as these ribs bake is absolutely incredible and will have everyone asking what’s for dinner before you’ve even finished cooking.
One of my favorite aspects of this recipe is how it teaches you fundamental cooking techniques that apply far beyond just ribs. Understanding how dry rubs work, how low-temperature cooking transforms tough cuts into tender masterpieces, and how to build layers of flavor through different cooking stages will make you a better cook overall. These skills transfer beautifully to other tough cuts of meat that benefit from slow cooking.
I recommend investing in a good meat thermometer if you don’t already have one. While visual cues are helpful, knowing the exact internal temperature ensures perfect results every single time. Ribs are done when they reach about 195-203°F internally, which is when that collagen has fully converted to gelatin and the meat pulls easily from the bone.
Whether you’re a seasoned home cook or just beginning your culinary journey, this oven-baked ribs recipe delivers impressive results with minimal stress. The combination of make-ahead convenience and restaurant-quality flavor makes this a recipe you’ll find yourself returning to again and again. Trust me, once you master this method, you’ll be making these ribs constantly for family dinners, weekend entertaining, and special celebrations.
Ingredients
- 2 full racks baby back ribs (about 3-4 pounds total), membrane removed
- 3 tablespoons brown sugar, packed
- 2 tablespoons smoked paprika
- 1 tablespoon garlic powder
- 1 tablespoon onion powder
- 1 tablespoon kosher salt
- 1 teaspoon black pepper, freshly ground
- 1 teaspoon cayenne pepper (adjust to taste)
- 1 teaspoon dry mustard powder
- 1 teaspoon chili powder
- 1/2 teaspoon ground cumin
- 1/2 teaspoon ground ginger
- 1 cup barbecue sauce (store-bought or homemade)
- 2 tablespoons apple cider vinegar
- 1 tablespoon honey
- 1 tablespoon butter, melted
- Aluminum foil for wrapping
Instructions
- Preheat your oven to 250°F and position the rack in the center. Line a large baking sheet with aluminum foil for easy cleanup, and place a second sheet of foil underneath if your ribs are particularly large.
- Remove the thin membrane from the back of the ribs by sliding a butter knife or your fingers under it and peeling it away completely. This step is crucial for allowing the dry rub to penetrate the meat.
- Pat the ribs completely dry with paper towels. Dry meat is essential for achieving a good crust on the exterior.
- In a small bowl, combine the brown sugar, smoked paprika, garlic powder, onion powder, kosher salt, black pepper, cayenne pepper, dry mustard powder, chili powder, ground cumin, and ground ginger. Mix thoroughly with a fork to break up any clumps.
- Generously apply the dry rub to both sides of the ribs, pressing it gently into the meat so it adheres well. Don’t be shy with the rub—this is where all your flavor comes from.
- Place the rubbed ribs bone-side down on your prepared baking sheet. If using two racks, position them so they don’t overlap.
- Tightly cover the ribs with aluminum foil, creating a seal around the edges. This traps steam and moisture, helping the ribs become incredibly tender during the low-and-slow cooking process.
- Place the baking sheet in your preheated 250°F oven and bake for 2 hours and 15 minutes without disturbing or peeking. The low temperature allows the collagen in the ribs to convert to gelatin gradually.
- After 2 hours and 15 minutes, carefully remove the ribs from the oven and peel back the foil. Be cautious of the steam that will escape.
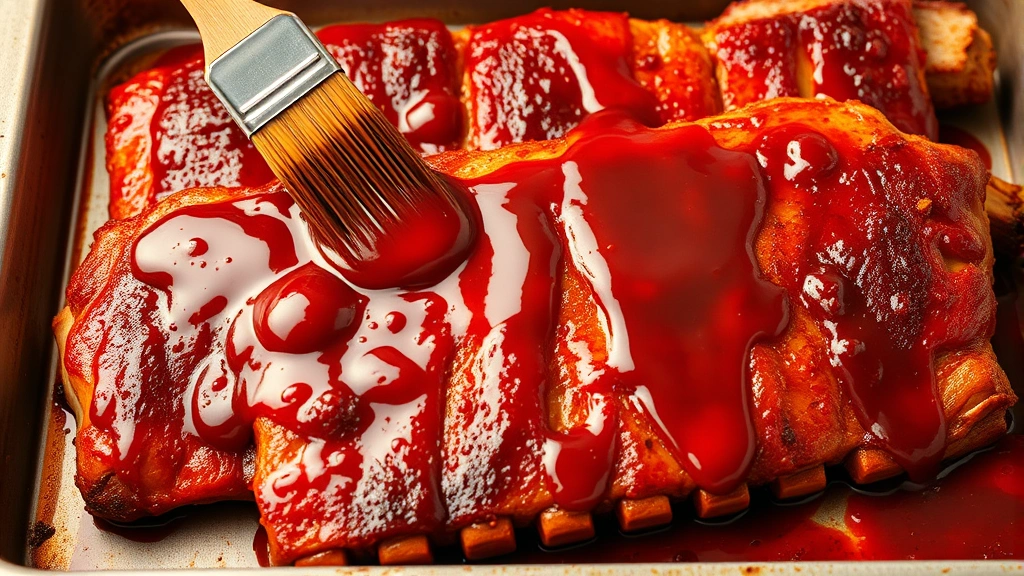
- In a small saucepan over medium-low heat, combine the barbecue sauce, apple cider vinegar, honey, and melted butter. Stir well until combined and warm through, about 2 minutes. This creates a glaze with more depth than sauce alone.
- Brush the sauce generously over the top of each rib rack, covering them evenly. Reserve about 1/4 cup of sauce for an additional coating.
- Return the ribs to the oven, uncovered, and bake for an additional 20-30 minutes. During the last 10 minutes, brush with the reserved sauce one more time. The ribs are ready when the sauce has caramelized and darkened slightly.
- Remove from the oven and allow the ribs to rest for 5 minutes before cutting. This resting period allows the juices to redistribute throughout the meat.
- Using a sharp knife, cut between the bones to separate individual ribs. Serve immediately while hot, with extra sauce on the side if desired.
Pro Tips
o Dry Rub Timing: You can apply the dry rub up to 8 hours in advance and refrigerate the ribs, which allows the flavors to penetrate deeper into the meat
o Temperature Precision: A meat thermometer is your best friend here—ribs are perfectly cooked when they reach 195-203°F internally, ensuring maximum tenderness
o Sauce Customization: Feel free to use your favorite barbecue sauce as the base, or make your own for more control over sweetness and spice levels
o Foil Tenting: Make sure the foil is sealed tightly around the edges to trap steam effectively, which is critical for achieving fall-off-the-bone tenderness
o Oven Variations: Different ovens run differently, so if your ribs don’t seem tender after 2 hours and 15 minutes, add an additional 15 minutes and check again
o Leftover Storage: Cooked ribs keep beautifully in an airtight container in the refrigerator for up to 4 days, and can be reheated gently in a 300°F oven
o Freezing Instructions: You can freeze cooked ribs for up to 3 months; thaw overnight in the refrigerator and reheat gently to prevent drying out
o Serving Suggestions: These ribs pair wonderfully with coleslaw, baked beans, cornbread, or roasted vegetables for a complete meal
o Make-Ahead Convenience: You can prepare the ribs with the dry rub in the morning, cover with plastic wrap, and refrigerate until you’re ready to bake them
o Wine Pairing: These richly flavored ribs pair beautifully with cold beer, lemonade, or a crisp white wine for a balanced meal
o Scaling the Recipe: This recipe doubles easily if you’re cooking for a larger crowd; just use additional baking sheets and maintain the same oven temperature and timing