
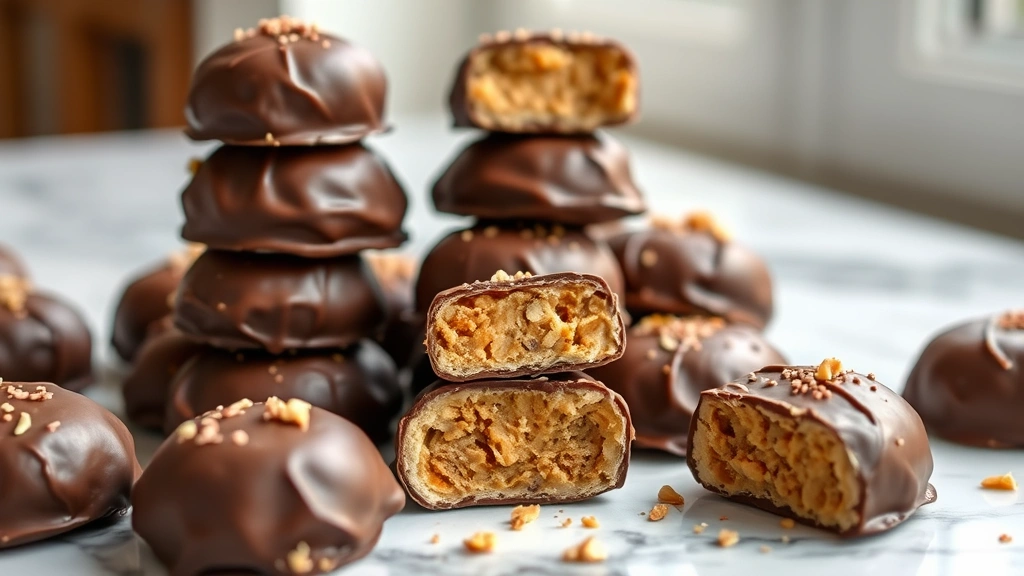
These homemade Butterfinger balls are an absolute game-changer for your dessert repertoire! They’re crispy, flaky, buttery, and absolutely irresistible—just like the candy bar, but even better because you made them yourself. This easy recipe comes together in minutes and requires just a handful of simple ingredients that you probably already have in your pantry.
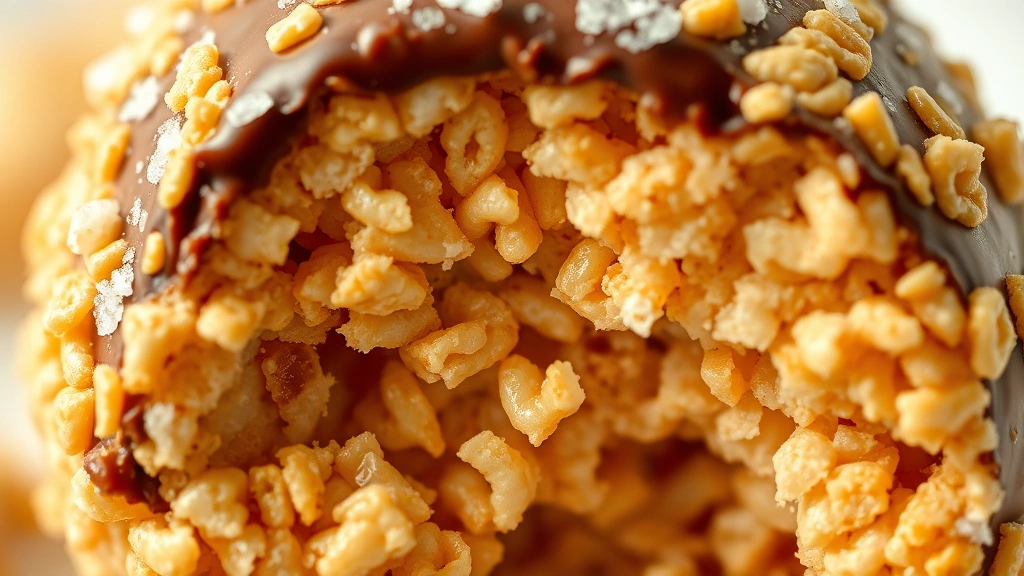
What makes these Butterfinger balls so special is that perfect combination of textures. You get that delicate, flaky cookie crunch on the outside, paired with a smooth chocolate coating that snaps when you bite into it. The peanut butter center ties everything together beautifully, creating a homemade treat that rivals any store-bought candy. Whether you’re making these for a holiday gathering, a special occasion, or just because you deserve something sweet, this butterfinger balls recipe is guaranteed to impress.
One of my favorite things about this recipe is how customizable it is. You can use different types of chocolate, adjust the peanut butter ratio, or even add a sprinkle of sea salt on top for a sweet and salty combo. I’ve also found that these make wonderful gifts when packaged in cute boxes or bags with a homemade label. Your friends and family will be absolutely amazed that you made these from scratch!
The beauty of making your own Butterfinger balls is that you have complete control over the quality of ingredients. No mysterious additives or preservatives—just real butter, real chocolate, and wholesome peanut butter. Plus, homemade versions taste fresher and have that authentic, indulgent flavor that store-bought candy just can’t match. They’re perfect for entertaining or keeping on hand for those moments when you need a little pick-me-up.
These Butterfinger balls are surprisingly easy to make, even for beginner candy makers. The process involves just a few simple steps: creating the crispy cookie base, forming it into balls, coating with chocolate, and letting them set. No special equipment needed—just your hands, a few bowls, and a little patience. I promise that once you master this recipe, you’ll be making them all the time. They also store beautifully in an airtight container for up to two weeks, so you can make a big batch and enjoy them throughout the month.
For more inspiration on sweet treats and desserts, check out these amazing resources: Bon Appétit’s dessert collection offers professional techniques, and Serious Eats has detailed candy-making guides. If you’re looking for chocolate-based treats, The New York Times Cooking section has wonderful chocolate dessert recipes to explore. You might also enjoy making other homemade treats using similar techniques, or exploring creative flavor combinations in your cooking.
So grab your ingredients and let’s get started on making these absolutely delicious homemade Butterfinger balls. I can’t wait for you to taste how incredible they are!
Ingredients
- 1 cup creamy peanut butter
- 1/2 cup butter, softened
- 2 cups powdered sugar
- 1 1/2 cups crispy rice cereal or crushed butterscotch chips
- 2 cups milk chocolate chips or semi-sweet chocolate chips
- 2 tablespoons coconut oil or vegetable shortening
- Sea salt for topping (optional)
- 1/2 teaspoon vanilla extract
Instructions
- In a large mixing bowl, combine the softened butter and creamy peanut butter together until well blended and smooth.
- Add the powdered sugar to the peanut butter mixture and stir until fully incorporated, making sure there are no lumps.
- Fold in the vanilla extract and crispy rice cereal until evenly distributed throughout the mixture. The mixture should be thick and moldable.
- Line a baking sheet with parchment paper or wax paper for easy transfer of the finished balls.
- Scoop the peanut butter mixture using a small cookie scoop or melon baller, creating uniform-sized portions.
- Roll each scoop between your hands to form smooth, compact balls about 1 inch in diameter.
- Place the formed balls on the prepared baking sheet and refrigerate for at least 30 minutes until firm.
- While the balls are chilling, prepare your chocolate coating by placing the chocolate chips in a microwave-safe bowl.
- Add the coconut oil or vegetable shortening to the chocolate chips to help thin the chocolate for easier coating.
- Microwave the chocolate mixture in 30-second intervals, stirring between each interval, until completely melted and smooth.
- Remove the chilled peanut butter balls from the refrigerator.
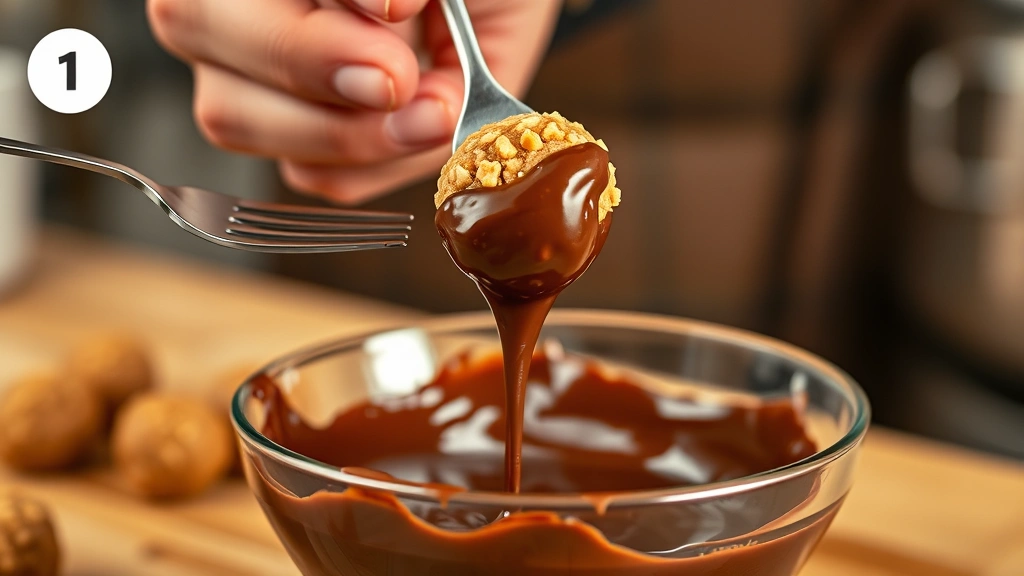
- Using a fork or chocolate dipping tool, carefully dip each ball into the melted chocolate, making sure to coat completely.
- Allow excess chocolate to drip off by holding the fork over the bowl for a few seconds.
- Place the chocolate-coated balls back onto the parchment-lined baking sheet.
- If desired, immediately sprinkle a tiny pinch of sea salt on top of each ball while the chocolate is still wet.
- Return the finished Butterfinger balls to the refrigerator for at least 30 minutes or until the chocolate is completely set.
- Store in an airtight container at room temperature for up to two weeks, or in the refrigerator for longer storage.
Pro Tips
- These homemade Butterfinger balls are best stored in an airtight container at room temperature for up to 2 weeks, or refrigerated for up to 4 weeks for extended freshness
- If your chocolate is too thick for dipping, add a little more coconut oil one teaspoon at a time until you reach the desired consistency
- For a crispier texture similar to actual Butterfinger candy bars, use crushed butterscotch chips instead of rice cereal in the filling
- You can customize the chocolate coating by using dark chocolate, white chocolate, or even milk chocolate—or try a combination of different types
- These make excellent homemade gifts when packaged in cute boxes, mason jars, or cellophane bags tied with ribbon and a handwritten label
- For extra indulgence, try adding 1/4 cup of finely chopped roasted peanuts to the filling mixture before shaping into balls
- If you don’t have coconut oil, vegetable shortening, or even butter can be used to thin the chocolate for easier dipping
- Make sure to use room-temperature ingredients when mixing the filling, as this helps create a smoother, more moldable texture
- These Butterfinger balls freeze beautifully for up to 3 months when stored in an airtight freezer container with parchment between layers
- For a no-bake option, you can also store these in the freezer and eat them straight from frozen for an extra cold, creamy treat
- Double the recipe easily—the ingredients scale up perfectly if you need to make larger batches for parties or holiday gifts
- If the filling becomes too soft while you’re shaping balls, pop it back in the refrigerator for 15 minutes to re-firm it
- Try adding 1/2 teaspoon of sea salt to the filling mixture itself for a salted peanut butter version that’s absolutely divine
- These are perfect for holiday gift-giving, potlucks, holiday parties, or just keeping on hand for your own sweet cravings throughout the week