

There’s something wonderfully nostalgic about homemade Pepperidge Farm-style dressing that tastes just like the classic stuffing you grew up with. This from-scratch version captures all that cozy, buttery goodness without opening a box, and honestly? It’s easier than you’d think. The secret is using day-old bread cubes, quality butter, and a careful balance of herbs and seasonings that make this dressing the star of any holiday table.
I’ve been making this recipe for years now, and every single time someone asks for the secret ingredient. Spoiler alert: there isn’t one—it’s just quality ingredients treated with care and attention. The beauty of making your own dressing is that you control every single element, from the type of bread to the ratio of mix-ins. Plus, your kitchen will smell absolutely incredible while it’s baking.
This dressing is incredibly versatile. Serve it alongside herb roasted turkey, with herb butter chicken, or even as a vegetarian main course topped with mushroom gravy. You can make it ahead and refrigerate it unbaked, or prepare the bread cubes days in advance. For more inspiration on classic holiday sides, check out Bon Appétit’s classic bread stuffing or Serious Eats’ stuffing guide.
The texture is key here—you want it moist but not soggy, with enough structure that each spoonful holds together beautifully. This comes down to the ratio of broth to bread and how long you let it bake. I always check mine about halfway through to make sure it’s browning evenly. The top should be gorgeously golden and crispy while the inside stays tender and flavorful.
What I love most about this recipe is how it brings people together. Whether you’re cooking for Thanksgiving, Christmas, or just a regular Sunday dinner, homemade dressing says “I made this with love.” It’s the kind of dish that people actually fight over at the dinner table, asking for seconds before they’ve finished their firsts. Once you master this version, you’ll never want to go back to boxed. Trust me on this one.
Ingredients
- 1 pound day-old bread (challah or brioche work beautifully), cubed into ½-inch pieces
- 6 tablespoons unsalted butter, plus more for the baking dish
- 2 medium onions, finely diced
- 4 celery stalks, finely diced
- 8 ounces mushrooms, cleaned and finely diced
- 4 cups low-sodium chicken or vegetable broth
- 3 large eggs, beaten
- 2 tablespoons fresh sage, finely chopped (or 1 tablespoon dried)
- 1 tablespoon fresh thyme, finely chopped (or 1½ teaspoons dried)
- 1 tablespoon fresh parsley, finely chopped
- ½ teaspoon kosher salt
- ¼ teaspoon freshly ground black pepper
- ¼ teaspoon garlic powder
- ¼ teaspoon onion powder
- Pinch of nutmeg
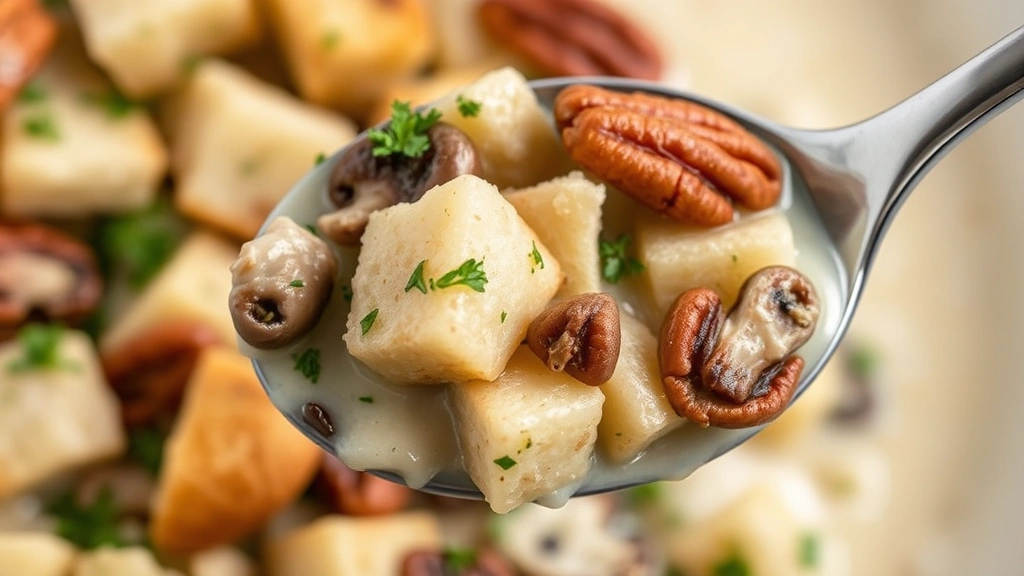
- ½ cup roughly chopped pecans or walnuts (optional but recommended)
Instructions
- Preheat your oven to 375°F. If your bread isn’t already day-old and dried out, spread the cubes on a baking sheet and toast them in the oven for about 10-12 minutes, stirring halfway through, until they’re lightly golden and slightly dried out. This step is crucial for getting the right texture.
- While the bread is toasting, melt the 6 tablespoons of butter in a large skillet over medium heat. Once melted and foaming, add your diced onions and celery.
- Sauté the onions and celery for about 5-7 minutes, stirring occasionally, until they’re softened and the onions are translucent. This builds the flavor foundation of your dressing.
- Add the diced mushrooms to the skillet and continue cooking for another 3-4 minutes, stirring frequently, until the mushrooms have released their moisture and are tender. The mixture should smell absolutely wonderful at this point.
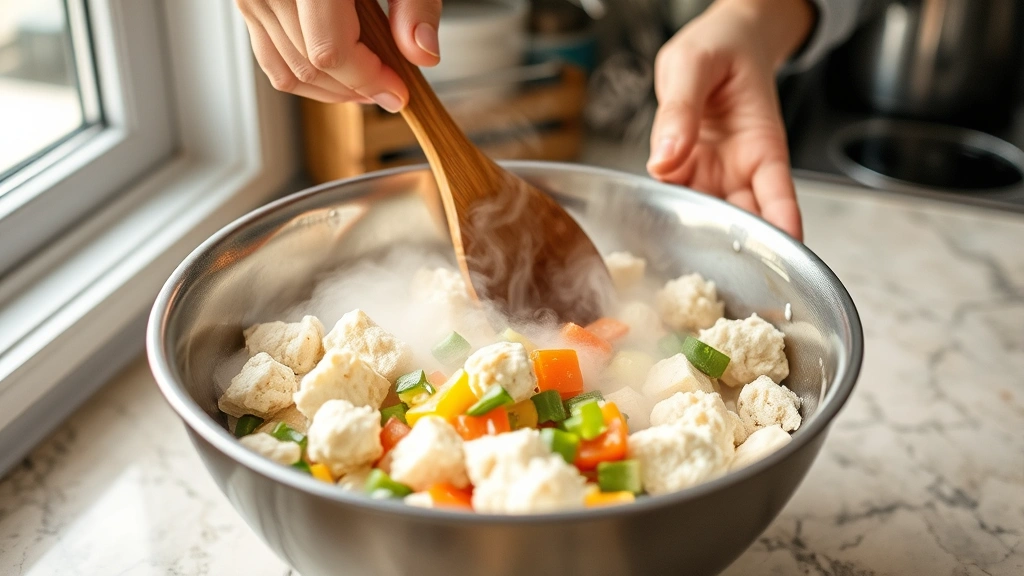
- In a large mixing bowl, combine the toasted bread cubes with the sautéed vegetable mixture, tossing gently to coat the bread with the butter and vegetables.
- In a separate bowl, whisk together the beaten eggs, chicken broth, chopped sage, thyme, parsley, salt, pepper, garlic powder, onion powder, and nutmeg.
- Pour the egg and broth mixture over the bread and vegetables, stirring gently with a wooden spoon or spatula until everything is evenly moistened. The bread should be wet but not mushy—you’re going for a moist consistency that will firm up during baking.
- Fold in the chopped pecans or walnuts if using, distributing them evenly throughout the mixture.
- Butter a 9×13-inch baking dish (or similar sized dish) and transfer the entire dressing mixture into it, spreading it out evenly. You can prepare it to this point up to 24 hours ahead and refrigerate it covered until ready to bake.
- If baking from room temperature, cover the dish with foil and bake for 25 minutes. If baking from refrigerated, add about 10-15 minutes to the covered baking time.
- After the initial covered baking time, remove the foil and continue baking for another 20-25 minutes, until the top is golden brown and crispy while the inside remains moist.
- Remove from the oven and let rest for 5 minutes before serving. This allows the structure to set slightly and makes it easier to scoop into serving portions.
- Serve warm, directly from the baking dish or transferred to a serving platter. Leftovers can be covered and refrigerated for up to 3 days, then gently reheated in a 325°F oven.
Pro Tips
- **Bread Selection**: The type of bread you use makes a huge difference. Day-old brioche or challah creates an incredibly rich, tender dressing. White bread works fine too, but avoid dense breads like sourdough for this recipe.
- **Make-Ahead Magic**: Prepare this through step 9 and refrigerate overnight. The bread will absorb the liquid slowly, and you’ll actually get a more evenly moist result. Just add 15 minutes to your covered baking time.
- **Texture Control**: If you prefer a moister dressing, use an extra half-cup of broth. For a firmer, more bread-forward version, reduce the broth by ½ cup. I like mine somewhere in the middle—moist but not wet.
- **Herb Variations**: Fresh herbs are always superior to dried, but if you only have dried versions, use half the amount called for since dried herbs are more concentrated. You can also add dried cranberries, fresh apple chunks, or sausage for variations.
- **Vegetable Flexibility**: This recipe is forgiving with vegetables. No mushrooms? Use more celery. Want to add carrots? Go ahead—just dice them small so they cook through. Leeks are wonderful too.
- **Nut Options**: Pecans are traditional, but walnuts, almonds, or even toasted pine nuts work beautifully. Toast them lightly first if you’re using raw nuts for better flavor development.
- **Storage and Reheating**: Leftover dressing keeps for 3-4 days in the refrigerator. Reheat gently in a 325°F oven covered with foil for about 15-20 minutes. You can also freeze unbaked dressing for up to 2 months—just thaw overnight in the refrigerator before baking.
- **Broth Temperature**: Using warm or hot broth helps the bread absorb the liquid more evenly and reduces overall baking time. Cold broth is fine too, just plan for a few extra minutes in the oven.
- **The Golden Rule**: Don’t skip the resting period after it comes out of the oven. Those 5 minutes make all the difference in achieving the perfect consistency.
- **Scaling**: This recipe easily doubles for a crowd. Use a 9×13-inch baking dish for the original amount, and for double, use two dishes or one larger roasting pan, adding a few minutes to the baking time.