
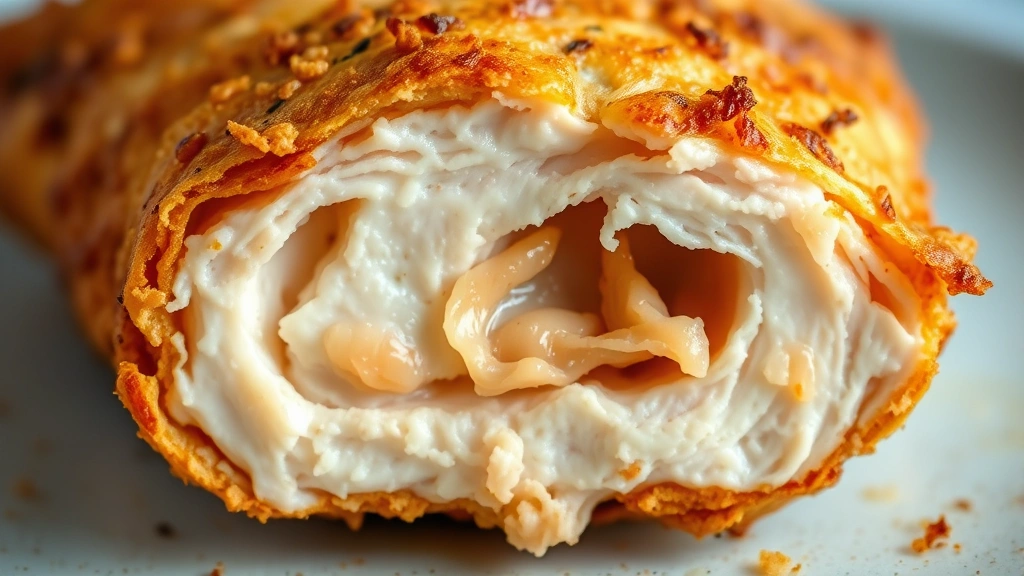
There’s something absolutely magical about homemade chicken tenders—they’re crispy on the outside, tender and juicy on the inside, and so much better than anything you’d grab from a freezer section. This simple chicken tenders recipe is perfect for busy weeknights when you need dinner on the table fast, but you don’t want to sacrifice flavor or quality. What I love most about making chicken tenders at home is how customizable they are. You can season them however you like, cook them your preferred way, and have them ready in under 30 minutes.
I’ve been making these for my family for years, and they’ve become such a staple in our dinner rotation. The beauty of this recipe lies in its simplicity—just a handful of pantry ingredients transform ordinary chicken breasts into something restaurant-worthy. Whether you’re feeding picky eaters or looking for an easy dinner solution, these tenders deliver every single time. They’re perfect served with your favorite dipping sauce, alongside Quick Tasty Bacon Carbonara for a complete meal, or paired with roasted vegetables for something lighter.
What makes this recipe so special is how versatile it is. You can bread them with panko for extra crunch, use regular breadcrumbs for a more delicate coating, or even try crushed crackers or cereal for fun variations. The technique I’m sharing with you today is foolproof—it ensures perfectly cooked, golden chicken tenders every time. I’ve tested this method countless times, and it never disappoints. The key is pounding the chicken to an even thickness so everything cooks at the same rate, which prevents the outside from burning before the inside is cooked through.
Beyond just being delicious, homemade chicken tenders are also more economical than buying pre-made versions. You control the quality of the ingredients, know exactly what’s going into your food, and often spend less money in the process. Plus, there’s something deeply satisfying about creating something this good from scratch. Your family will be impressed, and you’ll have the confidence knowing you made it all yourself.
This recipe is also incredibly forgiving. If you don’t have panko breadcrumbs, regular ones work fine. If you prefer baking over frying, that works too—just adjust the cooking time slightly. The versatility is part of what makes it so practical for everyday cooking. You can prepare the tenders ahead of time, refrigerate them, and cook them when you’re ready, making meal prep a breeze.
I recommend serving these with a variety of dipping sauces—honey mustard, ranch, barbecue sauce, or even a simple sriracha mayo. They’re also wonderful in sandwiches, chopped over salads like our Best Chickpea Salad Recipe, or alongside pasta dishes like our Delicious Heavy Cream Pasta Recipe. The options are truly endless.
For best results, I always recommend using chicken breasts that are roughly the same thickness. If they’re uneven, take a few minutes to pound them out—it makes such a difference in how evenly they cook. The coating should be seasoned well because it’s what gives these tenders most of their flavor. Don’t be shy with your seasonings here.
If you’re looking for more protein-packed dinner ideas, check out our Best Heavy Cream Alfredo Sauce Recipe which pairs beautifully with these tenders, or our Easy Pickled Red Onion Recipe for a tangy side. These chicken tenders are truly a game-changer for weeknight dinners. They’re quick, they’re easy, and they’re absolutely delicious. Your family is going to love them as much as mine does. Let’s get started on making the best chicken tenders you’ve ever had!
Ingredients
- 2 pounds boneless, skinless chicken breasts
- 1 cup all-purpose flour
- 1 cup panko breadcrumbs
- 2 large eggs
- 1/2 cup whole milk
- 2 teaspoons salt
- 1 teaspoon black pepper
- 1 teaspoon garlic powder
- 1 teaspoon paprika
- 1/2 teaspoon cayenne pepper (optional)
- Vegetable oil for frying (about 3-4 cups)
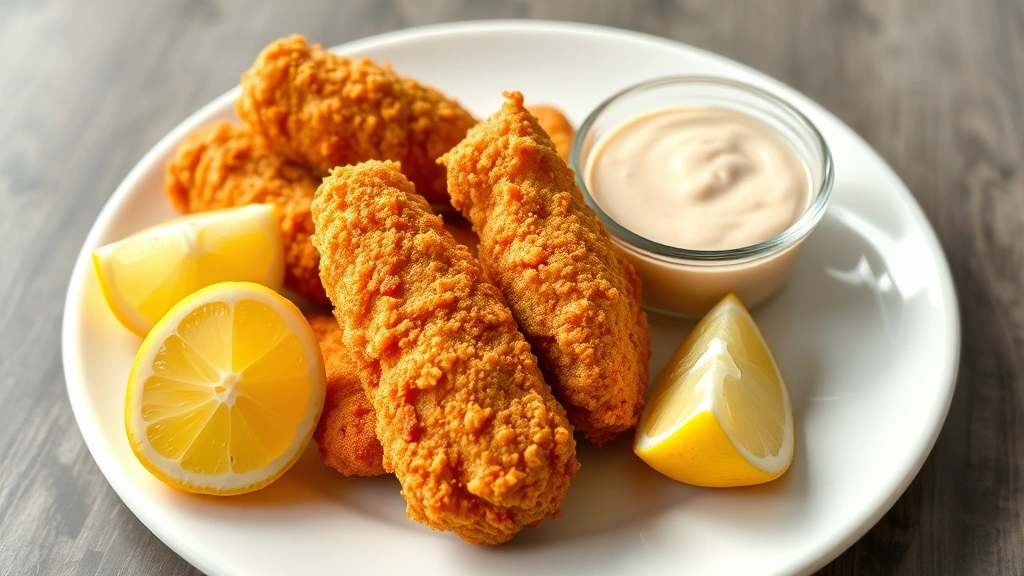
- Fresh lemon wedges for serving
Instructions
- Pat the chicken breasts dry with paper towels. Place one chicken breast on a cutting board and, using a sharp knife, carefully slice it horizontally to create two thinner pieces. Repeat with remaining chicken breasts. This step ensures even cooking throughout.
- Once all chicken is sliced, place each piece between two sheets of plastic wrap or parchment paper. Using a meat mallet or the bottom of a heavy pan, gently pound each chicken piece to an even 1/2-inch thickness. Be careful not to pound too hard or you’ll tear the chicken.
- In a shallow bowl, whisk together the eggs and milk until well combined. In another shallow bowl, combine the flour, garlic powder, paprika, cayenne pepper, salt, and pepper. Mix well to distribute the seasonings evenly. In a third shallow bowl, pour the panko breadcrumbs.
- Set up your breading station with the egg mixture, flour mixture, and panko in three separate bowls in a line. This makes the breading process quick and efficient.
- Working with one piece of chicken at a time, coat it thoroughly in the flour mixture, shaking off any excess. Then dip it into the egg mixture, making sure it’s completely coated. Finally, press it into the panko breadcrumbs, coating both sides generously. Place the breaded tender on a clean plate. Repeat with all remaining chicken pieces.
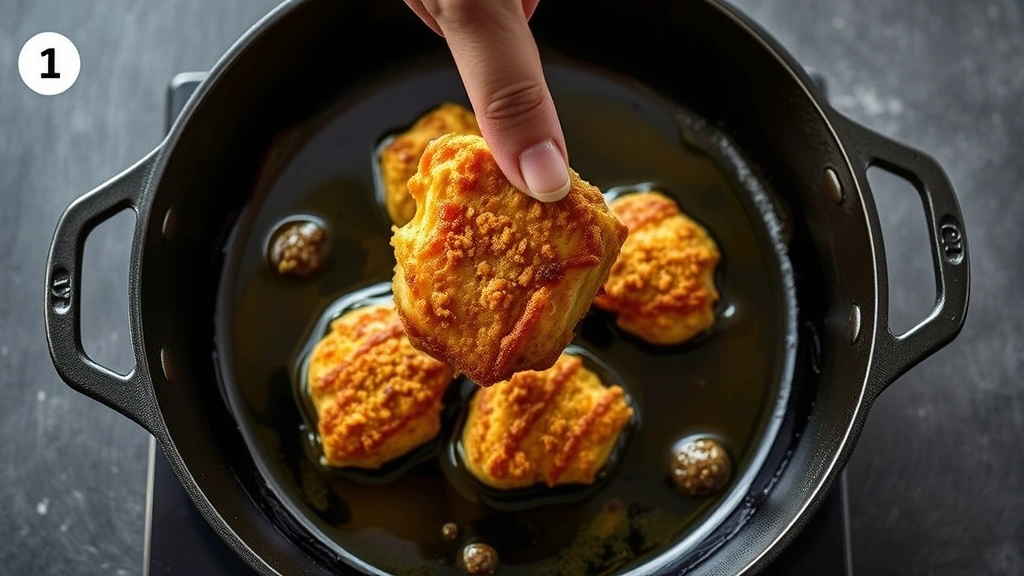
- Heat the vegetable oil in a large, heavy-bottomed skillet or Dutch oven to 350°F (175°C). You can test the temperature with a candy or deep-fry thermometer. If you don’t have one, drop a small piece of bread into the oil—it should sizzle immediately and turn golden brown in about 60 seconds.
- Working in batches to avoid overcrowding the pan, carefully place 4-5 chicken tenders into the hot oil. Fry for 3-4 minutes on the first side until golden brown and crispy.
- Using tongs or a slotted spoon, carefully flip each tender and fry for another 3-4 minutes until the second side is golden brown and the internal temperature reaches 165°F (74°C) when checked with a meat thermometer.
- Remove the cooked tenders from the oil and place them on a paper towel-lined plate to drain excess oil. Let them rest for 1-2 minutes before serving.
- Repeat the frying process with the remaining batches of chicken tenders, allowing the oil to return to temperature between batches.
- Serve the chicken tenders hot with your favorite dipping sauces, fresh lemon wedges, and your choice of sides. They’re best enjoyed immediately while still crispy on the outside and juicy on the inside.
Pro Tips
- For a healthier baked version, arrange breaded tenders on a greased baking sheet, lightly spray with cooking oil, and bake at 400°F (200°C) for 15-18 minutes, flipping halfway through. They won’t be quite as crispy as fried, but still delicious.
- Make ahead tip: Bread the chicken tenders up to 8 hours in advance and refrigerate on a parchment-lined baking sheet. This actually helps the coating stick better during cooking. Fry directly from the refrigerator, adding an extra minute or two to the cooking time.
- Oil temperature is crucial for perfect chicken tenders. If the oil isn’t hot enough, the coating will absorb too much oil and become greasy. If it’s too hot, the outside will burn before the inside cooks through. Invest in a thermometer for best results.
- Season the flour mixture generously—this is where most of the flavor comes from. Don’t be shy with the salt and spices. You can also add dried herbs like Italian seasoning or dried thyme for variation.
- Double-dredging technique: For an extra-crispy coating, dip the floured chicken in the egg mixture again, then coat with panko a second time. This creates an incredibly crunchy exterior.
- Panko versus regular breadcrumbs: Panko creates a lighter, crunchier coating because of its larger, airier texture. Regular breadcrumbs work fine but create a denser coating.
- For spicy tenders, add more cayenne pepper to the flour mixture or toss finished tenders in a spicy honey or hot sauce immediately after frying.
- Leftover tenders can be refrigerated in an airtight container for up to 3 days. Reheat in a 350°F (175°C) oven for about 10 minutes to restore crispiness. Don’t use a microwave as they’ll become soggy.
- Freezing instructions: Freeze breaded but uncooked tenders on a baking sheet for 2 hours, then transfer to a freezer bag. They’ll keep for up to 3 months. Cook directly from frozen, adding 2-3 minutes to the cooking time.
- Dipping sauce suggestions: honey mustard, ranch dressing, barbecue sauce, sriracha mayo, garlic aioli, buffalo sauce, or teriyaki glaze.
- These tenders are perfect for meal prep. Make a double batch and use them throughout the week in sandwiches, salads, pasta dishes, or as standalone proteins with different sides.