
Cake popsicles are the ultimate party treat and honestly? They’re easier to make than you’d think! This is my go-to recipe for baby showers, birthday celebrations, and those times when you want something a little more elegant than a regular cupcake. The beauty of cake popsicles lies in their simplicity – you’re basically combining two beloved desserts into one adorable handheld treat.
I first discovered cake popsicles at a fancy dessert shop in the city, and I was instantly smitten. They looked like little edible works of art, perfectly dipped in chocolate or pastel-colored candy melts with the most delicate decorative touches. But when I saw the price tag, I knew I had to figure out how to make them at home. After a few experiments in my kitchen, I’ve perfected the method, and today I’m sharing my foolproof technique with you.
The magic happens when you combine crumbly cake with creamy frosting to create a moldable mixture, then dip it in melted chocolate or candy coating. It’s almost like making truffles, but with the comforting flavor of cake. The best part? You can customize these with any cake flavor you love – vanilla, chocolate, red velvet, lemon – the possibilities are truly endless.
These are perfect for so many occasions. I’ve made them for baby showers where guests decorated their own with sprinkles, for wedding receptions as an elegant favor, and even for simple Tuesday afternoons when I needed something special. They also make wonderful gifts when packaged beautifully in a box lined with tissue paper. Your friends and family will be absolutely impressed, and you’ll love knowing exactly what’s inside them.
If you’re new to cake decorating or working with candy melts, don’t worry! This recipe is incredibly forgiving. Even if your first batch isn’t picture-perfect, they’ll still taste delicious. I always tell people that homemade cake popsicles taste better than any store-bought version because they’re made with love and quality ingredients. Plus, you can make them dairy-free, gluten-free, or vegan by using appropriate substitutes – just swap in your preferred cake mix and frosting, and you’re golden.
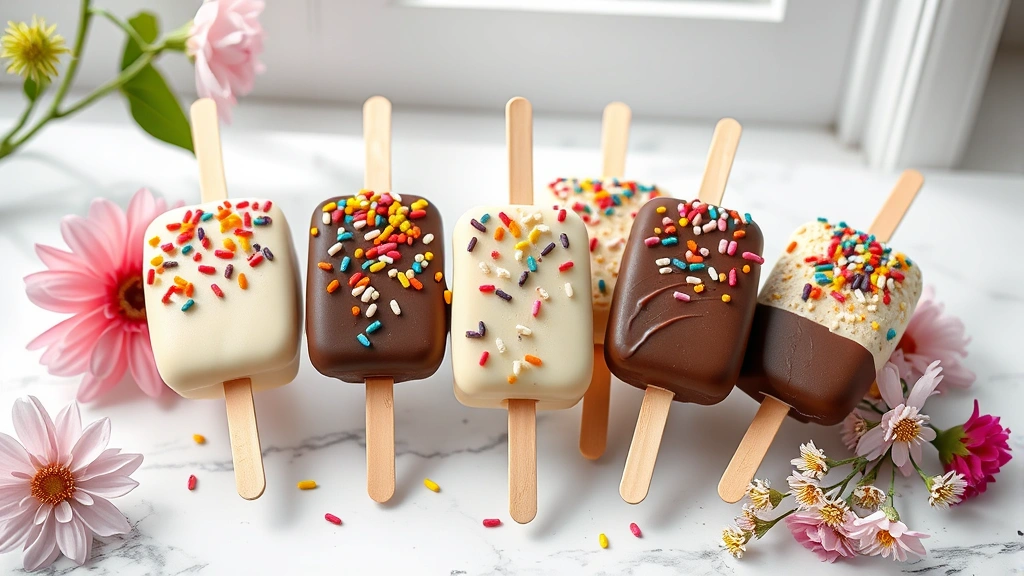
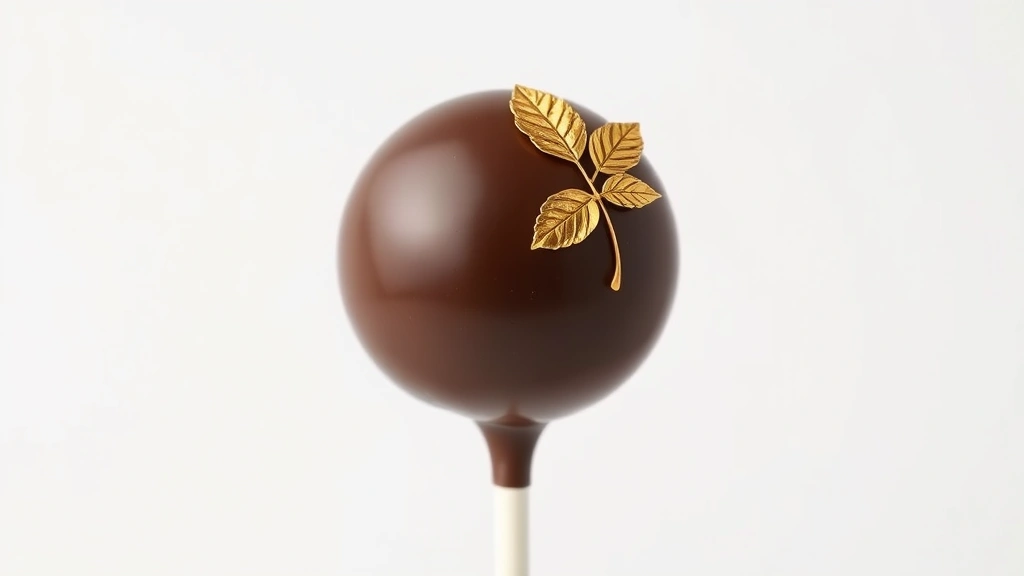
For an extra special touch, try dipping half of each cake pop in white chocolate and half in dark chocolate, or use complementary flavors to create stunning color combinations. You can also add a drizzle of contrasting chocolate on top, dust with edible glitter, or pipe a tiny rosette of buttercream on the side. The decorating is where you can really let your creativity shine.
I recommend making these a day or two ahead of your event. Once they’re sealed in an airtight container, they’ll keep perfectly in the fridge and actually taste even better as the flavors meld together. This makes them an ideal make-ahead dessert for busy hosts and hostesses. You’ll find that this straightforward approach to flavor combinations works beautifully with cake popsicles too.
For professional-looking results, invest in a good cake pop mold or use a melon baller to shape them uniformly. Lollipop sticks can be found at any craft store, and they make the presentation so much more charming. I also love using a styrofoam block or floral foam to stand the pops upright while the coating sets – it keeps them perfectly positioned and prevents any leaning.
The temperature of your candy melts is crucial for that beautiful, smooth coating. If it’s too hot, it’ll be thin and drippy; too cool and it’ll be thick and clumpy. I aim for around 110°F, using a candy thermometer to be precise. You can also add a tablespoon of coconut oil or shortening to your melts if they seem too thick – this helps create a thinner, more elegant coating.
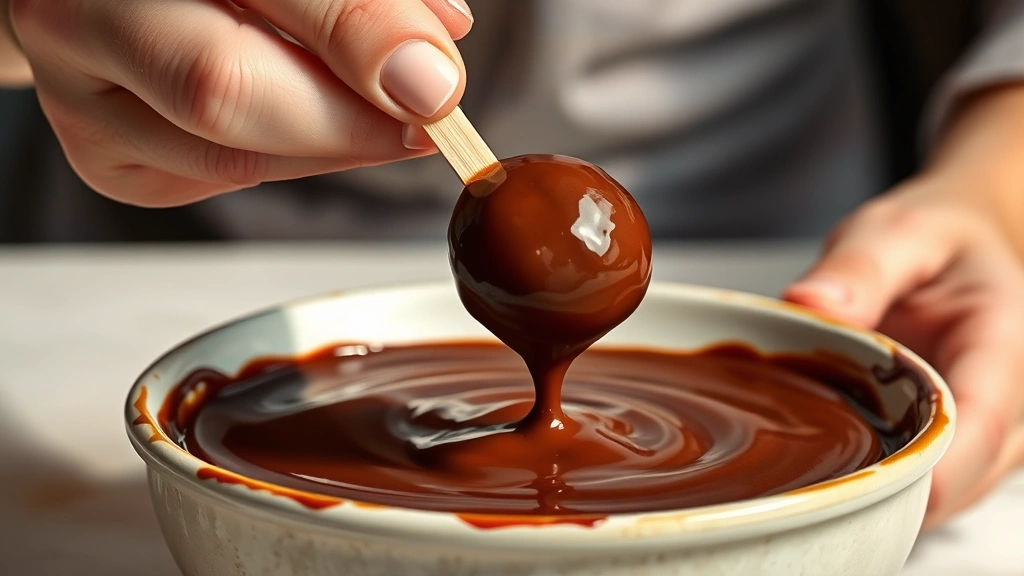
One of my favorite tricks is to dip the stick in melted chocolate first, then insert it into the cake ball. This acts like an edible glue and prevents the pop from sliding off during dipping. It’s a professional technique that makes all the difference. When you’re ready to dip, work quickly but confidently – twist the pop gently in the melted chocolate, then lift it out and let the excess drip off before standing it upright to set.
These little treats are also wonderful for teaching kids about baking and decorating. My niece and I have spent entire afternoons creating different designs together, and she’s developed such confidence in the kitchen from making cake popsicles. They’re the perfect gateway into more advanced decorating techniques. You might also enjoy exploring how simple ingredients can create something extraordinary, which is exactly what happens with cake popsicles.
For an extra indulgent version, try filling the center of your cake ball mixture with a small piece of chocolate, a sprinkle of sea salt, or a tiny dollop of jam. These surprise elements take your cake popsicles from lovely to absolutely unforgettable. Your guests will love discovering the hidden treasure inside!
If you’re planning to make these for a crowd, the recipe scales beautifully. You can make hundreds of these little treats without much additional effort – it’s really just about multiplying the components and giving yourself enough time for the coating to set between batches. I’ve made over three hundred for a corporate event, and it was actually quite meditative and enjoyable.
Store your finished cake popsicles in the refrigerator for up to two weeks, though honestly they rarely last that long in my house. They can also be frozen for up to a month, which makes them perfect for planning ahead. Just let them come to room temperature for about thirty minutes before serving for the best flavor and texture. For more inspiration on creating simple, impressive treats, check out this guide to making show-stopping additions that elevate any dessert.
I promise that once you master this recipe, you’ll find yourself making cake popsicles for every occasion. They’re the perfect sweet treat that’s elegant enough for fancy events but simple enough for everyday enjoyment. Let me walk you through my foolproof method for creating these adorable, delicious little bites of heaven.
Ingredients
- 1 box cake mix (any flavor) or 2 cups crumbled homemade cake
- 1 container (16 oz) frosting, any flavor
- 24 lollipop sticks or wooden dowels
- 2 pounds chocolate candy melts or white chocolate chips
- 2 tablespoons coconut oil or vegetable shortening
- Sprinkles, edible glitter, or other decorations (optional)
- Styrofoam block or floral foam for drying
Instructions
- Bake your cake according to package directions. Let it cool completely, then crumble it into fine crumbs in a large bowl – you should have about 2 cups of crumbs.
- Add the entire container of frosting to the crumbled cake and mix together with a fork or your hands until the mixture resembles wet sand and holds together when pressed.
- Roll the mixture into 1-inch balls (about the size of a walnut) and place them on a parchment-lined baking sheet.
- Refrigerate the cake balls for at least 30 minutes, or until they’re firm to the touch.
- While the balls chill, place your candy melts and coconut oil in a microwave-safe bowl. Microwave in 20-second intervals, stirring between each, until completely smooth and melted.
- Insert a lollipop stick about halfway into each cake ball.
- Working with one stick at a time, dip the very tip of the stick into the melted chocolate, then insert it fully into the cake ball – this acts as an edible glue.
- Hold the cake pop by the stick and dip it completely into the melted chocolate, twisting gently to coat all sides.
- Lift the pop out and let excess chocolate drip back into the bowl by holding it stick-side up for a few seconds.
- Immediately insert the stick into your styrofoam block to hold the pop upright while it dries.
- If desired, add sprinkles, edible glitter, or other decorations while the chocolate is still wet.
- Allow the chocolate coating to set completely for at least 2 hours before removing from the foam block.
- Store finished cake popsicles in an airtight container in the refrigerator for up to two weeks.
Pro Tips
The cake and frosting ratio is important for achieving the right consistency. If your mixture is too wet, add a few more crumbs; if it’s too dry, add a bit more frosting. The mixture should hold together firmly when squeezed but not be overly moist.
Don’t skip the chilling step before dipping. Warm or room-temperature cake balls will fall off the stick or crack when they hit the warm chocolate. A good chill ensures they stay perfectly intact during the dipping process.
For the most professional appearance, perform the “stick dip” technique – dip the stick in melted chocolate first, then insert it into the cake ball. This prevents the stick from pushing through and creating a hole on the opposite side.
If your chocolate sets before you finish decorating all your pops, simply reheat it gently in the microwave for 10-15 seconds. Never let it get too hot, or you’ll burn the chocolate and ruin the flavor.
Experiment with different cake and frosting combinations to create unique flavor profiles. Chocolate cake with vanilla frosting, vanilla cake with raspberry frosting, or red velvet with cream cheese frosting are all absolutely delicious.
For easier dipping, use a tall glass or mug that’s just slightly wider than your cake balls. The extra depth makes it easier to fully submerge them without splashing.
These make wonderful gifts when packaged in pretty boxes with tissue paper. They’re also perfect for wedding favors, baby shower favors, or corporate gifts. Your thoughtfulness will definitely be appreciated.
If you want to make these extra special, try adding a surprise center – a small piece of chocolate, a sprinkle of sea salt, or even a tiny dollop of jam in the middle of your cake ball mixture before rolling.
Leftover cake popsicles can be frozen in an airtight container for up to one month. Thaw at room temperature for about 30 minutes before serving for the best flavor and texture.