
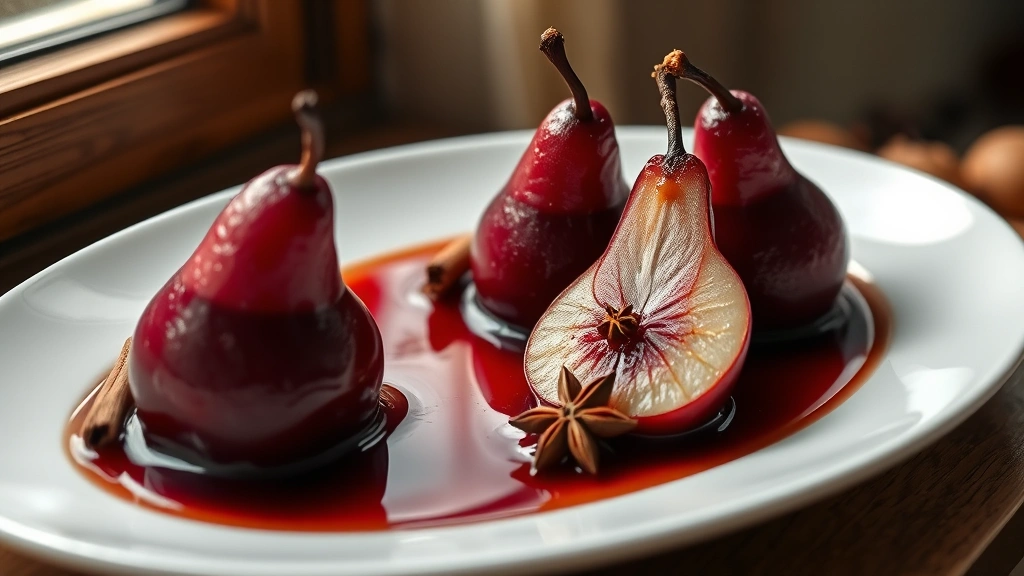
Poached pears are an elegant yet surprisingly simple dessert that never fails to impress. This classic French technique transforms humble pears into a sophisticated treat with minimal effort. The beauty of poaching lies in its simplicity – just pears, sugar, and your choice of aromatic liquid create something truly magical.
Whether you’re planning a dinner party or craving a refined weeknight dessert, poached pears deliver restaurant-quality results from your own kitchen. The gentle simmering process infuses the fruit with delicate flavor while maintaining a tender, slightly firm texture. What makes this recipe so appealing is its versatility – you can poach pears in red wine for a dramatic presentation, white wine for elegance, or even in a simple sugar syrup with spices for a lighter option.
I love serving these with silky custard sauce or alongside vanilla ice cream, though they’re equally delicious on their own. The poaching liquid becomes a gorgeous syrup that you can drizzle over the finished dish. This recipe has been a staple in my kitchen for years, and it’s the first thing I turn to when I need an impressive dessert that doesn’t require hours in the kitchen.
Many home cooks shy away from poached pears thinking they’re complicated, but this recipe proves otherwise. With just a handful of ingredients and about 30 minutes of hands-on time, you’ll have a dessert that looks like you spent hours preparing it. The poaching technique is actually one of the most forgiving cooking methods – there’s very little that can go wrong.
For the best results, choose pears that are ripe but still firm. If they’re too soft, they’ll fall apart during poaching. If they’re too hard, they won’t absorb the flavors properly. I recommend selecting Bosc or Bartlett pears, as they hold their shape beautifully during cooking. You can also experiment with different poaching liquids – red wine poached pears are stunning for special occasions, while a honey and cinnamon syrup creates a warm, comforting dessert.
The versatility of this recipe extends beyond just serving options. You can make poached pears ahead of time – they actually taste better after sitting in the syrup overnight as the flavors develop and deepen. This makes them perfect for entertaining, as you can prepare them completely the day before your guests arrive. Store them in an airtight container in the refrigerator for up to five days.
Learn more about wine-based desserts and discover how this classic technique pairs with various wines and flavor profiles. Whether you’re a beginner baker or an experienced home cook, this poached pears recipe will become a go-to favorite.
For additional inspiration, check out Bon Appétit’s wine-poached pears and Serious Eats’ poached pears guide. The New York Times also offers a classic poached pears recipe that showcases traditional French techniques. These resources provide excellent variations and professional tips for perfecting your poached pear game.
Ingredients
- 4 firm, ripe pears (Bosc or Bartlett varieties work best)
- 2 cups sugar
- 2 cups red wine (or dry white wine for a lighter version)
- 1 cup water
- 1 vanilla bean, split lengthwise (or 1 teaspoon vanilla extract)
- 3 cinnamon sticks
- 4 whole cloves
- 3 star anise
- 2 bay leaves
- 1 lemon, halved
- Zest of 1 orange
- 2 tablespoons honey (optional, for extra depth)
- Pinch of sea salt

Instructions
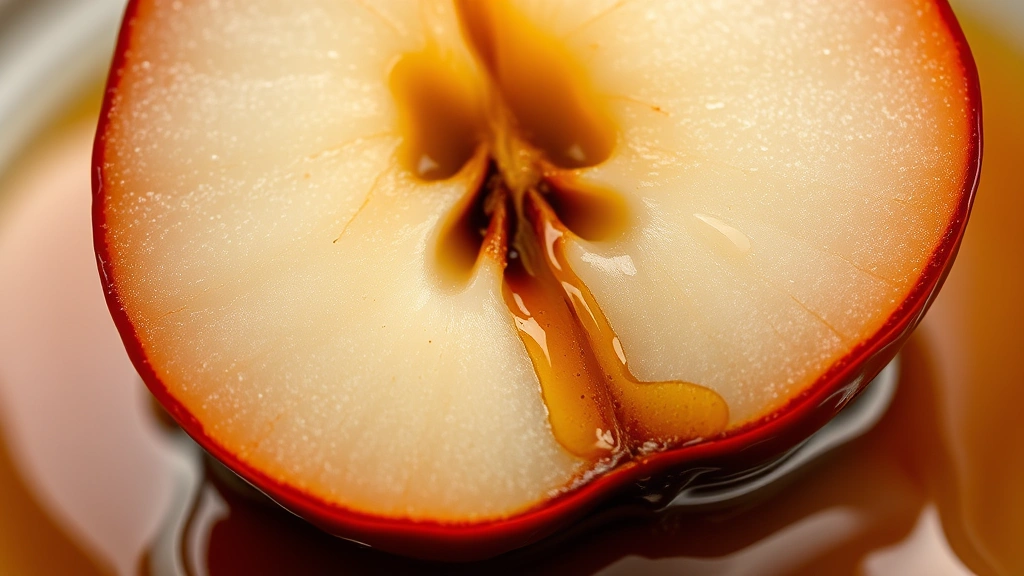
- Peel the pears carefully using a vegetable peeler or sharp knife, leaving the stem intact. Using a melon baller or small spoon, remove the core from the bottom of each pear, working gently upward but not cutting through the top. If you prefer, you can cut the pears in half lengthwise and use a spoon to scoop out the core – this makes them easier to serve. Place the prepared pears in a bowl of water with a squeeze of lemon juice to prevent them from browning.
- In a large, heavy-bottomed pot or deep skillet, combine the sugar, wine, and water over medium-high heat. Stir frequently until the sugar dissolves completely, about 3-4 minutes. This creates your poaching liquid base and should smell absolutely divine as the wine heats.
- Add the vanilla bean (if using), cinnamon sticks, cloves, star anise, bay leaves, lemon halves, and orange zest to the simmering liquid. If using vanilla extract instead of a whole bean, add it at the end of cooking. Stir gently to combine all the aromatics, and let the mixture simmer for 5 minutes to allow the spices to infuse their flavors into the liquid.
- Carefully add the prepared pears to the poaching liquid, standing them upright if they’re whole, or laying them cut-side down if halved. The liquid should come about three-quarters of the way up the sides of the pears – if needed, add a bit more water. Add the honey if using, and a small pinch of sea salt to enhance all the flavors.
- Reduce the heat to medium-low and simmer the pears gently for 20-30 minutes, depending on their size and ripeness. The pears are done when a fork or sharp knife easily pierces the flesh but they still hold their shape – they should be tender but not mushy. Turn the pears halfway through cooking if they’re not fully submerged to ensure even cooking and color distribution.
- Using a slotted spoon, carefully transfer the cooked pears to a serving dish or individual bowls. Avoid piercing the pears as you remove them, as they’re quite delicate at this point.
- Increase the heat under the poaching liquid to medium-high and simmer for another 10-15 minutes to reduce the liquid and concentrate the flavors into a beautiful, glossy syrup. You want to reduce it by about one-third of its original volume. Remove from heat and let cool for 5 minutes before straining out the solids, or leave the cinnamon sticks and star anise in for a more rustic presentation.
- Pour the warm poaching syrup over the pears, ensuring each one is generously coated. This is where the magic happens – the liquid will continue to develop flavor as it cools and the pears absorb more of the delicious essence.
- Serve the poached pears warm, at room temperature, or chilled, depending on your preference and the season. Spoon additional syrup over each pear and garnish with the reserved cinnamon stick or star anise if desired. Optional accompaniments include vanilla ice cream, crème fraîche, Greek yogurt, or a drizzle of dark chocolate sauce.
- To store, transfer the cooled pears and poaching liquid to an airtight container and refrigerate for up to 5 days. The flavors actually deepen and improve after a day or two of sitting in the syrup, making this an ideal make-ahead dessert.
Pro Tips
- **Pear Selection**: Choose pears that give slightly to gentle pressure but aren’t mushy. Bosc pears are excellent because they maintain their shape beautifully and have a firm texture that holds up well to poaching. Bartlett pears are sweeter and more delicate. Avoid very hard pears as they won’t cook through, and very soft ones will fall apart.
- **Wine Choices**: Red wine creates a stunning burgundy-colored pear with deeper, more complex flavors – perfect for elegant entertaining. Dry white wine or Champagne offers a more delicate, refined result. Rosé provides a beautiful pink hue and a nice middle ground between the two. You can also substitute wine with additional water and increase the sugar slightly for a classic poaching syrup.
- **Spice Variations**: The spice blend is completely customizable. Try adding fresh ginger slices, nutmeg, or cardamom pods for different flavor profiles. For a lighter version, reduce the number of spices or omit them entirely for a pure fruit and wine experience.
- **Make-Ahead Magic**: Poached pears actually taste better the next day after the flavors have fully melded. Prepare them up to three days ahead and store in the refrigerator in an airtight container with their poaching liquid. They’re perfect for busy hosts planning dinner parties.
- **Serving Suggestions**: While poached pears shine on their own, they pair beautifully with vanilla ice cream, crème fraîche, Greek yogurt, custard sauce, or a spoonful of whipped cream. A light dusting of ground cinnamon or a dark chocolate drizzle elevates them to restaurant status.
- **Syrup Reduction**: Don’t skip the final reduction step – this concentrates the flavors and creates a glossy, luxurious coating for the pears. The reduced syrup will thicken slightly as it cools, creating the perfect consistency.
- **Temperature Control**: Gentle heat is key to poaching. Boiling vigorously will break down the pears’ texture and make them mushy. Maintain a gentle simmer throughout cooking – you should see occasional bubbles breaking the surface, not a rolling boil.
- **Peeling Method**: A vegetable peeler creates the thinnest peel and preserves the pear’s flesh, though a sharp knife works equally well. If you’re worried about the pears browning, prepare them just before poaching or keep them in lemon water.
- **Leftover Syrup**: Don’t waste the poaching liquid! Use it to drizzle over ice cream, mix into sparkling water for a sophisticated beverage, or pour over fresh fruit salads. It keeps refrigerated for up to two weeks.
- **Gluten-Free & Vegan**: This recipe is naturally both gluten-free and vegan, making it an inclusive dessert option for guests with dietary restrictions.