

Amish Friendship Bread Starter is a treasured heirloom recipe that has been passed down through generations, and making it at home is easier than you might think! This classic sourdough starter combines simple pantry ingredients—flour, sugar, milk, and a touch of yeast—to create a living culture that will become the heart of your baking adventures. What makes this starter so special is its versatility; once you’ve cultivated this magical mixture, you can use it to create everything from fluffy pancakes and tender cakes to crusty breads and muffins that taste like they came straight from a country farmhouse kitchen.
The beauty of Amish Friendship Bread Starter lies not just in its incredible flavor, but in the tradition of sharing it with friends and family. This starter is meant to be divided and gifted, creating a chain of bakers who all nurture the same culture. It’s a wonderful way to spread joy and connect with others through the timeless art of baking. Whether you’re a seasoned baker or just beginning your culinary journey, this starter will become an invaluable tool in your kitchen.
Making your own starter takes just ten days of simple maintenance—stirring, feeding, and a little bit of patience. The process is quite forgiving, which is why Amish bakers have relied on it for centuries. You’ll start with basic ingredients mixed together, then watch as fermentation works its magic, creating bubbles, a pleasant sour aroma, and eventually a thick, ready-to-use culture.
Once you have your starter active and bubbly, you’ll want to explore all the amazing recipes you can make with it. Check out this Quick Tasty Bacon Carbonara Recipe for inspiration on enriched dough recipes, or try Best Heavy Cream Alfredo Sauce Recipe for complementary dishes. You can also explore Delicious Heavy Cream Pasta Recipe for dinner inspiration.
For more detailed guidance on sourdough starters, check out this comprehensive sourdough starter guide from Serious Eats, and for traditional Amish recipes, Bon Appétit’s Amish Friendship Bread article offers wonderful insights. You might also enjoy New York Times’ bread baking guide for comprehensive baking techniques.
Ingredients
- 2 cups all-purpose flour
- 2 cups granulated sugar
- 2 cups whole milk
- 1/4 teaspoon active dry yeast or instant yeast
- Pinch of salt (optional, for day 5 feeding)
Instructions
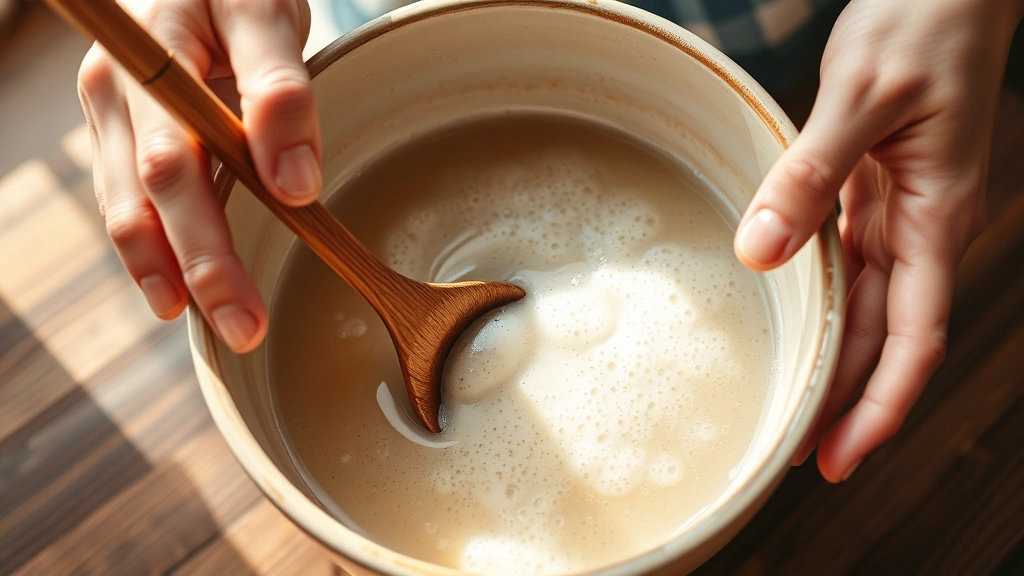
- Day 1: In a large glass jar or ceramic bowl (do not use metal), combine 2 cups all-purpose flour, 2 cups granulated sugar, and 2 cups whole milk. Stir well until completely combined, breaking up any lumps. The mixture should be smooth and thick like pancake batter. Cover loosely with a cloth or paper towel—you want air circulation, not a sealed lid. Set on your counter at room temperature, away from direct sunlight.
- Day 2: Stir the mixture well with a wooden spoon or silicone spatula. You may notice it hasn’t changed much, and that’s completely normal. Cover loosely again and let it sit.
- Day 3: Stir the mixture again. It should still look fairly similar to day 2, though you might see a few bubbles forming on the surface. This is a good sign that fermentation is beginning. Cover loosely and continue sitting at room temperature.
- Day 4: Give it another good stir. The mixture is starting to develop flavor and may smell slightly tangy or yeasty. This is exactly what should be happening. Cover loosely.
- Day 5: Today you’ll begin regular feedings. Stir the starter well, then add 1 cup flour, 1 cup sugar, and 1 cup milk. Mix thoroughly until smooth. The starter should now be bubbly and have a noticeably sour smell. Cover loosely and let it continue fermenting.
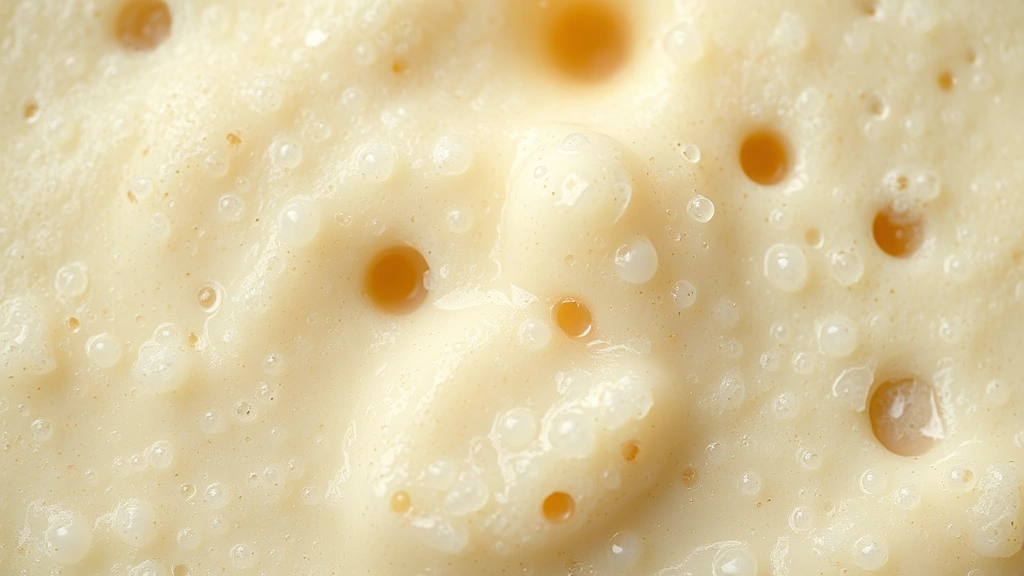
- Day 6: Stir well. You should see active bubbles throughout the mixture, indicating healthy fermentation is taking place. Cover loosely.
- Day 7: This is another feeding day. Stir the starter, then add 1 cup flour, 1 cup sugar, and 1 cup milk. Mix well until completely combined and smooth. Cover loosely. Your starter should be quite bubbly and fragrant by now.
- Day 8: Stir the mixture thoroughly. The bubbles should be quite visible, and the aroma should be distinctly sour and pleasant, like sourdough. Cover loosely.
- Day 9: Give it a final stir. Your starter is almost ready to use! It should be bubbly, thick, and smell deliciously sour. Cover loosely for one more night.
- Day 10: Your Amish Friendship Bread Starter is now ready to use! It should be thick, bubbly, and smell wonderfully sour. At this point, you have several options: you can use it immediately to bake, you can divide it into portions to gift to friends (along with printed recipe instructions), or you can store it in the refrigerator for later use. If storing in the fridge, you only need to feed it once a week with the same ratio of 1 cup flour, 1 cup sugar, and 1 cup milk. Remove from the fridge, let it sit at room temperature for a few hours, feed it, stir well, and return to the fridge.
Pro Tips
- **Storage Instructions**: Once your starter is active, you can keep it on the counter if you bake frequently (feeding it daily), or store it in the refrigerator if you bake less often (feeding it weekly). Always use a non-metal container—metal can react with the acidic starter and affect flavor.
- **Gifting Your Starter**: One of the joys of Amish Friendship Bread is sharing it! When dividing your starter on day 10, give each friend 1 cup of active starter along with printed instructions for care and use. Include a note explaining that they should begin with day 5 of the process (the first feeding), then continue with the regular feeding schedule.
- **Feeding Ratio**: The standard feeding ratio is 1:1:1 (one part flour, one part sugar, one part milk by volume). Some bakers prefer to feed with just flour and water after the initial creation, but the traditional Amish method includes sugar and milk throughout.
- **Signs of Healthy Fermentation**: A healthy starter will show bubbles, smell pleasantly sour (not rotten or like nail polish), and have a slightly thick consistency. If it develops a pink or orange tint or smells extremely unpleasant, discard it and start over.
- **Using Your Starter**: Before using your starter in recipes, you can either use it directly from the jar or divide it—keeping half for continued feeding and using half for your baking project. This ensures your starter never runs out.
- **Flexibility with Temperature**: Fermentation speed varies based on room temperature. In cooler kitchens (65-68°F), the process may take 11-12 days. In warmer kitchens (72-75°F), it might be ready by day 9. Both are perfectly normal.
- **Flour Type**: While all-purpose flour is traditional, some bakers experiment with whole wheat flour or bread flour for different flavors. Stick with all-purpose for your first batch to ensure success.
- **Long-Term Maintenance**: Your starter can last for years with proper care. Many Amish families have starters that have been maintained for generations. Store in the refrigerator between uses, and feed weekly.
- **Discard or Use**: When feeding your starter, you can either discard half before adding new ingredients, or use the discard in recipes like pancakes, muffins, or crackers. This reduces waste and gives you delicious baked goods.
- **Consistency**: The starter should be thick and pancake-batter-like. If it becomes too thin, reduce the milk slightly in the next feeding. If too thick, add a bit more milk.