
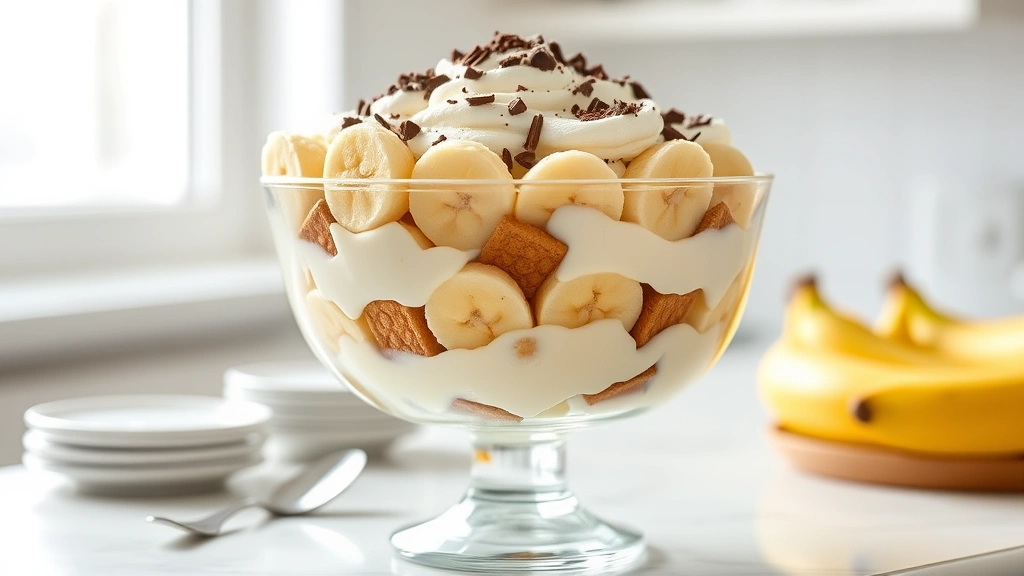
Listen, if you’re tired of the same old banana pudding that’s been made the exact same way since your grandmother was born, it’s time to shake things up! This isn’t your mama’s banana pudding recipe – this is a sophisticated, elegant take on a classic Southern dessert that’ll have everyone at the table wondering what your secret is. We’re talking about layers of creamy, dreamy custard infused with Madagascar vanilla, crispy homemade wafer cookies that actually stay crunchy (not soggy!), perfectly ripe bananas sliced at just the right moment, and a cloud of fresh whipped cream that ties it all together.
What makes this version different? We’re using real vanilla bean, a touch of bourbon for depth, and a combination of both custard and a silky mascarpone cream layer that creates an incredibly luxurious texture. The homemade vanilla wafers are the real game-changer here – store-bought ones can get soggy and lose their charm, but making your own gives you control over the texture and flavor. Plus, the aroma of them baking will make your kitchen smell absolutely divine.
This recipe serves 8-10 people and is perfect for dinner parties, holiday gatherings, or those nights when you want to feel fancy without spending all day in the kitchen. It can be assembled the day before and refrigerated, making it the ideal make-ahead dessert. The beauty of this banana pudding is that every component – the custard, the wafers, the whipped cream – can be made in advance, so you’re really just doing a bit of assembly on the day you’re serving it. Trust me, once you make this version, you’ll never go back to the box mix again!
Feel free to customize this dessert to your liking. Some people love adding a layer of rich cream sauce between the wafers, while others prefer to keep it pure and simple. You can also check out this heavy cream recipe for additional cream-based inspiration, or explore more decadent dessert options with complementary flavor profiles. For garnish ideas, consider making pickled elements for contrast, or even pairing with a light salad for a unique dessert course. Check out these expert resources for additional techniques: Bon Appétit’s banana pudding guide, Serious Eats’ vanilla pudding techniques, and New York Times’ classic banana pudding for additional inspiration.
Ingredients
- For the Homemade Vanilla Wafers: 1 cup all-purpose flour
- 1/2 teaspoon baking powder
- 1/4 teaspoon salt
- 1/2 cup (115g) unsalted butter, softened to room temperature
- 1/2 cup (100g) granulated sugar
- 1 large egg yolk
- 1 teaspoon pure vanilla extract
- 1/2 teaspoon Madagascar vanilla bean paste (optional but recommended)
- For the Bourbon Vanilla Custard: 2 cups whole milk
- 1 cup heavy cream
- 1 vanilla bean, split and scraped (or 2 teaspoons vanilla extract)
- 6 large egg yolks
- 1/2 cup (100g) granulated sugar
- 3 tablespoons cornstarch
- 2 tablespoons unsalted butter
- 2 tablespoons bourbon or dark rum (optional)
- 1/4 teaspoon salt
- For the Mascarpone Cream Layer: 8 oz mascarpone cheese, room temperature
- 1/2 cup heavy cream, cold
- 2 tablespoons powdered sugar
- 1 teaspoon vanilla extract
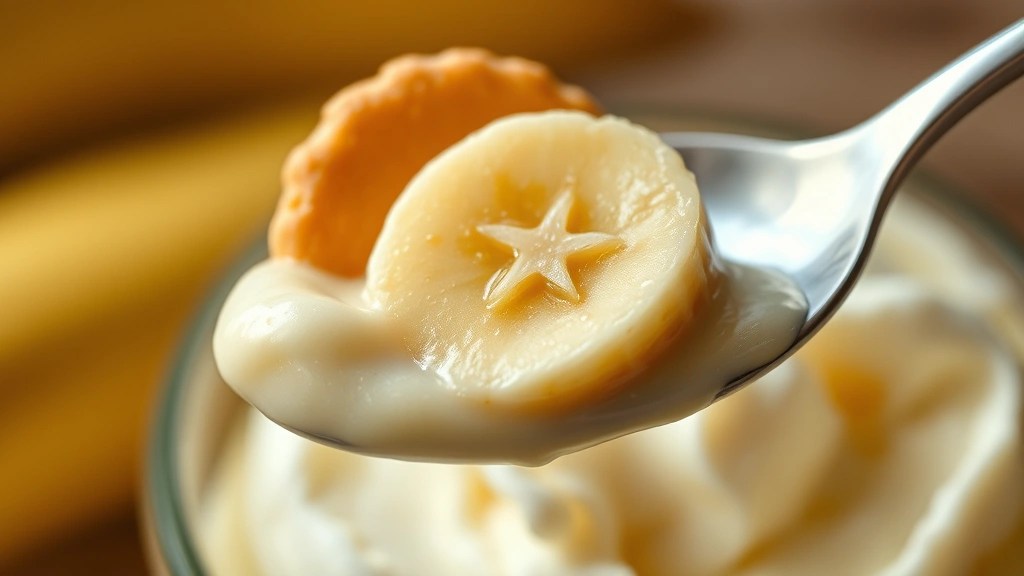
- For Assembly: 6-7 ripe but firm bananas
- 2 tablespoons fresh lemon juice
- 1 cup heavy cream, cold (for fresh whipped cream)
- 2 tablespoons powdered sugar
- 1 teaspoon vanilla extract
- Chocolate shavings for garnish (optional)
- Fresh mint for garnish (optional)
Instructions
- Make the vanilla wafers first by preheating your oven to 350°F (175°C) and lining two baking sheets with parchment paper. In a small bowl, whisk together the flour, baking powder, and salt; set aside.
- In a medium bowl, cream together the softened butter and granulated sugar, beating for 2-3 minutes until light and fluffy. This step is crucial for getting the right texture in your wafers.
- Add the egg yolk to the butter mixture and beat well, then add the vanilla extract and vanilla bean paste if using. Mix until fully combined and the mixture is pale and creamy.
- Gently fold the dry ingredients into the wet ingredients until just combined – don’t overmix or your wafers will be tough. The dough should come together but still be slightly crumbly.
- Transfer the dough to a piping bag fitted with a small round tip (or use a small spoon). Pipe small rounds onto your prepared baking sheets, spacing them about 2 inches apart since they’ll spread slightly during baking.
- Bake for 12-15 minutes until the wafers are golden brown on the edges but still slightly soft in the center. They’ll crisp up as they cool. Let them cool on the baking sheet for 5 minutes, then transfer to a wire rack to cool completely.
- While the wafers are cooling, make the bourbon vanilla custard by heating the milk and heavy cream in a saucepan over medium heat until it just begins to steam. If using a vanilla bean, add the scraped seeds and the pod to the milk mixture and let it infuse for 10 minutes before removing the pod.
- In a separate bowl, whisk together the egg yolks, granulated sugar, and cornstarch until the mixture is pale and thick, about 2-3 minutes. This helps prevent lumps in your custard.
- Slowly pour the hot milk mixture into the egg yolk mixture while whisking constantly. This tempers the eggs so they don’t scramble. Continue whisking until everything is fully combined.
- Pour the mixture back into the saucepan and cook over medium heat, stirring constantly with a whisk, for about 5-7 minutes until it thickens and coats the back of a spoon. You should be able to draw a line through it with your finger and have it stay.
- Remove from heat and stir in the butter, bourbon or rum if using, vanilla extract (if you didn’t use a bean), and salt. Pour the custard through a fine-mesh strainer into a bowl to remove any lumps.
- Press plastic wrap directly onto the surface of the custard to prevent a skin from forming and refrigerate for at least 1 hour or up to 24 hours.
- Make the mascarpone cream layer by bringing the room-temperature mascarpone to room temperature if needed. In a separate bowl, whip the cold heavy cream with an electric mixer until soft peaks form.
- In another bowl, beat the mascarpone with powdered sugar and vanilla extract until smooth and creamy, being careful not to overmix or it will become grainy.
- Gently fold the whipped cream into the mascarpone mixture in two additions until fully combined and light and fluffy. Set aside in the refrigerator.
- About 2 hours before serving, begin assembly. Slice the bananas into 1/4-inch thick rounds and toss gently with lemon juice to prevent browning. Set aside.
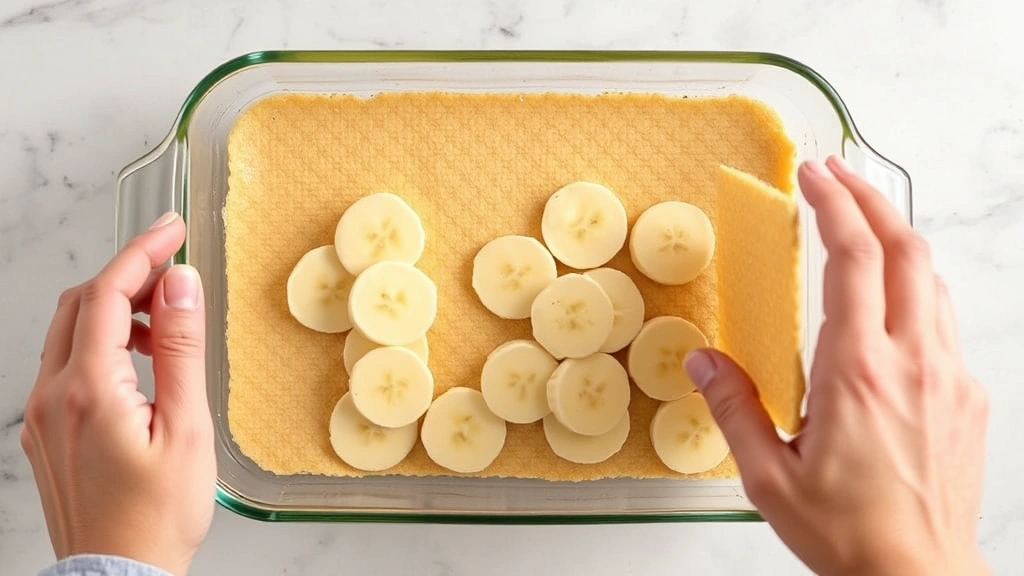
- In a 9×13-inch baking dish or a large trifle bowl, spread a thin layer of the bourbon vanilla custard on the bottom – about 1/2 cup.
- Layer about 1/3 of the homemade vanilla wafers over the custard, breaking them into bite-sized pieces if needed to fit them snugly.
- Layer 1/3 of the sliced bananas over the wafers, then spread 1/3 of the mascarpone cream mixture over the bananas.
- Repeat the layers two more times: custard, wafers, bananas, and mascarpone cream, ending with a layer of the mascarpone cream on top.
- Cover with plastic wrap and refrigerate for at least 1-2 hours before serving, which allows the flavors to meld and the dessert to set properly.
- Just before serving, make fresh whipped cream by beating cold heavy cream with powdered sugar and vanilla extract until stiff peaks form.
- Top the banana pudding with a generous dollop of fresh whipped cream and garnish with chocolate shavings and fresh mint if desired. Serve immediately and enjoy the surprised faces around the table!
Pro Tips
Wafer Perfection: The key to non-soggy wafers is baking them until they’re crisp on the edges but still slightly tender in the center. They’ll continue to crisp up as they cool. If you prefer store-bought wafers to save time, that’s completely acceptable – just add them closer to serving time to maintain maximum crunch. Nabisco vanilla wafers work well in a pinch.
Banana Timing: Choose bananas that are ripe but still firm with no brown spots. If you slice them too far in advance, they’ll brown and soften. The lemon juice helps prevent browning and adds a subtle brightness that balances the sweetness. If you can’t find fresh lemons, bottled lemon juice works fine.
Custard Consistency: The custard should coat the back of a spoon when done – if you run your finger through it, it should leave a clear path. If it seems too thick, whisk in a tablespoon of milk at a time. If it’s too thin, let it cool slightly as it will continue to thicken. The cornstarch is essential here as it stabilizes the custard and prevents it from breaking.
Mascarpone Tips: Make sure your mascarpone is at room temperature before mixing, or it will be lumpy. Don’t overmix once you’ve added the whipped cream – just fold gently two or three times until combined. This layer adds richness and creaminess that elevates this recipe above traditional versions.
Bourbon Optional: The bourbon adds depth and sophistication, but it’s completely optional. You can omit it entirely, substitute with dark rum, or use a splash of brandy. The alcohol cooks off during the heating process, so it’s safe for all ages.
Serving Suggestions: This dessert is beautiful served in a large trifle bowl so guests can see all the gorgeous layers. You can also assemble individual portions in wine glasses or mason jars for a fancy presentation. This recipe easily doubles if you’re feeding a crowd.
Storage: Covered banana pudding keeps in the refrigerator for up to 3 days. The wafers will soften slightly over time, which some people actually prefer. You can also freeze the assembled pudding (without the whipped cream topping) for up to 2 weeks – just thaw in the refrigerator overnight and add fresh whipped cream before serving.
Pingback: How to Make the Perfect BBQ Burger Recipe! – Simple Recipe Finder
Pingback: How to make the Perfect Tacos al Pastor Recipe! – Simple Recipe Finder