

There’s nothing quite like homemade beef sausage—it’s a game-changer for breakfast, dinner, or anytime you want restaurant-quality flavor at home. Making sausage from scratch might seem intimidating, but I’m here to tell you it’s easier than you think! With just a few quality ingredients and some simple techniques, you’ll be creating the most delicious, juicy beef sausage that’ll have everyone asking for your secret.
I’ve been making sausage for years now, and I’ve perfected this recipe to get that perfect balance of seasoning, fat content, and texture. The key is using freshly ground beef (or grinding it yourself if you’re feeling fancy), quality spices, and cold equipment. Trust me, once you taste homemade sausage, you’ll never go back to store-bought.
This beef sausage is incredibly versatile. Serve it for breakfast with creamy sauces, crumble it into pasta dishes, or enjoy it as a standalone protein. You can also use it as a base for more complex recipes or customize the seasonings to your preference. The beauty of making your own sausage is complete control over ingredients—no mystery fillers or preservatives.
Making sausage at home is also surprisingly economical. When you buy quality ground beef in bulk, you save money compared to purchasing pre-made sausages. Plus, you know exactly what’s going into your food. I love using this sausage in everything from breakfast scrambles to hearty dinner bowls, and it’s always a hit with my family and guests.
Whether you’re a seasoned home cook or trying this for the first time, this recipe will guide you through every step. I’ll share all my tips and tricks for achieving that perfect sausage texture, how to season it properly, and the best ways to cook it. Let’s get started on making the best beef sausage you’ve ever tasted!
Ingredients
- 2 pounds ground beef (80/20 blend is ideal)
- 1/4 cup ice water
- 2 tablespoons kosher salt
- 1 tablespoon black pepper
- 1 tablespoon garlic powder
- 1 tablespoon onion powder
- 1 teaspoon paprika
- 1 teaspoon dried sage
- 1/2 teaspoon dried thyme
- 1/4 teaspoon cayenne pepper (optional, for heat)
- 1/4 teaspoon curing salt (pink salt, optional but recommended)
- 2 tablespoons fresh parsley, finely chopped
- 1 teaspoon Worcestershire sauce
- Natural hog casings (soaked in warm water for 30 minutes) or collagen casings
- Oil for cooking
Instructions
- Start by preparing your workspace and equipment. Place your meat grinder, grinding bowl, and any tools you’ll use in the freezer for at least 30 minutes. Cold equipment is crucial for achieving the right sausage texture—warm equipment will cause the fat to smear rather than stay distinct, resulting in a mushy sausage.
- Cut your beef into 1-inch cubes and place them on a chilled baking sheet. Make sure the meat is very cold, almost starting to freeze. This temperature control is essential for getting that perfect sausage texture with good binding and juiciness.
- In a separate bowl, combine all your dry spices: kosher salt, black pepper, garlic powder, onion powder, paprika, sage, thyme, and cayenne pepper. Mix these together thoroughly so the seasonings are evenly distributed. This ensures every bite of sausage will have consistent flavor.
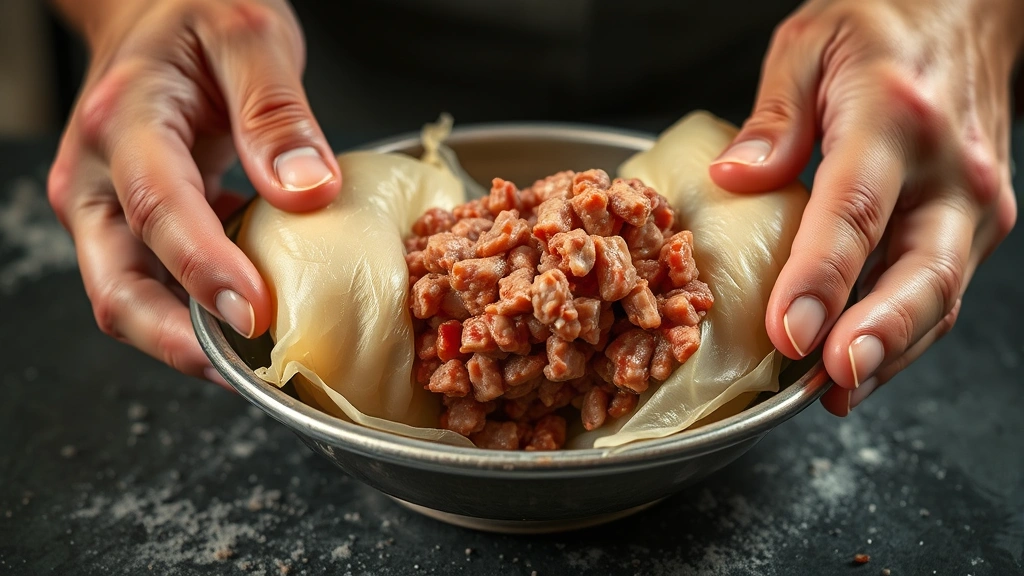
- Grind your cold beef using the chilled grinder with the medium die. Catch the ground meat in a cold bowl. Work quickly to keep everything cold during this process.
- Add the ice water and Worcestershire sauce to your ground beef. Using your hands (or a stand mixer with a paddle attachment), mix the meat and liquid together for about 2-3 minutes until the mixture becomes sticky and cohesive. You’ll see the texture change as the proteins bind with the liquid and seasonings.
- Add your spice mixture and fresh parsley to the ground beef. Mix everything together thoroughly for another 2-3 minutes, making sure the seasonings are evenly distributed throughout. The mixture should be very sticky and hold together when squeezed.
- Prepare your sausage casings by rinsing them thoroughly inside and out with cool water. This removes excess salt and makes them easier to handle. Keep them in a bowl of cool water until you’re ready to stuff.
- If using a sausage stuffer, attach the appropriate-sized tube to your stuffer and thread one casing onto it. Leave about 2 inches of empty casing at the beginning. Fill the stuffer with your sausage mixture.
- Begin stuffing the casings slowly and steadily, twisting them into individual links as you go. Leave about 1/4 inch of space at the end of each casing to prevent bursting during cooking. Don’t overstuff—the casings should be filled but still have a little give.
- Once you’ve filled all your casings, use a clean fork or sausage pricker to gently pierce each link in several places. This prevents air pockets that can cause the casing to burst while cooking and allows for more even cooking throughout.
- Let your sausages rest in the refrigerator for at least 2 hours, but ideally overnight. This resting period allows the flavors to meld and the sausage to firm up, making it easier to cook and resulting in better texture.
- When ready to cook, bring your sausages to room temperature for about 10 minutes before cooking. Heat a large skillet over medium-high heat and lightly oil it.
- Place the sausages in the hot skillet, being careful not to crowd the pan. Work in batches if necessary. Resist the urge to move them around—let them cook undisturbed for 3-4 minutes to develop a nice brown crust.
- Turn the sausages and continue cooking for another 8-10 minutes, turning occasionally, until they’re browned on all sides and cooked through (internal temperature should reach 160°F). You can also add a splash of water to the pan and cover it to help cook them through if needed.
- Remove the cooked sausages from the heat and let them rest for a few minutes before serving. This allows the juices to redistribute throughout the sausage.
- Serve your homemade beef sausage immediately while hot, or store in the refrigerator for up to 4 days or freeze for up to 3 months. These sausages are perfect alongside breakfast eggs, in pasta dishes like creamy mains, or enjoyed on their own as a protein-packed meal.

Pro Tips
Fat Content Matters: The 80/20 blend of beef is perfect for sausage because it has enough fat to keep the sausage juicy and flavorful without being too greasy. If you use leaner meat, your sausage will be dry. Don’t skip this detail.
Casing Options: Natural hog casings provide the most authentic snap and texture, but they require more careful handling. Collagen casings are easier to work with and don’t require soaking, though they’re slightly less traditional. Either option works beautifully.
Seasoning Adjustments: Feel free to customize the spices to your preference. If you like Italian sausage, add fennel seeds. For a spicier version, increase the cayenne pepper. This is your chance to make sausage exactly how you love it.
Make-Ahead Magic: You can prepare the sausage mixture up to 24 hours in advance, storing it in the refrigerator. This actually helps develop the flavors even more. You can also cook sausages in advance and reheat them gently when ready to serve.
Stuffing Without a Machine: Don’t have a sausage stuffer? You can use a piping bag with a large round tip or even a simple funnel. It requires more patience but works in a pinch.
Cooking Methods: Beyond pan-frying, you can grill these sausages over medium heat, bake them at 375°F for about 20 minutes, or even cook them sous vide for precise temperature control.
Frozen Storage: These sausages freeze beautifully for up to 3 months. Wrap them individually in plastic wrap, then place in a freezer bag to prevent freezer burn. Thaw in the refrigerator before cooking.