
There’s nothing quite like the drama and indulgence of a Bloomin Onion—that glorious golden flower of crispy, fried perfection that graces appetizer menus everywhere. But here’s the secret: you don’t need to wait for a special night out to enjoy this showstopper. With the right technique and a few key ingredients, you can recreate this restaurant favorite right in your own kitchen, and honestly, homemade tastes even better.
This Bloomin Onion recipe is all about technique and temperature. The magic happens when you properly prepare your onion, create a light and crispy batter, and maintain the perfect oil temperature throughout the frying process. I’m going to walk you through every step to ensure your bloomin onion comes out perfectly golden, supremely crispy on the outside, and tender on the inside every single time.
What makes this recipe special is the combination of a well-seasoned flour mixture and a delicate batter that crisps up beautifully in hot oil. You’ll want to serve this immediately with a homemade dipping sauce—I recommend pairing it with a creamy horseradish sauce or a tangy ranch. If you’re looking for other impressive appetizers, check out this Best Shishito Peppers Recipe for another crowd-pleaser.
The beauty of making a bloomin onion at home is that you can customize the seasoning to your preference, adjust the spice level, and control exactly how crispy you want it. Plus, your guests will be absolutely amazed when you present this golden masterpiece at the table. Whether you’re hosting a dinner party, watching the game, or simply craving something special, this bloomin onion recipe delivers restaurant-quality results with impressive presentation.
I’ve made this recipe dozens of times, and I’m excited to share all my tips and tricks with you. From selecting the right onion to achieving that perfect crispy exterior, you’ll learn everything you need to know. Let’s get started on creating this unforgettable dish!
For other delicious appetizer inspiration, you might also enjoy this Best Chickpea Salad Recipe for a lighter option. And if you’re planning a full meal, consider pairing your bloomin onion with one of these creamy pasta options like our Delicious Heavy Cream Pasta Recipe or this Perfect Creamy Pasta Recipe.
For a deeper dive into restaurant techniques and similar fried appetizers, I recommend checking out Serious Eats’ guide to fried appetizers and Bon Appétit’s fried onion variations. The New York Times also offers excellent notes on perfecting this technique.
Ingredients
- 1 large yellow onion (about 4-5 inches in diameter), preferably Vidalia or Spanish
- 2 cups all-purpose flour, divided
- 1 tablespoon paprika
- 1 tablespoon garlic powder
- 1 tablespoon onion powder
- 2 teaspoons cayenne pepper
- 1 teaspoon black pepper
- 1 teaspoon salt, plus more for seasoning
- 1 teaspoon dried thyme
- ½ teaspoon dried oregano
- 1 large egg
- 1 cup whole milk
- 1 tablespoon cornstarch
- 1 teaspoon baking powder
- Oil for frying (vegetable or peanut oil), about 2-3 quarts
- Fresh parsley for garnish (optional)
Instructions
- Prepare your onion by cutting off the top quarter inch to create a flat base. Using a sharp knife, make vertical cuts around the onion about ½ inch apart, cutting from the top down but stopping about ½ inch from the bottom—you want to keep the base intact so the onion holds together. Once you’ve made cuts all the way around, make horizontal cuts perpendicular to the vertical cuts to create a crosshatch pattern, again stopping before you reach the base.
- Carefully separate the onion pieces with your fingers, gently pulling back and spreading the layers outward to create the signature flower bloom effect. Be gentle but deliberate—you want to open it up enough to allow the batter to coat all the pieces. Rinse the opened onion under cold water and pat it very dry with paper towels. Any excess moisture will prevent proper crisping, so this step is crucial.
- Place the dried onion bloom upside down on a cutting board and carefully trim the root end if needed, making sure the base is stable. You can prop it in a tall glass or bowl to keep it upright while you prepare the batter.
- In a medium bowl, whisk together 1 cup of flour with paprika, garlic powder, onion powder, cayenne pepper, black pepper, salt, thyme, and oregano. Set this seasoned flour mixture aside.
- In another bowl, whisk together the egg and milk until well combined. In a third bowl, mix together the remaining 1 cup flour, cornstarch, and baking powder.
- Add the flour-cornstarch mixture to the egg-milk mixture and whisk until you have a smooth batter with no lumps. The consistency should be similar to thick pancake batter. If it’s too thick, add a bit more milk; if too thin, add a touch more flour.
- Heat your oil to exactly 350°F (175°C) in a deep pot, Dutch oven, or deep fryer. Use a reliable thermometer to ensure accuracy—this temperature is essential for achieving a crispy exterior without burning. Let the oil reach temperature and maintain it steadily.
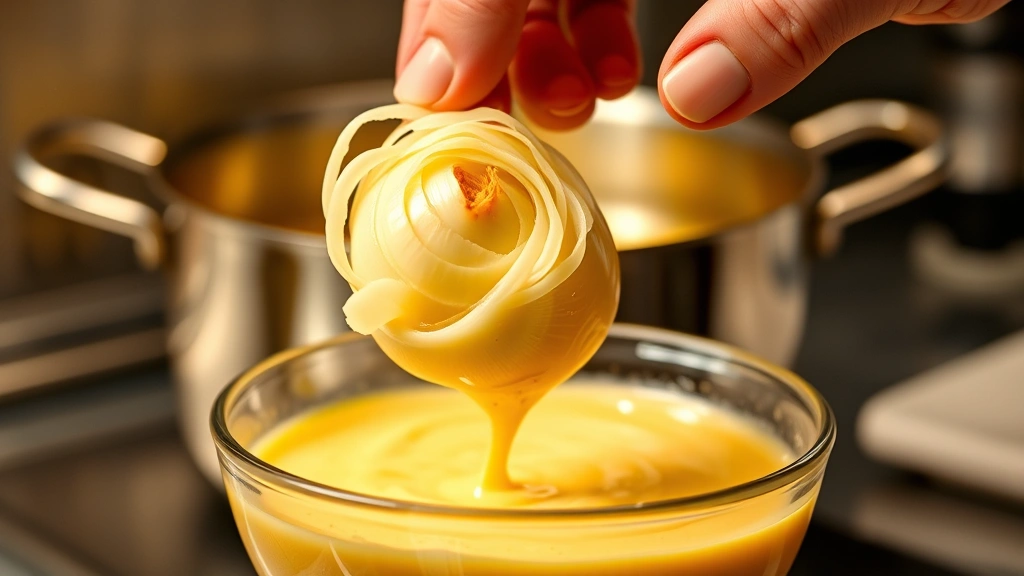
- Working quickly, dredge the onion bloom in the seasoned flour mixture, shaking off any excess and making sure all the separated layers are well coated. This creates a base layer that helps the batter adhere.
- Carefully dip the floured onion into the batter, using a spoon to help coat all the separated layers and petals. Make sure every piece gets a good coating of batter by spooning the batter over any areas that might have been missed.
- Gently lower the battered onion bloom into the hot oil, being very careful not to splash. You can use a slotted spoon or spider strainer to help guide it in. The onion should not touch the bottom of the pot.
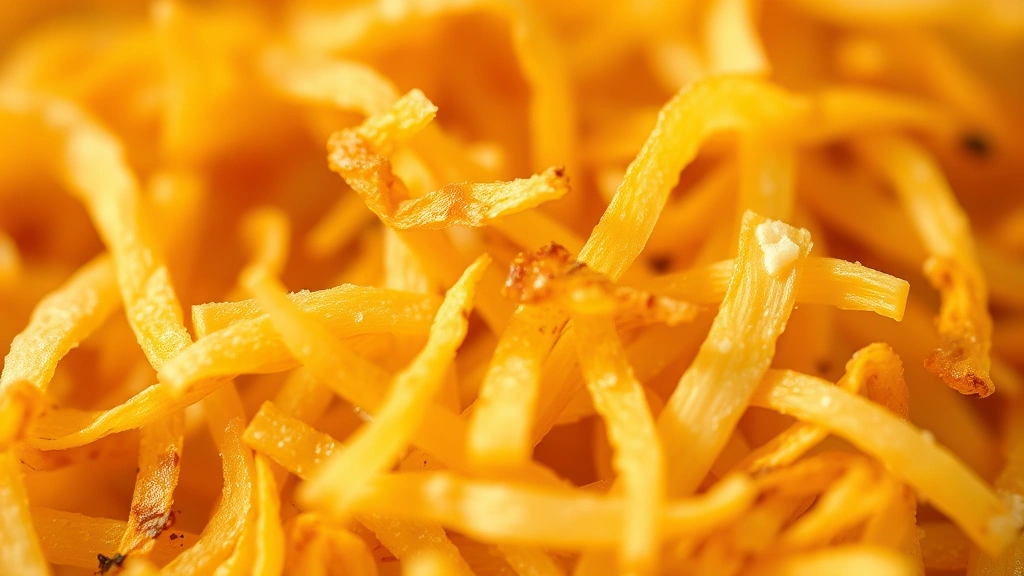
- Fry for 6-8 minutes, turning carefully halfway through cooking with tongs or a slotted spoon. The onion should turn a beautiful golden brown color. If it’s browning too quickly, your oil might be too hot; if it’s taking longer than 8 minutes, your oil might not be hot enough.
- Once the onion is golden brown and crispy all over, carefully remove it from the oil using tongs or a slotted spoon. Place it on a paper towel-lined plate to drain excess oil.
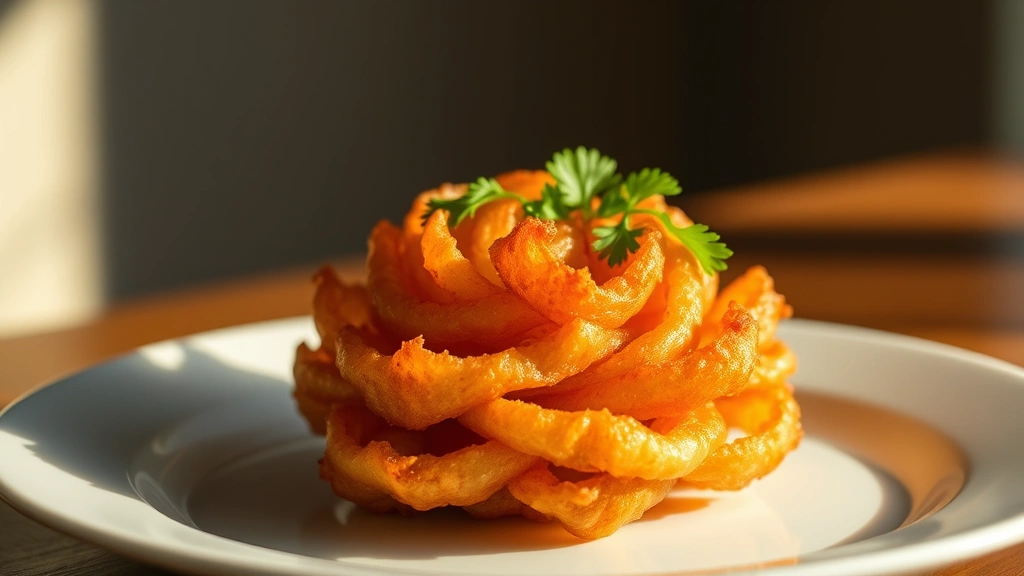
- Season immediately with additional salt and any of your preferred seasonings while still warm. The salt will adhere better to the warm, crispy surface.
- Transfer to a serving platter and garnish with fresh parsley if desired. Serve immediately with your choice of dipping sauce while it’s still warm and crispy.
Pro Tips
- **Onion Selection**: Choose a large, firm onion that’s roughly spherical. Vidalia or Spanish onions work beautifully because they’re sweeter and more tender than regular yellow onions. Avoid onions that are too small or irregularly shaped, as they won’t bloom properly.
- **The Bloom Technique**: This is the most critical step. Make sure your cuts are deep enough to reach near the base but not so deep that they sever it completely. The goal is to have the onion hold together at the base while allowing the layers to spread out dramatically. Practice makes perfect here.
- **Oil Temperature**: Invest in a good deep-fry thermometer. Temperature is absolutely crucial—too hot and your onion will burn before the inside cooks; too cool and you’ll end up with a greasy, soggy result rather than a crispy masterpiece. 350°F is the sweet spot.
- **Dryness Matters**: After washing and opening your onion, pat it very thoroughly dry. Moisture is the enemy of crispiness. Some bakers even let the prepared onion sit in the refrigerator for 15-20 minutes to help it dry further before battering.
- **The Batter**: The batter should be smooth and relatively thick. A thick batter creates that satisfying crispy coating, while a thin batter can result in a more delicate crust. The cornstarch and baking powder are key ingredients that help achieve that extra-crispy texture.
- **Seasoning Options**: While my spice blend is classic, feel free to customize. You could reduce the cayenne if you prefer less heat, or add smoked paprika for a deeper flavor. Some people love a hint of garlic powder; others prefer to keep it simpler.
- **Dipping Sauces**: The traditional accompaniment is a spicy horseradish sauce, but ranch dip, sriracha mayo, or even a simple cocktail sauce all work wonderfully. You can make a quick sauce by mixing sour cream with horseradish and a touch of hot sauce.
- **Serving Immediately**: This is not a dish that waits well. It’s best served immediately after frying while it’s still hot and crispy. If you must hold it, keep it in a 200°F oven for no more than 10-15 minutes.
- **Oil Reuse**: You can reuse your frying oil 2-3 times for similar foods. Strain it through a fine mesh strainer or cheesecloth and store it in a cool place between uses.
- **Make-Ahead Tip**: You can prepare the onion (cut and bloom it) several hours ahead of time. Store it in the refrigerator covered with plastic wrap. Just make sure to dry it thoroughly again before battering and frying.
- **Scaling Up**: This recipe works well for feeding a crowd. Just prepare multiple onions and fry them one at a time, maintaining your oil temperature between batches. Allow 5-10 minutes of resting time between frying each onion to let the oil temperature recover.