
There’s something absolutely magical about boneless short ribs – they’re tender, juicy, and packed with rich beef flavor that makes you feel like you’ve been cooking all day, even though the technique is surprisingly straightforward. This recipe transforms these humble cuts into restaurant-quality masterpieces that will have your dinner guests asking for seconds (and thirds!). The key to the BEST boneless short ribs lies in a perfect combination of a flavorful dry rub, a beautiful sear, and low-and-slow braising that breaks down the connective tissue into pure, melt-in-your-mouth perfection.
Boneless short ribs are actually cut from the chuck or rib section of the cow, and they’re incredibly forgiving to cook with because they have just enough marbling to stay juicy throughout the process. Unlike their bone-in cousins, boneless short ribs cook a bit faster and are easier to portion for plating – making them perfect for both weeknight dinners and special occasions. I’ve tested this recipe countless times, tweaking the spice ratios and cooking times until I landed on this version that delivers maximum flavor with minimal fuss.
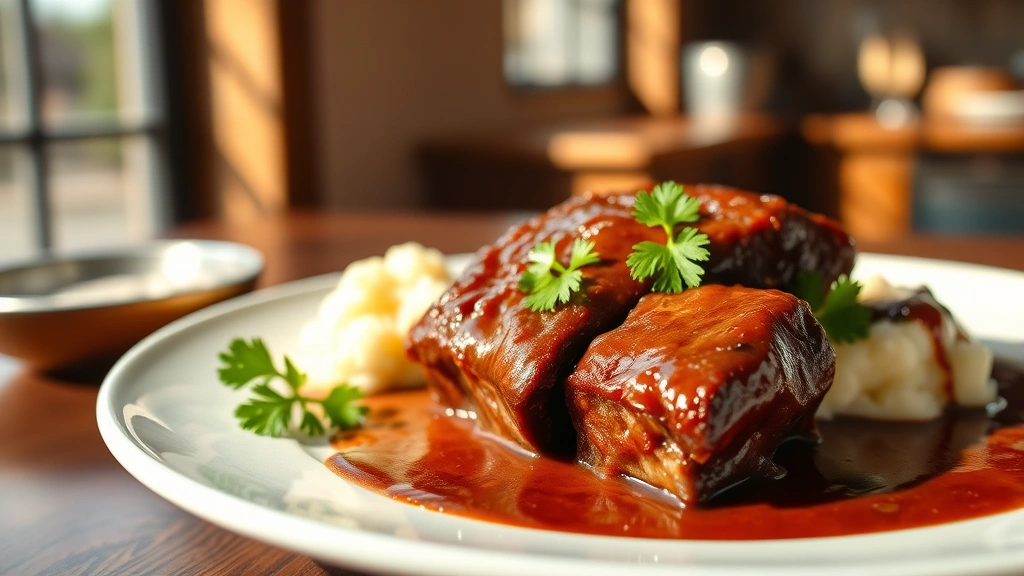
What makes this recipe stand out is the three-stage cooking method: first, we create a gorgeous caramelized crust through a hot sear; second, we build a deeply flavored braising liquid that infuses the meat with savory goodness; and third, we finish with a silky pan sauce that brings everything together. The result is meat so tender it practically melts on your fork, with a savory, slightly sweet sauce that begs to be sopped up with crusty bread. Whether you’re serving this over creamy mashed potatoes, polenta, or egg noodles, these boneless short ribs will absolutely steal the show. Check out our classic comfort food pairings for more sides that complement this dish beautifully.
I absolutely love how adaptable this recipe is too – you can switch up the braising liquid based on what you have on hand, add different aromatics, or even make it ahead and reheat it the day before serving. For more detailed braising techniques, check out this braising guide from Serious Eats that really dives deep into the science. The beauty of boneless short ribs is that they’re nearly impossible to overcook when braising, so you can be confident in your timing. I’ve included detailed notes below about variations, storage, and make-ahead options to help you master this recipe completely.
Ingredients
- 4-6 boneless short ribs (about 3-4 pounds total), trimmed of excess fat
- 2 tablespoons kosher salt
- 1 tablespoon black pepper
- 1 tablespoon smoked paprika
- 2 teaspoons garlic powder
- 2 teaspoons onion powder
- 1 teaspoon cayenne pepper (optional, for a subtle kick)
- 3 tablespoons olive oil, divided
- 1 large yellow onion, roughly chopped
- 4 large carrots, cut into 2-inch pieces
- 6 garlic cloves, minced
- 2 cups beef broth (preferably homemade or low-sodium)
- 1 cup red wine (a full-bodied variety like Cabernet Sauvignon)
- 2 tablespoons tomato paste
- 3 sprigs fresh thyme
- 2 bay leaves
- 1 tablespoon balsamic vinegar
- 1 tablespoon honey
- 2 tablespoons butter, cold and cubed
- Fresh parsley for garnish
- Fleur de sel for finishing (optional but recommended)
Instructions
- Pat your boneless short ribs completely dry with paper towels – this is crucial for achieving a proper sear and beautiful crust. Remove them from the refrigerator about 30 minutes before cooking so they come to room temperature, which ensures even cooking throughout.
- In a small bowl, combine the kosher salt, black pepper, smoked paprika, garlic powder, onion powder, and cayenne pepper. Mix thoroughly and set aside. This dry rub is the flavor foundation, so don’t skip tasting it – adjust the seasonings to your preference.
- Rub each short rib generously on all sides with the dry rub mixture, really working it into the meat. You want every surface covered. If you have time, let them sit for 15-20 minutes so the seasonings penetrate the meat.
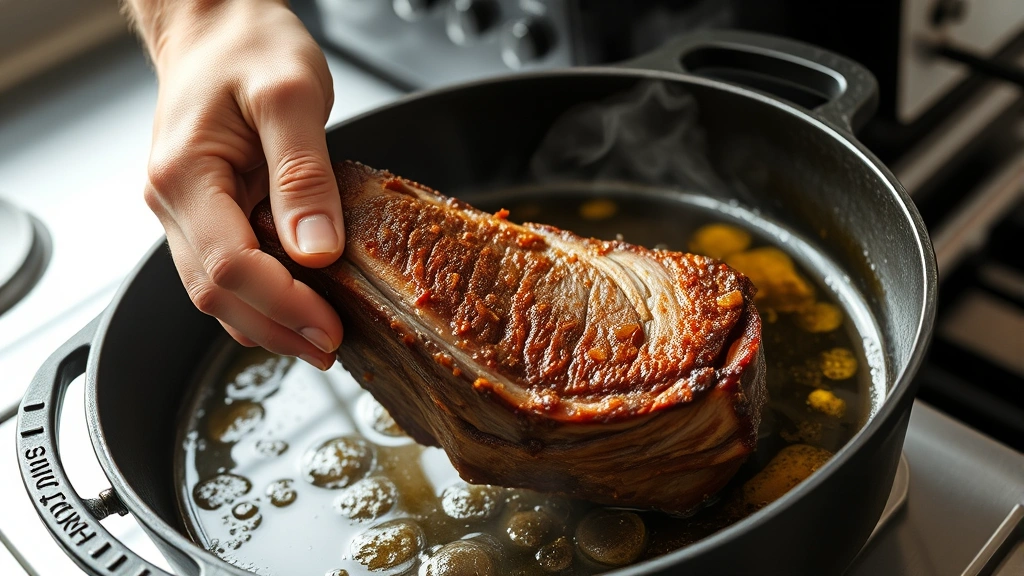
- Heat 2 tablespoons of olive oil in a large Dutch oven or heavy-bottomed braising pot over medium-high heat until it’s shimmering and just starting to smoke. Working in batches if necessary to avoid crowding, carefully place the short ribs in the pot.
- Let each short rib sear undisturbed for 4-5 minutes until a deep golden-brown crust forms on the bottom. Flip and sear the other side for another 4-5 minutes. You’re looking for rich caramelization, not just browning – this is where the flavor magic happens. Transfer the seared short ribs to a plate and set aside.
- Reduce the heat to medium and add the remaining 1 tablespoon of olive oil to the pot. Add the chopped onion and carrot pieces, stirring occasionally for about 5-7 minutes until they start to soften and pick up some of the browned bits from the bottom of the pot.
- Add the minced garlic to the vegetables and cook for another 2 minutes, stirring frequently, until fragrant. This builds the aromatic base for your braising liquid.
- Stir in the tomato paste and cook for 1-2 minutes, allowing it to caramelize slightly and deepen in color. This adds richness and umami to the final sauce.
- Carefully pour in the red wine, using a wooden spoon to scrape up all the flavorful browned bits stuck to the bottom of the pot – this is called deglazing and it’s essential for maximum flavor. Let the wine simmer for 2-3 minutes to reduce slightly and cook off the raw alcohol taste.
- Add the beef broth, balsamic vinegar, honey, thyme sprigs, and bay leaves. Stir everything together well. The liquid should come about halfway up the sides of the short ribs – you want them partially submerged but not completely covered.
- Return the seared short ribs to the pot, nestling them among the vegetables and aromatics. Bring the liquid to a gentle simmer on the stovetop, then cover the pot with a lid and transfer it to a preheated 325°F oven.
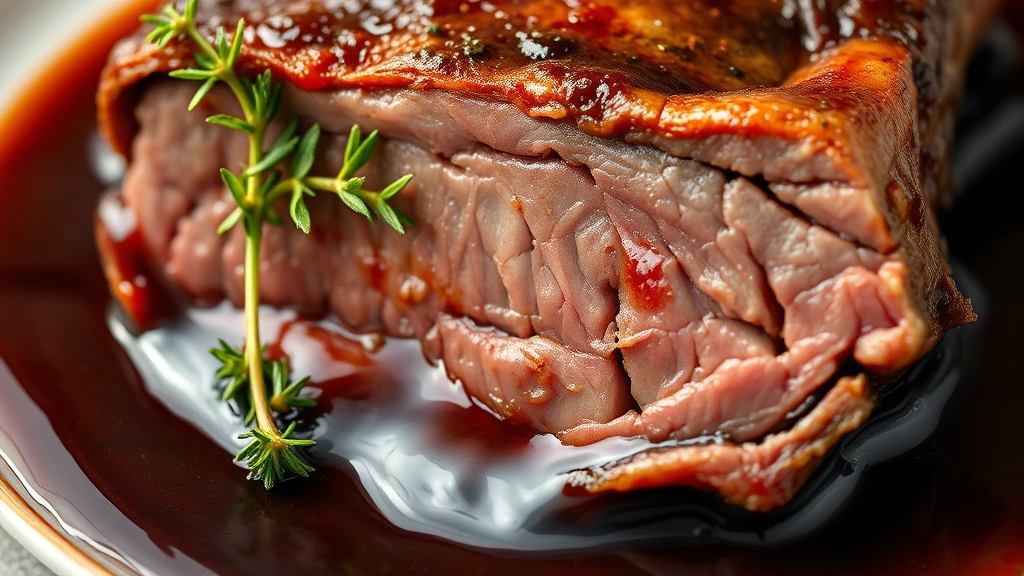
- Braise for 2.5 to 3 hours, checking after 2 hours. The short ribs are done when a fork easily pierces the meat with no resistance and the meat is falling-apart tender. The exact time depends on the size and thickness of your ribs.
- Using a slotted spoon, carefully transfer the cooked short ribs to a serving platter or individual plates. Tent loosely with foil to keep them warm while you finish the sauce.
- Strain the braising liquid through a fine-mesh strainer into a saucepan, discarding the solids (or save the carrots to serve alongside if you prefer). Skim as much fat as possible from the surface of the liquid using a fat separator or by carefully tilting the pan and spooning off the fat.
- Place the saucepan over medium heat and simmer the strained liquid for 5-8 minutes to reduce and concentrate the flavors. You want it to reduce by about one-third, becoming silkier and more sauce-like.
- Remove from heat and whisk in the cold butter cubes one at a time, waiting until each piece is fully incorporated before adding the next. This creates a glossy, velvety sauce – don’t skip this step as it adds richness and helps bind the sauce.
- Taste the sauce and adjust seasonings as needed – you might want more salt, a touch more vinegar for brightness, or a pinch more cayenne for heat. Pour the finished sauce over the short ribs.
- Garnish with fresh parsley and a sprinkle of fleur de sel if desired. Serve immediately while hot, with your favorite sides like mashed potatoes, creamy polenta, egg noodles, or crusty bread to soak up every drop of that incredible sauce.
Pro Tips
- Make-Ahead Magic: This dish is actually better made a day ahead! Prepare through step 15, cool completely, then refrigerate overnight. The next day, the fat solidifies on top and is easy to remove, and the flavors deepen and meld together. Simply reheat gently on the stovetop over low heat until warmed through, then whisk in the cold butter before serving.
- Wine Selection: The wine you choose really matters here – avoid anything you wouldn’t drink yourself, as the flavors concentrate during braising. A full-bodied red like Cabernet Sauvignon, Malbec, or even Burgundy works beautifully. You can substitute with beef broth if you prefer to skip the wine entirely, though you’ll lose some of that lovely depth.
- Vegetable Variations: Feel free to add mushrooms, parsnips, celery, or potatoes directly to the braising liquid. Root vegetables especially become incredibly tender and flavorful. Add them during the last 45 minutes of braising so they don’t fall apart.
- Batch Cooking and Freezing: This recipe doubles beautifully – make a full batch and freeze half for later. Freeze the short ribs and sauce together in airtight containers for up to three months. Thaw overnight in the refrigerator and reheat gently on the stovetop.
- Browning Tips: Don’t rush the searing step – this is where you build flavor. If your pan isn’t hot enough, the meat will steam instead of sear. Make sure the oil is shimmering and just starting to smoke before adding the ribs. Avoid moving them around – let them sit undisturbed to develop that gorgeous crust.
- Doneness Testing: The short ribs are done when they’re fork-tender, but not falling apart. You want them tender enough to cut with a fork but still holding their shape. Braising times vary based on the size of your ribs and your oven’s temperature, so start checking at the 2-hour mark.
- Serving Suggestions: These short ribs pair beautifully with creamy mashed potatoes, soft polenta, egg noodles tossed with butter and parsley, or even crusty bread for sauce-soaking. A side salad with a bright vinaigrette cuts through the richness nicely.
- Sauce Consistency: If your sauce is too thin after reducing, you can whisk in a slurry of cornstarch and water (1 tablespoon cornstarch mixed with 2 tablespoons cold water), whisking it in gradually until you reach the desired consistency. If it’s too thick, simply whisk in a splash of broth.
- Storage: Leftover short ribs keep beautifully in an airtight container in the refrigerator for up to 4 days. The sauce protects the meat and keeps it moist. You can also freeze for up to 3 months – just thaw overnight before reheating gently.
- Substitutions: Can’t find boneless short ribs? Beef chuck roast cut into large chunks works wonderfully, though cooking time may vary. Bone-in short ribs will take slightly longer but follow the same method.
- Dutch Oven Essential: A quality Dutch oven is invaluable for this recipe – it transitions seamlessly from stovetop to oven and distributes heat evenly. If you don’t have one, use any heavy-bottomed pot with an oven-safe lid.