

I’m absolutely thrilled to share my favorite borax slime recipe with you today! There’s something so magical about making slime at home—it’s the perfect activity for kids, a fun science experiment, and honestly, just plain therapeutic for adults too. This classic borax slime has been a staple in our kitchen for years, and I’ve perfected it to create the stretchiest, most satisfying slime that holds together beautifully.
What I love most about this recipe is how simple it is to make, yet how impressive the results are. The science behind it is fascinating—when borax mixes with glue, it creates these long polymer chains that give slime its signature stretchy texture. Plus, this recipe uses basic pantry ingredients that you likely already have on hand, making it budget-friendly and accessible for everyone.
I’ve tested this recipe countless times with different variations, and I’m confident this is the BEST version out there. The key is getting the ratios just right and understanding how to adjust the consistency to your preference. Whether you want it thick and putty-like or thin and stretchy, I’ll walk you through exactly how to achieve it. This slime is perfect for sensory play, stress relief, or just having fun with the kids on a rainy afternoon. The best part? It stores beautifully in an airtight container for weeks, so you can make a big batch and enjoy it over time.
I’ve also included tips for troubleshooting common issues and creative ways to customize your slime with colors and glitter. Check out my Quick Tasty Bacon Carbonara Recipe for another fun activity to do with the family! If you’re looking for more hands-on fun, my Easy Chicken Alfredo Recipe is perfect for a family dinner night before slime-making fun.
For more detailed slime science, check out Serious Eats which often explores the chemistry behind cooking and crafts. You might also enjoy Bon Appétit for other fun family activities and recipes. For scientific explanations, New York Times Cooking sometimes features interesting kitchen science experiments.
Let me share my personal journey with slime-making. I first started making this with my daughter when she was about five years old, and it became our weekly tradition. Now she’s older, but we still make it together, and it’s become something we bond over. The memory of her face lighting up when the slime first came together is priceless! I’ve since shared this recipe with countless friends and family members, and everyone raves about how easy and perfect it turns out. I hope you and your family will enjoy making this as much as we do!
Ingredients
- 4 oz white school glue (such as Elmer’s)
- ½ teaspoon borax powder
- 1 tablespoon warm water
- ½ cup warm water (for the borax solution)
- Food coloring or gel food coloring (optional, 2-3 drops)
- Glitter, beads, or foam balls for decoration (optional)
- Bowl for mixing
- Spoon for stirring
- Measuring spoons
- Small container for borax solution
Instructions
- Pour the 4 oz of white school glue into your mixing bowl. This is your base, and using quality glue makes a huge difference in the final texture of your slime.
- Add 2-3 drops of food coloring to the glue if you want colored slime. Stir thoroughly with your spoon until the color is evenly distributed throughout the glue. Make sure there are no streaks!
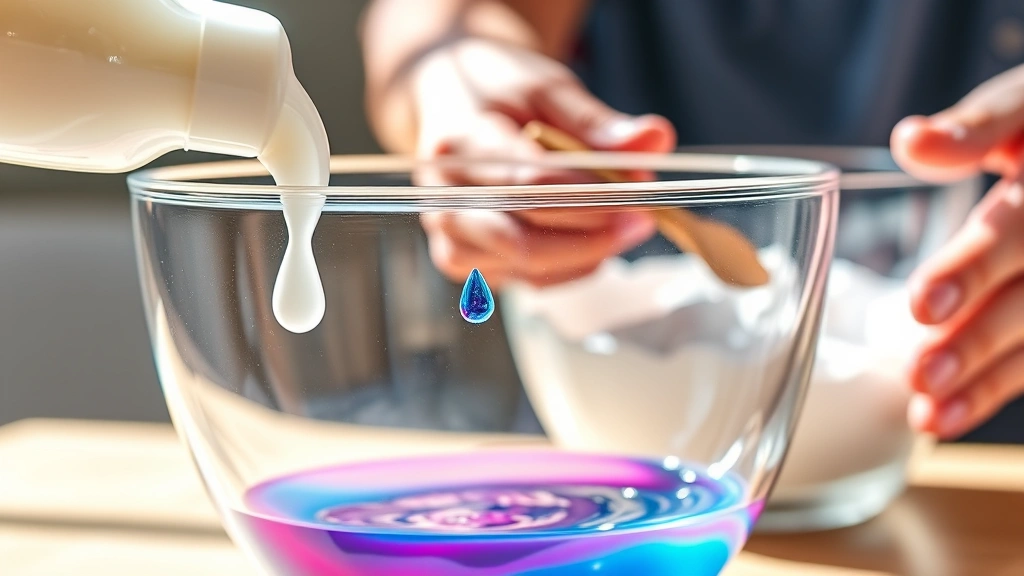
- In a separate small container, mix together the ½ teaspoon of borax powder with ½ cup of warm water. Stir well until the borax is completely dissolved. This is your activator solution.
- Pour approximately ¼ of the borax solution into the colored glue while stirring constantly. You’ll immediately notice the mixture starting to thicken and come together.
- Continue stirring as the slime forms. It will look stringy and separated at first—this is completely normal! Keep stirring until it becomes too thick to stir with just a spoon.
- Once the slime becomes difficult to stir, carefully remove it from the bowl and begin kneading it with your hands. It will still feel sticky and wet at this stage.
- Knead the slime for 2-3 minutes in your hands. As you work it, it will become less sticky and more cohesive. If it’s still too sticky, add a few more drops of the borax solution and knead again.
- Continue kneading until you reach your desired consistency. The slime should be stretchy, not sticky, and should hold together when you pick it up.
- If you want to add glitter or other decorations, sprinkle them onto the slime while kneading to incorporate them evenly throughout.
- Your slime is now ready to play with! Store it in an airtight container when not in use to keep it fresh and prevent it from drying out.

Pro Tips
- BORAX SAFETY: Borax is generally safe for this craft when used as directed, but always supervise children, avoid contact with eyes, and wash hands thoroughly after playing. Do not ingest slime.
- CONSISTENCY ADJUSTMENTS: If your slime is too sticky, add more borax solution one drop at a time. If it’s too stiff, add a tiny amount of lotion or oil to make it stretchier.
- COLOR OPTIONS: Use gel food coloring for the most vibrant colors, or add a few drops of acrylic paint to the glue before mixing. You can also make rainbow slime by dividing the glue into portions and coloring each differently.
- STORAGE: Keep slime in an airtight container or ziplock bag at room temperature. Properly stored slime can last for several weeks!
- TROUBLESHOOTING: If slime is stringy and won’t come together, you may need more borax solution. If it breaks apart, reduce the amount of borax you’re using as you may have added too much.
- GLITTER ADDITION: Use craft glitter or iridescent glitter for a magical effect. Add it during the kneading process for even distribution throughout the slime.
- TEXTURE VARIATIONS: For putty-like slime, use more borax. For stretchy slime, use less borax and add a drop of lotion.
- ALTERNATIVES TO BORAX: If you prefer not to use borax, you can make slime with contact lens solution containing boric acid as an alternative activator.
- SENSORY BENEFITS: Making and playing with slime is excellent for sensory development, stress relief, and provides tactile stimulation for children of all ages.
- EDUCATIONAL VALUE: This project teaches kids about polymer chemistry, chemical reactions, and the scientific method in a fun, hands-on way.