
There’s something absolutely magical about biting into a crispy, golden bubble waffle with its delightful honeycomb pockets just waiting to be filled with your favorite toppings. These Belgian-style waffles have taken the dessert world by storm, and honestly, once you master this recipe, you’ll be making them constantly. The beauty of bubble waffles is in their simplicity – a light, airy batter that creates those signature crispy exteriors and soft, pillowy interiors that make them so irresistible.
I’ve been perfecting this bubble waffle recipe for years, and I’m thrilled to finally share my foolproof method with you. Whether you’re planning a fun brunch, hosting a dessert bar, or simply treating yourself to something special, these waffles are guaranteed to impress. The key to achieving that perfect texture is understanding the batter consistency and mastering your waffle iron technique. I’m going to walk you through every step, sharing all my secrets and tips to ensure your bubble waffles turn out absolutely perfect every single time.
What makes this recipe so special is how versatile it is. You can serve them warm with ice cream and fresh fruit, drizzle them with chocolate sauce, or even use them as the base for a stunning dessert creation. The possibilities are truly endless, and your family and friends will be begging you for the recipe. Let’s dive into how to create these stunning waffles in your own kitchen!
Before we get started, I want to mention that a quality waffle iron designed for bubble waffles is really important for getting those perfect honeycomb pockets. If you’re serious about making these regularly, it’s worth investing in a good one. The batter itself is straightforward, but the equipment does make a difference. Now, let’s create some waffle magic!
One thing I absolutely love about this recipe is how it brings people together. There’s something inherently fun and interactive about making bubble waffles – you can set up a toppings bar and let everyone customize their creation. It reminds me of making special treats with loved ones, where the experience is just as important as the final result. These waffles create memories, and that’s what cooking is really all about.
Ingredients
- 2 cups all-purpose flour
- 2 tablespoons granulated sugar
- 1 tablespoon baking powder
- 1/2 teaspoon salt
- 2 large eggs
- 1 3/4 cups whole milk
- 4 tablespoons unsalted butter, melted
- 1 teaspoon vanilla extract
- Cooking spray or additional melted butter for the waffle iron
- Toppings: powdered sugar, chocolate sauce, whipped cream, fresh fruit, ice cream, Nutella, caramel sauce
Instructions
- Preheat your bubble waffle iron according to manufacturer instructions, usually about 5 minutes. Lightly grease it with cooking spray or melted butter to prevent sticking.
- In a large mixing bowl, whisk together the flour, sugar, baking powder, and salt. Set this dry mixture aside.
- In another bowl, beat the eggs together, then whisk in the milk, melted butter, and vanilla extract until well combined.
- Pour the wet ingredients into the dry ingredients, stirring gently with a spatula until just combined. The batter should be smooth but still slightly thick – avoid overmixing, as this can result in tough waffles.
- Let the batter rest for about 5 minutes. This allows the baking powder to activate and creates lighter, fluffier waffles.
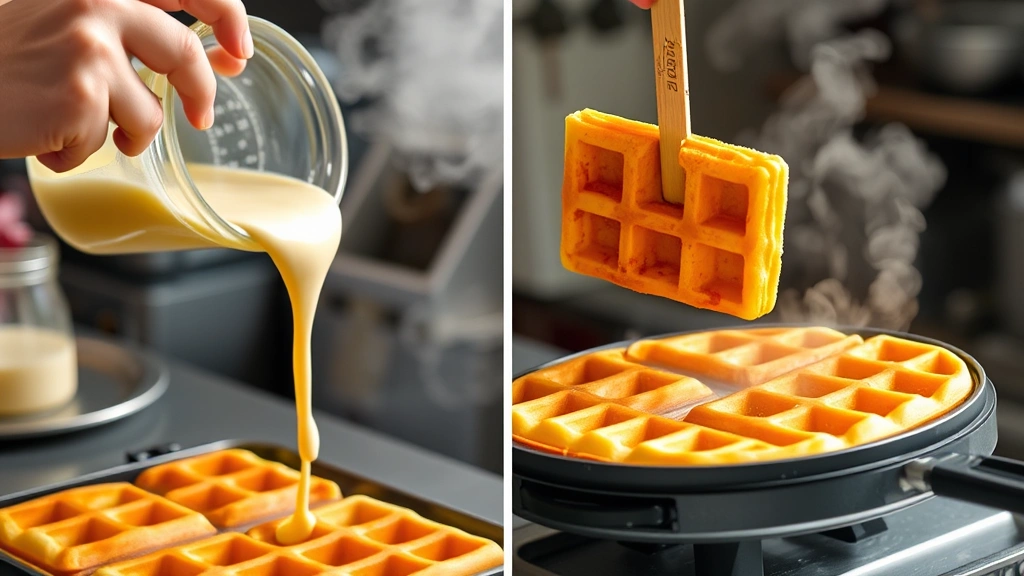
- Once your waffle iron is preheated and ready, pour approximately 1/2 to 3/4 cup of batter into the center of the iron, depending on your waffle iron’s size.
- Close the waffle iron carefully and cook for about 2-3 minutes, or until the waffle is golden brown and crispy. Resist the urge to open it too early, as this can disrupt the waffle’s structure.
- Using a fork or wooden skewer, carefully lift the bubble waffle out of the iron and place it on a wire rack to cool slightly.
- Repeat steps 6-8 with the remaining batter, ensuring your waffle iron stays hot between batches.
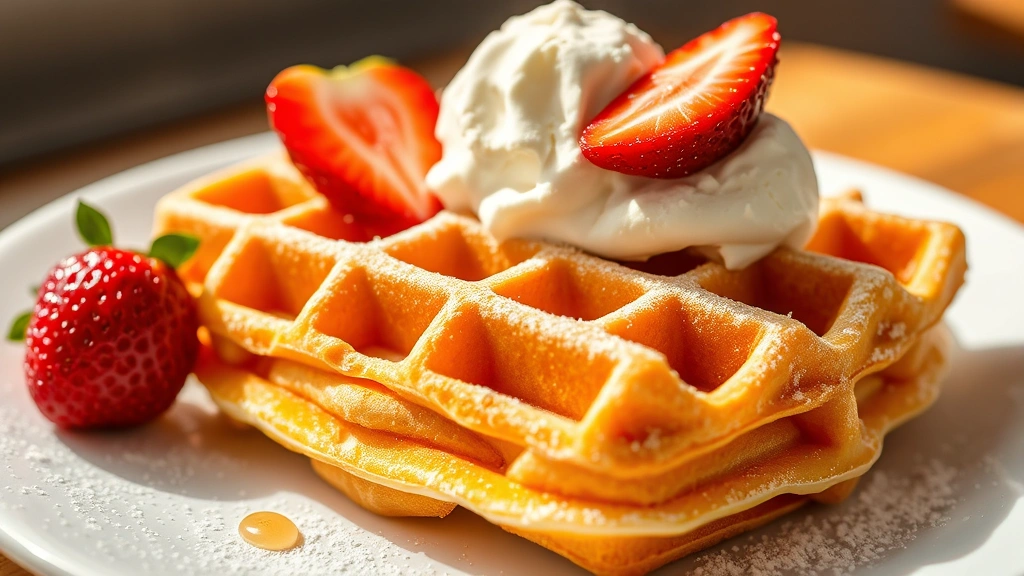
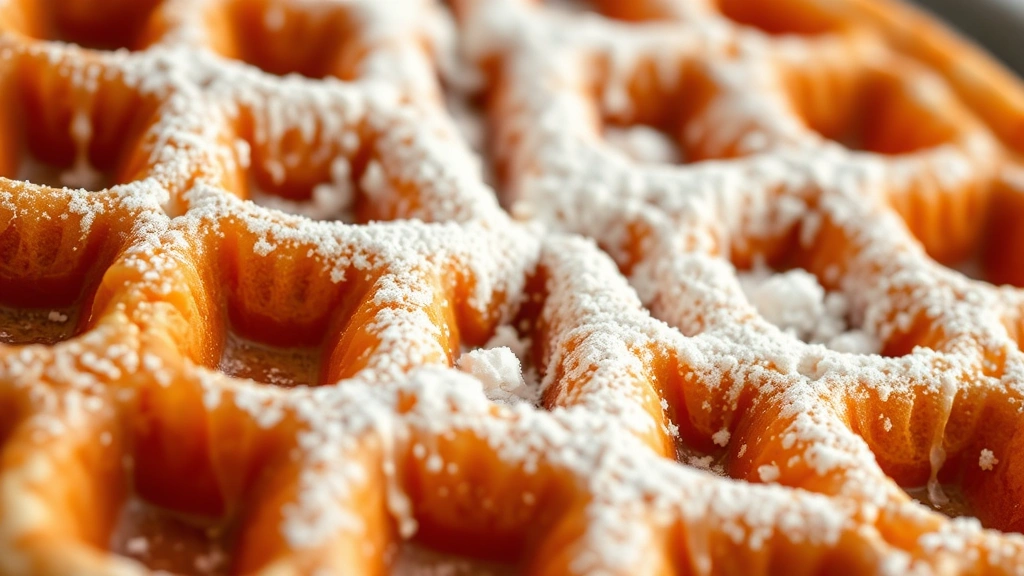
- While the waffles are still warm, dust them generously with powdered sugar or arrange them on serving plates.
- Top your bubble waffles with your choice of toppings – try ice cream, chocolate sauce, fresh berries, whipped cream, or a drizzle of honey.
- Serve immediately while the waffles are still crispy on the outside and warm on the inside for the best experience.
Pro Tips
Don’t skip the resting time after mixing. This allows the leavening agents to work properly and results in lighter, airier waffles with better texture.
For extra crispy waffles, increase the butter in your batter to 5 tablespoons. This adds richness and helps achieve that perfect golden exterior.
If your waffles aren’t browning enough, your waffle iron may not be hot enough. Give it extra time to preheat, or check the temperature settings.
Keep finished waffles warm by placing them on a baking sheet in a 200°F oven while you finish cooking the remaining batches.
For make-ahead convenience, you can prepare the batter the night before and store it in the refrigerator. Just give it a gentle stir before using, and you might need to add a splash of milk to reach the right consistency.
These waffles pair beautifully with both sweet and savory toppings. Consider drizzling with cream-based sauces or topping with fresh whipped cream for an elegant presentation.
For a chocolate lover’s version, add 2 tablespoons of cocoa powder to your dry ingredients and reduce the flour to 1 3/4 cups.
If you’re making these for a crowd, set up a toppings bar with various options so guests can customize their waffles. This creates an interactive and fun dining experience.
Store leftover waffles in an airtight container in the refrigerator for up to 3 days. Reheat in a toaster oven at 350°F for about 5 minutes to restore crispiness.