
There’s something wonderfully nostalgic and absolutely delicious about a perfectly made canned corned beef hash—it’s the ultimate comfort food that brings back memories of weekend breakfasts and cozy dinners. This recipe elevates the humble canned corned beef into something truly special, transforming it into crispy, golden hash that’s both satisfying and surprisingly elegant.
Canned corned beef is such an underrated ingredient in the modern kitchen. While it might seem like a relic of mid-century home cooking, it’s actually a brilliant pantry staple that deserves a place in every well-stocked kitchen. When prepared with care and quality ingredients, canned corned beef hash becomes something restaurant-worthy—with perfectly crispy edges, tender potatoes, and that savory, umami-rich flavor that keeps everyone coming back for seconds.
What makes this particular recipe special is the technique. Rather than simply mixing everything together and hoping for the best, we’re building layers of flavor and texture. We start by rendering the corned beef to develop its complex, meaty notes, then we create a perfectly golden crust on the bottom of the skillet while keeping the interior tender and moist. The addition of caramelized onions and fresh herbs takes this from weeknight breakfast to something you’d be thrilled to serve to guests.
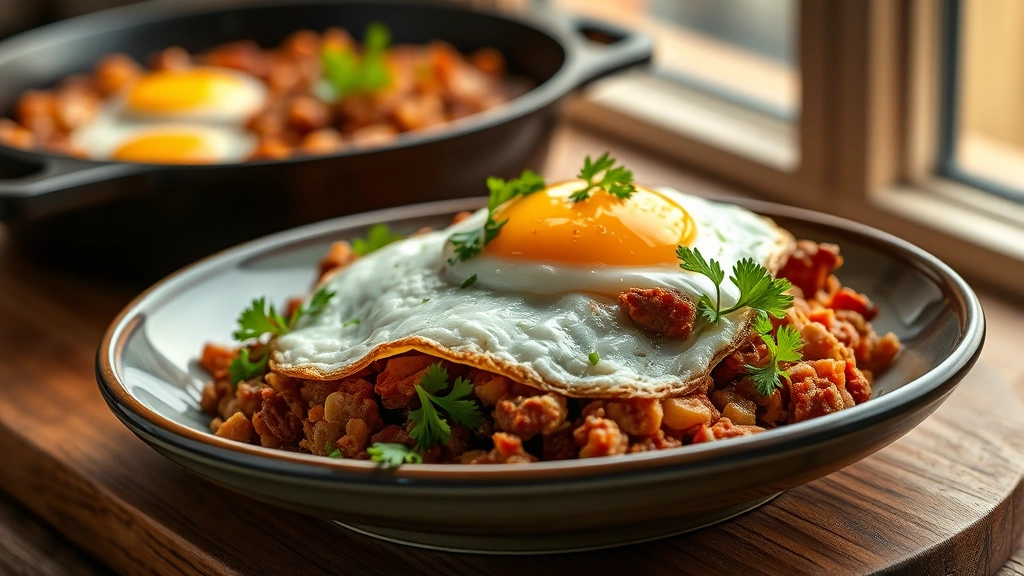
The beauty of this recipe is its flexibility. Serve it with a perfectly fried egg on top for breakfast, alongside some pickled red onions for brightness and acidity, or pair it with a crisp salad like this chickpea salad for a lighter lunch option. It’s equally at home on a brunch table or as an easy weeknight dinner.
I love how the exterior gets wonderfully crispy while the inside remains moist and flavorful. The key is patience—don’t stir too much, and let that hash develop that gorgeous golden crust. This is one of those recipes where technique matters as much as ingredients, so follow along carefully and you’ll have restaurant-quality results in your own kitchen.
For more hearty, satisfying pasta options that share that same comfort-food appeal, check out our heavy cream pasta recipe or this stunning alfredo sauce recipe. And if you’re looking for more protein-forward breakfast inspiration, our bacon carbonara offers that same satisfying richness.
This canned corned beef hash recipe is proof that simple, humble ingredients can become something extraordinary with the right technique and a little love. It’s quick enough for busy mornings, impressive enough for weekend entertaining, and absolutely delicious no matter when you serve it.
Ingredients
- 1 (12-ounce) can corned beef, chilled
- 3 medium russet potatoes, peeled and diced into 1/4-inch cubes
- 1 large yellow onion, finely diced
- 3 tablespoons unsalted butter, divided
- 2 tablespoons olive oil
- 1/2 red bell pepper, finely diced
- 3 cloves garlic, minced
- 1 teaspoon Dijon mustard
- 1 teaspoon Worcestershire sauce
- 1/2 teaspoon smoked paprika
- 1/2 teaspoon cayenne pepper, optional
- 1/4 cup fresh parsley, chopped
- 2 tablespoons fresh chives, chopped
- Salt and freshly ground black pepper to taste
- Fresh eggs for serving, optional
- Hot sauce for serving, optional
Instructions
- Bring a large pot of salted water to a boil and add the diced potatoes. Cook until just tender but still holding their shape, approximately 8-10 minutes. The potatoes should be cooked through but not falling apart. Drain thoroughly and set aside.
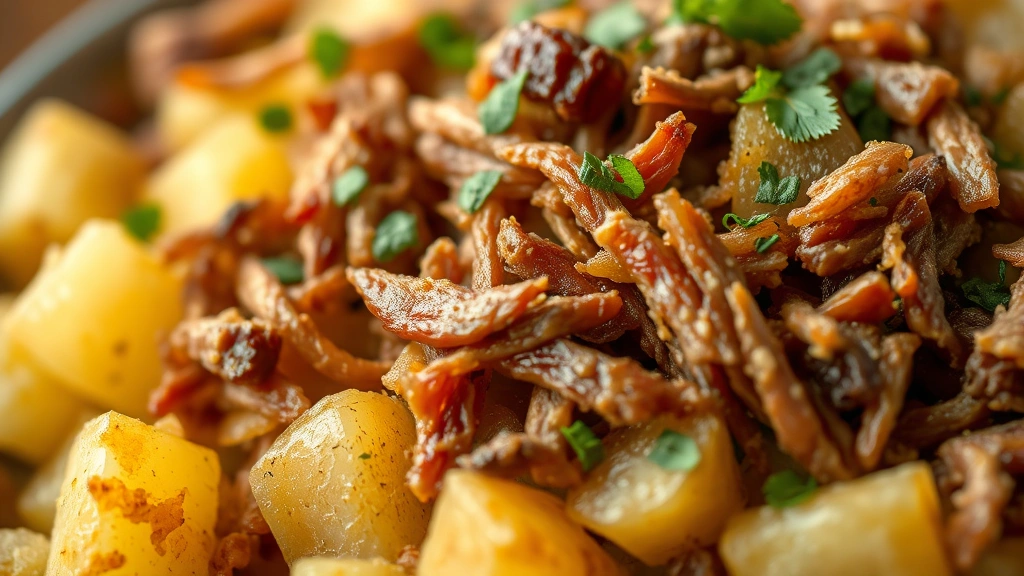
- While the potatoes are cooking, remove the chilled can of corned beef from the refrigerator. Using a can opener, carefully open and remove the corned beef. The chill helps it maintain its shape. Using a fork, break the corned beef into small, bite-sized pieces, working gently to avoid creating a paste.
- Heat 1 tablespoon of butter and 1 tablespoon of olive oil in a large cast-iron or heavy-bottomed skillet over medium-high heat. Once the butter is foaming and the oil is shimmering, add the diced onion.
- Cook the onion, stirring occasionally, until deeply caramelized and golden brown, approximately 8-10 minutes. This slow cooking develops the natural sugars in the onion and creates a sweet, complex flavor base. Transfer the caramelized onion to a small bowl and set aside.
- In the same skillet, add the remaining 2 tablespoons of butter and 1 tablespoon of olive oil. Once melted and foaming, add the diced red bell pepper and cook for 2-3 minutes until slightly softened.
- Add the minced garlic to the skillet and cook for 30 seconds until fragrant, being careful not to burn it. The garlic should smell wonderful but still be pale in color.
- Add the cooked potatoes to the skillet with the peppers and garlic. Stir to combine, then allow the mixture to cook undisturbed for 3-4 minutes. This helps develop a golden crust on the bottom.
- Stir the potato mixture and cook for another 2-3 minutes, again allowing it to settle and develop color without constant stirring. The goal is to create multiple layers of golden, crispy edges.
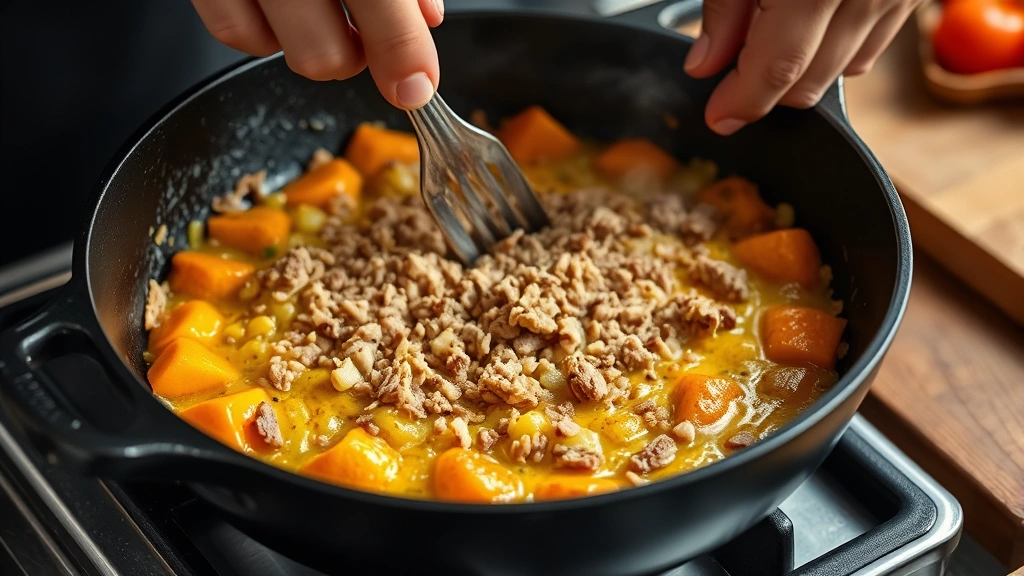
- Add the broken corned beef pieces to the skillet along with the caramelized onions. Gently fold everything together, being careful not to break up the potatoes too much.
- Sprinkle the Dijon mustard, Worcestershire sauce, smoked paprika, and cayenne pepper over the hash. Stir gently to distribute the seasonings evenly throughout the mixture.
- Cook without stirring for 4-5 minutes, allowing a golden crust to form on the bottom of the hash. This crust is absolutely essential for texture and flavor.
- Gently stir the hash, scraping up the golden bits from the bottom of the skillet. Cook for another 2-3 minutes until everything is heated through and additional crispy edges have formed.
- Remove from heat and taste the hash, adjusting seasoning with salt and pepper as needed. Remember that the corned beef is already quite salty, so taste before adding additional salt.
- Transfer the hash to a serving platter or individual bowls. Garnish generously with fresh parsley and chives. If desired, top each serving with a fried egg and serve immediately with hot sauce on the side.
- For best results, serve immediately while the hash is still hot and the exterior remains crispy. Leftovers can be stored in an airtight container in the refrigerator for up to 3 days and reheated gently in a skillet with a bit of butter.
Pro Tips
- Quality matters: While this recipe uses canned corned beef, choosing a quality brand makes a noticeable difference. Look for corned beef that is properly spiced and has good color.
- Chill the corned beef: Keeping your can of corned beef in the refrigerator before opening makes it much easier to break into pieces rather than having it turn into mush. Cold corned beef holds its shape beautifully.
- Don’t skip the caramelization: Taking the time to properly caramelize your onions develops deep, complex flavors that elevate this entire dish. It’s not a step to rush through.
- The crust is everything: The hallmark of great hash is a crispy, golden exterior. Don’t stir constantly—let it sit undisturbed for a few minutes at a time to develop those gorgeous crusty bits.
- Potato selection and preparation: Use russet potatoes for their starch content, which helps create those crispy edges. Cut them uniformly so they cook evenly. Slightly undercooking them helps them maintain their shape and texture.
- Cast iron is your friend: A cast-iron skillet is ideal for this recipe because it distributes heat evenly and helps develop that beautiful crust. If you don’t have cast iron, use the heaviest-bottomed skillet you have.
- Customize your add-ins: Feel free to add diced bell peppers, jalapeños for heat, or even diced crispy bacon for additional flavor and texture.
- Make it vegetarian-adjacent: While corned beef is traditional, you can substitute with diced ham, crispy bacon bits, or even sautéed mushrooms for umami depth.
- Egg preparation: A perfectly fried egg on top takes this from good to absolutely transcendent. Cook your egg separately so you control the yolk doneness.
- Storage and reheating: Leftover hash keeps well for up to three days. Reheat gently in a skillet with a small amount of butter to restore the crispy exterior.
- Seasoning balance: Corned beef already contains salt and spices, so taste your hash before aggressively seasoning. You may need less salt than expected.