
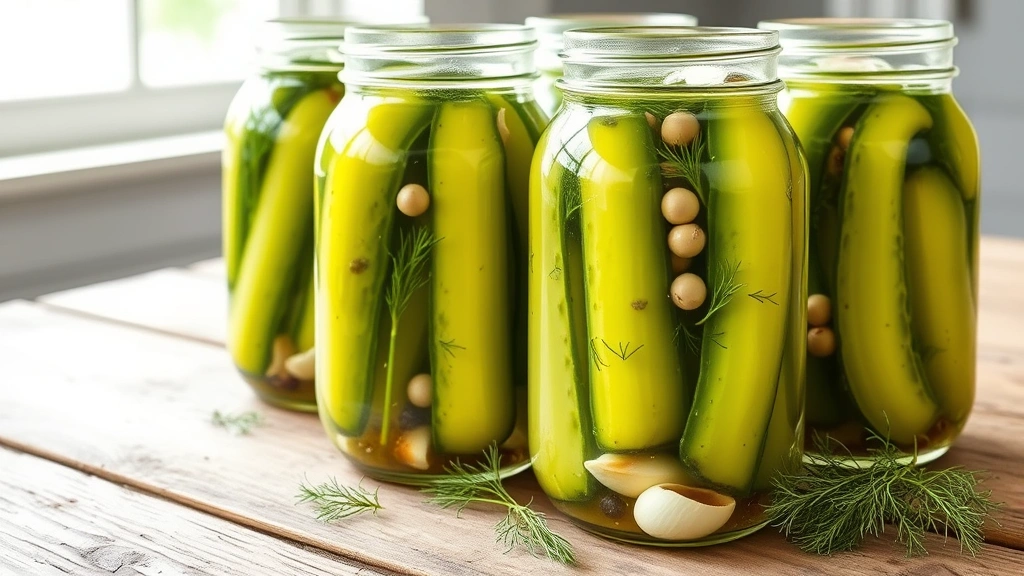
Making homemade canned dill pickles is easier than you might think, and the results are absolutely spectacular! There’s nothing quite like the crisp, tangy crunch of a perfectly brined pickle fresh from your own kitchen. These pickles are the perfect balance of dill, garlic, and vinegar—with just the right amount of heat to keep things interesting.
This recipe has been passed down through generations of pickle enthusiasts, and for good reason. Unlike store-bought varieties, you have complete control over the flavor profile, spice level, and crunchiness factor. Whether you prefer your pickles with a gentle dill whisper or a bold herbal punch, you can adjust this recipe to suit your preferences perfectly.
The beauty of canning your own pickles is that they make wonderful gifts, add a professional touch to your pantry, and taste infinitely better than anything you’ll find on a grocery store shelf. Plus, once you master this basic canning technique, you’ll be ready to preserve all sorts of vegetables throughout the season.
One of the secrets to achieving that perfect crispy texture is using fresh dill heads and grape leaves—the tannins in grape leaves help maintain the pickle’s crunch throughout storage. Combined with properly processed jars and the right vinegar-to-water ratio, you’ll create pickles that rival any deli counter.
These dill pickles with warming spices are versatile too. Serve them alongside charcuterie boards, chop them into relish for hot dogs, or simply enjoy them straight from the jar as a refreshing snack. The brine can even be repurposed for salad dressings or cocktails—nothing goes to waste!
Before you begin, make sure you have proper canning equipment and understand safe water bath canning practices. This recipe has been tested and verified for safety at the recommended processing time and temperature. Serious Eats has an excellent guide to pickle troubleshooting if you run into any issues.
The result? Jars of golden-green perfection that will make you the star of every potluck, and a pantry that smells absolutely divine.
Ingredients
- 4 pounds pickling cucumbers (4-6 inches long), washed and trimmed
- 8 cups white distilled vinegar (5% acidity)
- 8 cups water
- ½ cup pickling salt (non-iodized)
- 8 fresh dill heads or 16 dill sprigs
- 8 cloves garlic, peeled and halved
- 8 whole black peppercorns
- 4 teaspoons yellow mustard seeds
- 4 teaspoons red pepper flakes (adjust to taste)
- 4 bay leaves
- 8 grape leaves or horseradish leaves (optional but recommended)
- 4 sterilized quart-sized mason jars with lids and bands
Instructions
- Wash your pickling cucumbers thoroughly under cool running water, rubbing gently to remove any dirt or debris. Trim off the blossom end (opposite the stem) as it contains enzymes that can soften your pickles. Leave about ¼ inch of stem attached to each cucumber.
- Prepare your canning equipment by washing the jars, lids, and bands in hot soapy water. Sterilize the jars by placing them in a large pot of boiling water for 10 minutes. Keep them hot until ready to fill.
- In a large stainless steel pot, combine the white distilled vinegar and water. Add the pickling salt and stir until completely dissolved. Bring the brine to a rolling boil over medium-high heat.
- While the brine heats, prepare your jar seasonings. For each of the 4 jars, you’ll add: 2 dill heads, 2 garlic halves, 2 peppercorns, 1 teaspoon mustard seeds, 1 teaspoon red pepper flakes, 1 bay leaf, and 2 grape leaves. Place these seasonings in the bottom of each hot jar.
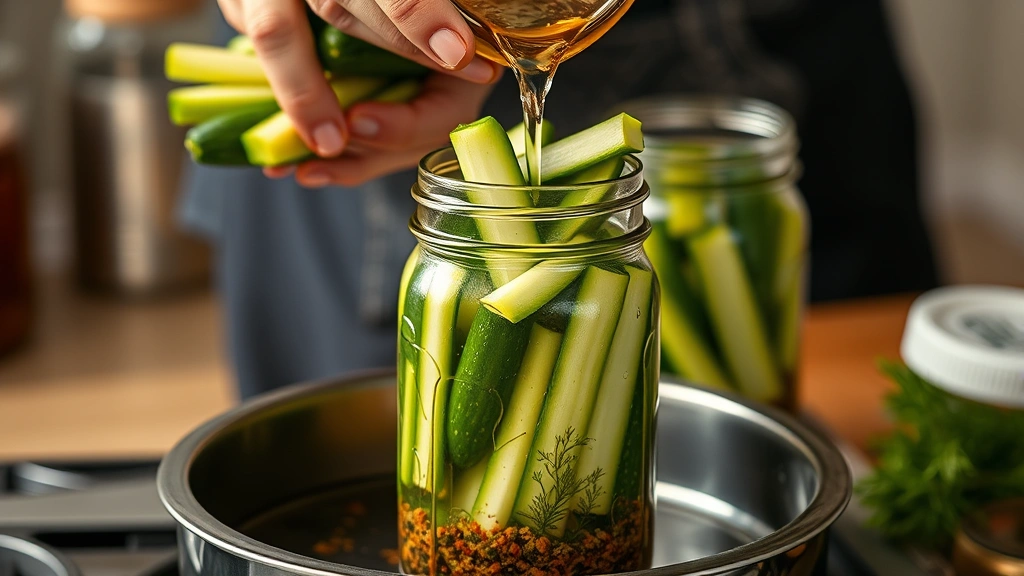
- Pack the hot jars with cucumber spears, standing them upright and packing them tightly but not so tightly that the brine can’t circulate. Fill each jar until the cucumbers reach about ½ inch from the top.
- Carefully pour the hot brine into each jar, covering the cucumbers completely and leaving exactly ½ inch of headspace from the rim. Use a bubble remover or chopstick to gently release any trapped air bubbles by running it around the inside of the jar.
- Wipe the rim of each jar with a clean, damp cloth to remove any brine or debris that could prevent a proper seal.
- Place a hot lid on each jar and screw the band on until fingertip-tight (snug but not overly tight). Do not over-tighten, as the jar needs to vent slightly during processing.
- Process the jars in a boiling water bath canner for 15 minutes for quart jars, adjusting time if you’re at high altitude (add 1 minute for every 1,000 feet above sea level).
- Carefully remove the processed jars from the water bath using a jar lifter, placing them on a clean kitchen towel or cooling rack. Space them apart and avoid drafts. Do not tighten the bands.
- Allow the jars to cool completely at room temperature for 12-24 hours. You should hear a satisfying ‘pop’ as each jar seals, indicating the lid has formed an airtight seal.
- After cooling completely, check the seals by pressing the center of each lid—it should not flex or pop. Remove the bands and store in a cool, dark place for up to one year.
- For best flavor development, allow the pickles to cure for at least 1-2 weeks before opening. The flavor will continue to develop and improve over time, with peak flavor at 3-4 weeks.
Pro Tips
- **Cucumber Selection**: Choose fresh, firm pickling cucumbers. Avoid waxed cucumbers or those that are soft. The fresher your cucumbers, the crispier your finished pickles will be.
- **Blossom End Removal**: This step is crucial. The blossom end contains enzymes that break down pectin, leading to soft pickles. Don’t skip this!
- **Salt Quality**: Use pickling salt or canning salt only. Table salt contains anti-caking agents and iodine that can cloud your brine and affect flavor. Kosher salt works if it contains no additives.
- **Vinegar Type**: White distilled vinegar at 5% acidity is essential for safety and proper preservation. Don’t substitute with apple cider vinegar or flavored vinegars without adjusting the recipe.
- **Grape Leaves**: These contain tannins that help maintain crispness. If unavailable, oak, horseradish, or cherry leaves work similarly. Some people use 1-2 tablespoons of powdered alum instead.
- **Spice Customization**: This recipe is a baseline. Add more red pepper flakes for heat, increase dill for more herbaceous flavor, or add coriander seeds, celery seeds, or fresh thyme for complexity.
- **Processing Time**: The 15-minute processing time is for quart jars. If making pint jars, reduce to 10 minutes. Always follow tested USDA guidelines for food safety.
- **Water Bath vs. Pressure Canning**: Pickles must be processed in a boiling water bath canner, not a pressure canner, due to their acidity. The high vinegar content makes them safe for water bath processing.
- **Curing Period**: While technically safe to eat after sealing, the flavor truly develops during the curing period. The spices infuse, the brine mellows, and the pickles firm up perfectly during this time.
- **Storage**: Store sealed jars in a cool, dark, dry place. A basement, pantry, or kitchen cabinet away from direct sunlight is ideal. Once opened, refrigerate and consume within 2-3 weeks.
- **Failed Seals**: If a jar doesn’t seal properly, refrigerate it immediately and consume within a few weeks, or reprocess the jar within 24 hours with a new lid.
- **Troubleshooting**: If pickles become soft, you likely didn’t remove the blossom ends, used old or weak vinegar, or didn’t process long enough. If they’re too salty, you added too much salt or didn’t follow measurements precisely.