
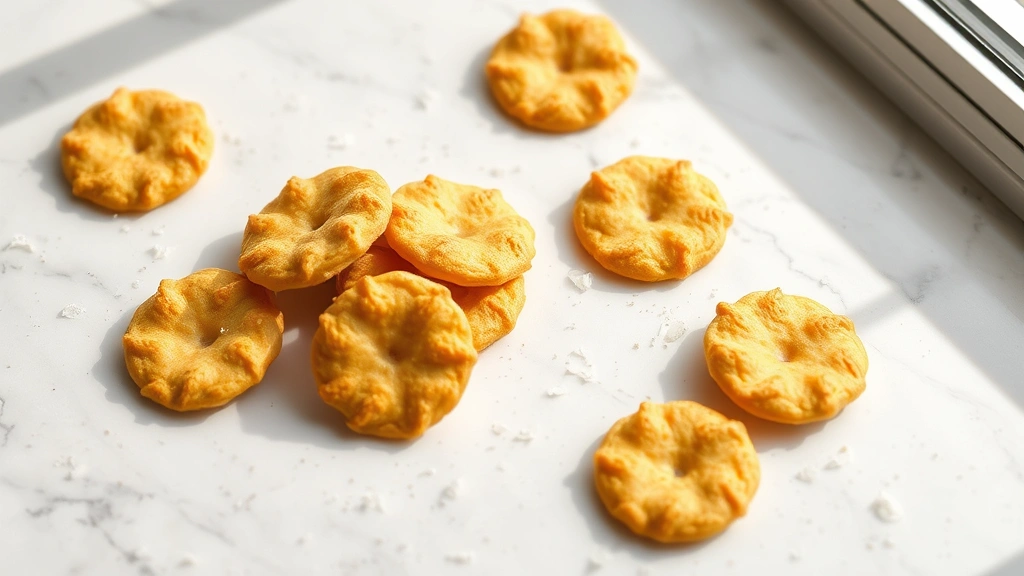
Homemade cheese crackers are an absolute game-changer, and honestly, once you make them, you’ll never look at store-bought versions the same way again. These crispy, buttery, intensely cheesy bites are the perfect combination of sophistication and nostalgia—they’re fancy enough to serve at a dinner party, yet so addictively delicious that they disappear in minutes. The secret to achieving that perfect crackle and cheese flavor lies in using real, high-quality cheese (I’m partial to sharp cheddar), maintaining the right dough consistency, and not skipping the chilling step.
What I absolutely love about this recipe is how versatile it is. You can customize these crackers with different cheeses—try aged Gruyère for a more elegant touch, or mix sharp cheddar with a little white cheddar for visual interest and complex flavor. Some of my favorite additions include a pinch of cayenne pepper for a subtle kick, fresh cracked black pepper, or even a touch of smoked paprika. The beauty of making your own crackers is that you control every single ingredient, which means you can adjust the seasoning to your exact preferences.
These buttery-textured treats come together surprisingly quickly—the dough itself takes just minutes to mix together. The real time investment is in the chilling and baking, but trust me, it’s absolutely worth it. I typically make a big batch on Sunday afternoon and keep them in an airtight container throughout the week for snacking, entertaining, or adding to a charcuterie board. They pair beautifully with everything from sharp pickles and cured meats to creamy spreads and dips.
One of the best parts about this recipe is that it’s incredibly forgiving. Even if your crackers aren’t perfectly uniform in size, they’ll still taste amazing. Some of the slightly thicker pieces will be a bit more substantial and chewy, while the thinner edges get wonderfully crispy—and honestly, that variety is part of their charm. For more inspiration on cheese-forward recipes, check out cheese straws or parmesan crisps.
I’ve also found that these crackers freeze beautifully, either before or after baking. If you freeze the dough, you can slice and bake them straight from the freezer—just add a minute or two to the baking time. This makes them perfect for those moments when unexpected guests arrive, or when you want a homemade snack without any last-minute stress. For detailed baking techniques, Serious Eats has wonderful resources on perfecting your technique, and Bon Appétit offers creative variations on classic appetizers. If you’re looking for more cheesy inspiration, New York Times Cooking has fantastic cheese-focused recipes, and Serious Eats appetizer collection is incredibly comprehensive.
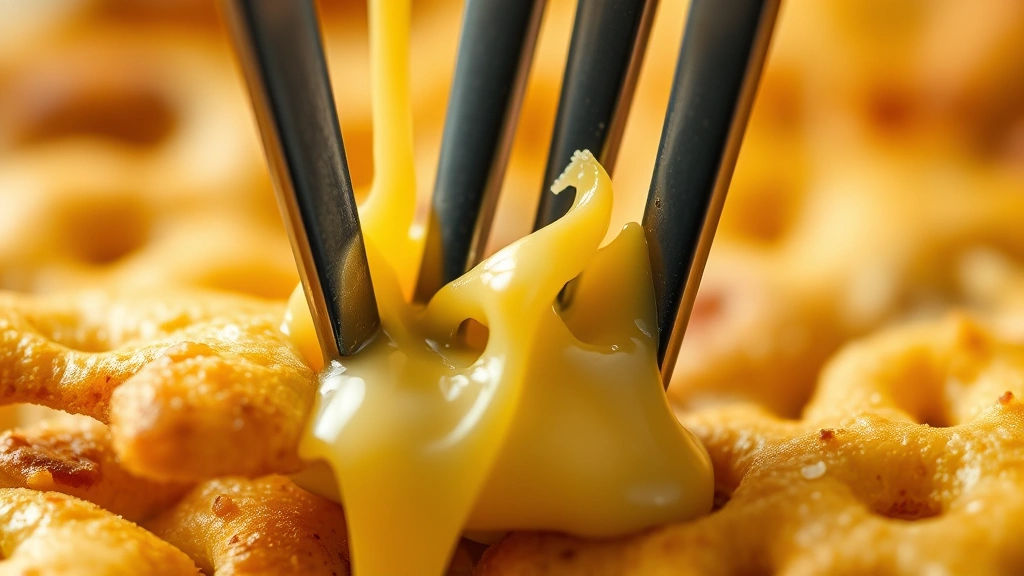
The flavor profile of these crackers is unmatched—that sharp, aged cheese flavor combined with the buttery, slightly salty notes creates something truly special. The texture is what really sets homemade crackers apart though: crispy on the outside with just enough structure to hold up to dips, yet delicate enough to melt on your tongue. This is the kind of recipe that makes people ask “Did you really make these?” and suddenly you’re the person known for incredible homemade crackers.
Ingredients
- 2 cups all-purpose flour
- 1 teaspoon salt
- ½ teaspoon cayenne pepper (optional, or ¼ teaspoon for milder heat)
- ¼ teaspoon black pepper, freshly cracked
- ½ pound (2 sticks) unsalted butter, cold and cubed
- 2 cups sharp cheddar cheese, finely grated (about 8 ounces)
- 2 tablespoons Parmesan cheese, finely grated
- 3-4 tablespoons ice water
- ¼ teaspoon garlic powder
- Sea salt for topping (optional)
Instructions
- In a large mixing bowl, whisk together the flour, salt, cayenne pepper, black pepper, and garlic powder until well combined. Set aside.
- Add the cold, cubed butter to the flour mixture and use a pastry cutter, two knives, or your fingertips to work the butter into the flour until the mixture resembles coarse breadcrumbs with some pea-sized pieces of butter remaining.
- Stir in the grated cheddar cheese and Parmesan cheese until evenly distributed throughout the dough mixture.
- Add the ice water one tablespoon at a time, gently mixing with a fork until the dough just begins to come together. You want the dough to be slightly crumbly but hold together when gently pressed.
- Turn the dough out onto a clean work surface and gently knead it 2-3 times until it just comes together into a cohesive ball. Do not overwork the dough, as this will make the crackers tough.
- Divide the dough in half and shape each half into a disk about ½-inch thick. Wrap each disk individually in plastic wrap and refrigerate for at least 2 hours, or up to 24 hours. (This chilling time is crucial for flavor development and makes the dough easier to work with.)
- Preheat your oven to 375°F (190°C). Line two large baking sheets with parchment paper or silicone baking mats.
- Remove one dough disk from the refrigerator and let it sit at room temperature for about 5 minutes to soften slightly, making it easier to roll.
- On a lightly floured surface, roll out the dough to about ⅛-inch thickness. For more uniform crackers, place the dough between two pieces of parchment paper before rolling.
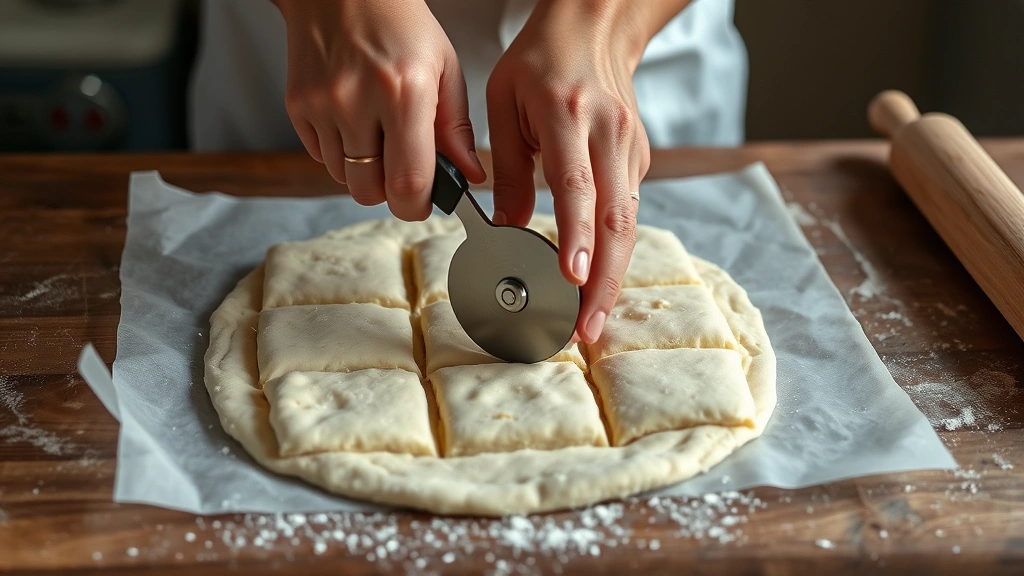
- Using a sharp knife, pizza cutter, or pastry wheel, cut the dough into roughly 1-inch squares or rectangles. You can also use small cookie cutters for shaped crackers.
- Transfer the crackers to the prepared baking sheets, spacing them about ½-inch apart. Prick each cracker 2-3 times with the tines of a fork to prevent excessive puffing during baking.
- If desired, sprinkle a tiny pinch of sea salt on top of each cracker for extra flavor and a beautiful finish.
- Bake for 12-15 minutes, until the edges are golden brown and the crackers appear set and crispy. The timing will depend on your oven and the thickness of your crackers.
- Remove the baking sheets from the oven and let the crackers cool on the baking sheet for 2-3 minutes before transferring them to a wire rack to cool completely.
- Repeat the rolling, cutting, and baking process with the remaining dough disk.
- Once completely cooled, store the crackers in an airtight container at room temperature for up to 7 days. For longer storage, freeze the crackers in a freezer-safe container for up to 3 months, or freeze the dough disks for up to 2 months before baking.
Pro Tips
- **Cheese Selection Matters**: Sharp cheddar is my go-to because of its bold flavor, but feel free to experiment. Gruyère adds sophistication, white cheddar provides a slightly different flavor profile, or try a combination of cheeses for complexity. Avoid pre-shredded cheese as it contains anti-caking agents that can affect texture.
- **Cold Ingredients Are Essential**: Keep your butter and water ice-cold throughout the process. This ensures the crackers stay crispy and flaky rather than tough. If your kitchen is warm, chill your mixing bowl before starting.
- **The Prick and Fork Step**: Don’t skip pricking the crackers with a fork. This prevents them from puffing up unevenly and ensures a uniform, crispy texture throughout.
- **Seasoning Variations**: Beyond the basic recipe, try adding smoked paprika for a smoky depth, Italian seasoning for a savory twist, rosemary for an herbaceous note, or a tiny pinch of smoked salt for complexity. You can also add finely minced fresh herbs like chives or dill.
- **Baking Sheet Matters**: Using parchment paper or silicone mats prevents sticking and allows for even browning on the bottom. If you use ungreased baking sheets, the crackers may stick slightly.
- **Uniform Sizing**: For consistently-sized crackers that bake evenly, try using a ruler and sharp knife or pizza cutter. Alternatively, roll the dough between two pieces of parchment paper for thickness consistency.
- **Freezing Options**: Freeze the dough disks before cutting for the ultimate convenience—just slice and bake directly from frozen, adding 2-3 minutes to the baking time. Pre-baked frozen crackers can be thawed at room temperature or warmed briefly in a 300°F oven to restore crispness.
- **Troubleshooting Tough Crackers**: If your crackers are tough or chewy, you’ve likely overworked the dough or added too much water. Mix gently, and add water gradually.
- **Perfect for Entertaining**: Make these ahead of time for stress-free entertaining. They’re elegant enough for sophisticated gatherings but approachable enough for casual snacking.
- **Leftover Dough**: If you have scraps after cutting, gently press them together, re-chill, and re-roll. While these crackers might be slightly less tender, they’ll still be delicious.
- **Storage Tips**: Store in an airtight container with parchment paper between layers to prevent sticking. If they lose crispness, refresh them in a 300°F oven for 3-5 minutes.