
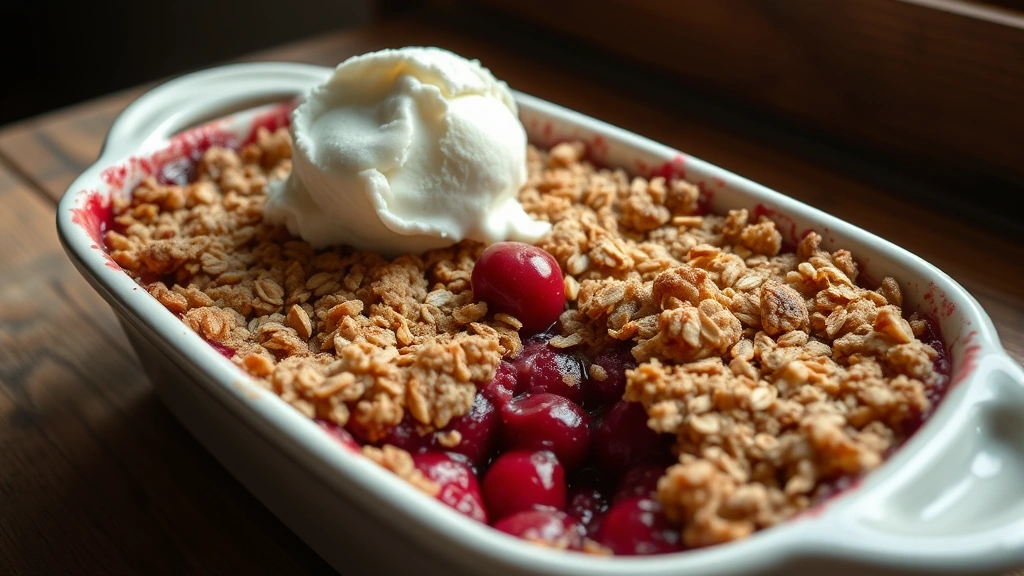
There’s nothing quite like a warm, comforting cherry crisp fresh from the oven – it’s the perfect dessert that feels fancy but comes together in just minutes. This cherry crisp recipe is my go-to when I want something delicious without spending hours in the kitchen. The beauty of this dish is in its simplicity: juicy, tart cherries are topped with a buttery, oat-based crisp topping that bakes until golden and crunchy. It’s the kind of dessert that brings back memories of summer gatherings and makes your kitchen smell absolutely divine.
I’ve been making cherry crisps for years, and I’ve finally perfected the formula for what makes the BEST version. The secret isn’t complicated – it’s all about using fresh or frozen cherries, balancing the sweetness with a touch of lemon, and creating a topping that’s crispy on top but stays tender underneath. Whether you’re baking for a special occasion or just a regular Tuesday night, this recipe delivers restaurant-quality results every single time.
What I love most about this cherry crisp is how forgiving it is. You can make it ahead, customize the toppings, and even swap out ingredients based on what you have on hand. Plus, it serves a crowd beautifully and pairs wonderfully with complementary dessert sauces. If you’re looking for more fruit-based desserts, check out my creamy dessert recipes or explore other baking inspiration on the blog.
Let me walk you through exactly how to make this stunning cherry crisp. I’m going to share not just the recipe, but all my tips and tricks for getting it absolutely perfect. Whether you’re using fresh cherries from the farmer’s market or a bag of frozen ones from your freezer, this method works beautifully.
For the filling, you’ll want to use about six cups of fresh or frozen cherries. If you’re using fresh cherries, pit them carefully – I like to use a cherry pitter for this job as it makes quick work of it. Frozen cherries are already pitted and actually work wonderfully in this recipe because they break down slightly during baking, creating a lovely jammy filling. Toss your cherries with sugar, lemon juice, lemon zest, and a pinch of salt. This combination brings out the natural flavor of the cherries and prevents them from tasting one-dimensional.
The crisp topping is where the magic happens. You’ll need rolled oats, flour, brown sugar, butter, and a few flavor-boosters like vanilla extract and a pinch of cinnamon. Some people add nuts to their crisps – walnuts or almonds work beautifully – but this recipe is delicious on its own. The key to a perfect crisp topping is keeping your butter cold and incorporating it so you get a mixture with a sandy texture. When it bakes, this creates those gorgeous golden clumps that everyone fights over.
One thing that sets this recipe apart is the addition of a tiny bit of cornstarch to the cherry filling. This helps thicken the juices without making the filling taste cornstarchy or weird. You only need about a tablespoon for six cups of cherries, and it makes all the difference in preventing a watery crisp.
Baking your cherry crisp is straightforward. You’ll pour the cherry mixture into a baking dish, then sprinkle the crisp topping evenly over the top. Don’t press it down – you want it loose so it gets crispy during baking. Bake at 375°F for about 35-40 minutes until the topping is golden brown and the cherry filling is bubbling at the edges. You can also try making this in individual ramekins for a more elegant presentation.
For more creative dessert ideas and flavor combinations, check out this flavor pairing guide or explore other recipe variations that might inspire you. You can also find excellent baking guidance at Bon Appétit’s dessert section and Serious Eats’ baking guides.
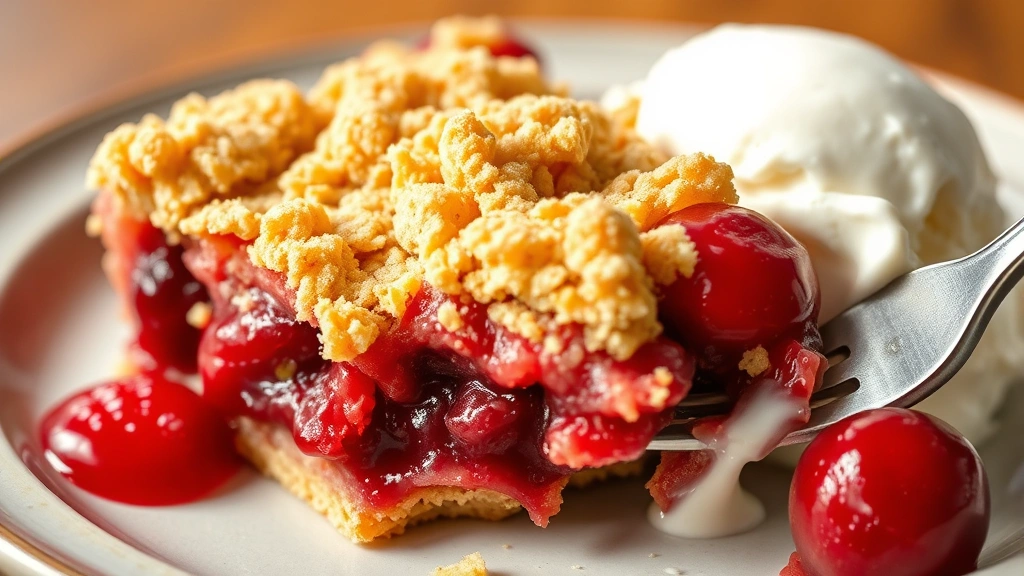
Serving your cherry crisp is half the fun. Let it cool for about 10-15 minutes after coming out of the oven, then serve it warm with a scoop of vanilla ice cream or a dollop of freshly whipped cream. The contrast between the warm, juicy filling and cold ice cream is absolutely heavenly. Some people even drizzle a bit of extra cream over the top or add a sprinkle of toasted nuts for extra crunch.
This recipe is perfect for meal prep too. You can make it the morning of and reheat it gently before serving, or even prepare the filling and topping separately and assemble it right before baking. It also freezes beautifully – you can freeze the unbaked crisp for up to three months, then bake it directly from frozen (just add a few extra minutes to the baking time).
I hope you’ll make this cherry crisp recipe soon. It’s been a family favorite for years, and I’m thrilled to finally share it with you. For additional baking inspiration, visit New York Times Cooking or explore more of my favorite recipes here. Happy baking, and enjoy every delicious bite!
Ingredients
- 6 cups fresh or frozen pitted cherries
- 3/4 cup granulated sugar
- 3 tablespoons fresh lemon juice
- 1 teaspoon lemon zest
- 1/4 teaspoon salt
- 1 tablespoon cornstarch
- 1 1/2 cups old-fashioned rolled oats
- 1 cup all-purpose flour
- 3/4 cup packed brown sugar
- 1/2 teaspoon ground cinnamon
- 1/4 teaspoon salt
- 1 teaspoon vanilla extract
- 10 tablespoons cold unsalted butter, cubed
- Vanilla ice cream or whipped cream for serving (optional)

Instructions
- Preheat your oven to 375°F and position a rack in the middle of the oven.
- In a large bowl, combine the pitted cherries, granulated sugar, lemon juice, lemon zest, salt, and cornstarch. Toss gently until the cherries are evenly coated and set aside for 10 minutes to allow the flavors to meld.
- Pour the cherry mixture into a 9×13-inch baking dish, spreading it into an even layer.
- In a separate large bowl, combine the rolled oats, flour, brown sugar, cinnamon, and salt. Whisk together until well combined.
- Add the vanilla extract to the oat mixture and stir to distribute evenly.
- Add the cold cubed butter to the oat mixture and use a pastry cutter, fork, or your fingertips to work the butter into the dry ingredients until the mixture resembles coarse sand with some pea-sized clumps throughout.
- Sprinkle the crisp topping evenly over the cherry filling, being careful not to pack it down – you want it loose so it will become crispy during baking.
- Place the baking dish on a baking sheet (to catch any drips) and transfer to the preheated oven.
- Bake for 35-40 minutes, until the topping is golden brown and the cherry filling is bubbling at the edges.
- Remove from the oven and allow to cool for 10-15 minutes before serving.
- Serve warm with vanilla ice cream or a dollop of whipped cream if desired.
Pro Tips
Frozen Cherries: Fresh or frozen cherries work equally well in this recipe. If using frozen cherries, do not thaw them before adding to the filling – they’ll cook beautifully in the oven and create a delicious jammy consistency.
Nut Addition: For extra crunch and flavor, add 1/2 cup chopped walnuts, almonds, or pecans to the crisp topping. Stir them in after incorporating the butter.
Lemon Alternatives: If you don’t have fresh lemons, you can substitute with 1/4 teaspoon of almond extract or 1/2 teaspoon of vanilla extract in place of the lemon juice and zest.
Baking Dish Options: This recipe works beautifully in individual ramekins – divide the cherry mixture among 8-10 ramekins, top with the crisp mixture, and bake for 20-25 minutes until golden.
Storage: Cover leftovers with foil and store in the refrigerator for up to 4 days. Reheat gently in a 325°F oven for about 10-15 minutes before serving. You can also freeze unbaked crisps for up to 3 months – bake directly from frozen, adding 5-10 minutes to the baking time.
Serving Suggestions: This cherry crisp pairs beautifully with vanilla ice cream, whipped cream, Greek yogurt, or even a drizzle of sweet cream. It’s perfect for serving at summer gatherings, dinner parties, or simple weeknight desserts.