
There’s nothing quite like that perfectly crispy, juicy Chick-fil-A chicken sandwich, and the good news is that you can absolutely recreate it at home! This copycat recipe captures all the magic of the beloved fast-food favorite, complete with that signature golden-brown breading and tender, flavorful chicken breast. Whether you’re looking to satisfy a craving or impress your family with restaurant-quality chicken, this guide will walk you through every step to achieve perfection.
The secret to nailing this recipe lies in a few key techniques: proper brining to keep the chicken incredibly moist, the right breading mixture for that signature crunch, and the correct frying temperature to ensure a golden exterior without drying out the meat. I’ve tested this recipe multiple times to dial in the exact ratios and methods that make it taste just like the real deal.
What makes this chicken so special is the combination of simplicity and technique. You don’t need fancy ingredients or complicated procedures—just quality chicken, proper preparation, and a little patience. Once you master this technique, you’ll be making it again and again. Serve it on a buttered bun with pickles, or use it as a base for other dishes like protein-packed meals or fresh salads.
This copycat version uses a buttermilk-based brine that keeps the chicken incredibly juicy, combined with a seasoned flour mixture that creates that irresistible crunch. The technique is straightforward enough for beginners but produces results that rival the professionals. I’ve also included tips for getting the breading extra crispy and maintaining the perfect internal temperature.
One of the best parts about making this at home is that you can control every ingredient, from the quality of the chicken to the type of oil you use for frying. You can also make it exactly the way you like it—extra crispy, with different seasonings, or even baked if you prefer a lighter version. This recipe is incredibly versatile and forgiving, making it perfect for weeknight dinners or meal prep.
The beauty of this recipe is that once you understand the fundamentals, you can easily scale it up for a crowd or adjust it to your personal preferences. Many home cooks are surprised at how close they can get to the original, and how much fresher and more flavorful homemade chicken tastes. Plus, you’ll save money compared to hitting the drive-through multiple times a week!
Ingredients
- 4 boneless, skinless chicken breasts (about 6-8 ounces each)
- 2 cups buttermilk
- 1 tablespoon salt
- 1 teaspoon black pepper
- 1 teaspoon garlic powder
- 1 teaspoon paprika
- 2 cups all-purpose flour
- 1 tablespoon salt (for breading)
- 1 tablespoon black pepper (for breading)
- 1 tablespoon paprika (for breading)
- 1 teaspoon garlic powder (for breading)
- Oil for frying (vegetable or peanut oil)
- 4 sandwich buns
- 2 tablespoons butter (for toasting buns)
- 4 dill pickle chips
- Salt to taste
Instructions
- Pat your chicken breasts dry with paper towels and place them on a cutting board. Using a sharp knife or meat mallet, gently pound each breast to an even thickness of about ¾ inch—this ensures they cook evenly and achieve that signature tender texture.
- In a large bowl, whisk together the buttermilk, 1 tablespoon salt, 1 teaspoon black pepper, 1 teaspoon garlic powder, and 1 teaspoon paprika until well combined. This is your brining mixture.
- Place the pounded chicken breasts into a large zip-top bag or container, then pour the buttermilk mixture over them, ensuring each piece is fully submerged. Seal and refrigerate for at least 4 hours, or up to 24 hours—the longer you brine, the more tender and juicy your chicken will be.
- When ready to cook, remove the chicken from the refrigerator and let it sit at room temperature for about 15-20 minutes while you prepare your breading station.
- In a shallow bowl, whisk together 2 cups all-purpose flour, 1 tablespoon salt, 1 tablespoon black pepper, 1 tablespoon paprika, and 1 teaspoon garlic powder. Mix thoroughly to ensure the seasonings are evenly distributed throughout the flour.
- Heat your oil to 350°F in a heavy-bottomed pot, Dutch oven, or deep skillet—use a reliable thermometer to monitor the temperature. This temperature is crucial: too hot and the breading burns before the chicken cooks through, too cool and it becomes greasy.
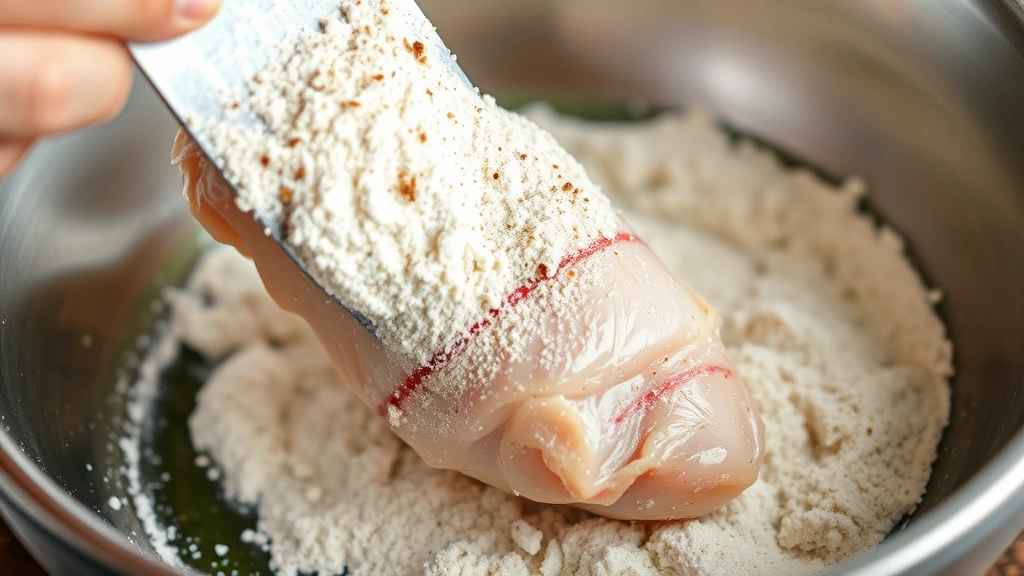
- Remove one chicken breast from the buttermilk mixture, allowing excess liquid to drip back into the bowl. Carefully dredge the chicken in the seasoned flour mixture, coating both sides thoroughly and shaking off any excess flour.
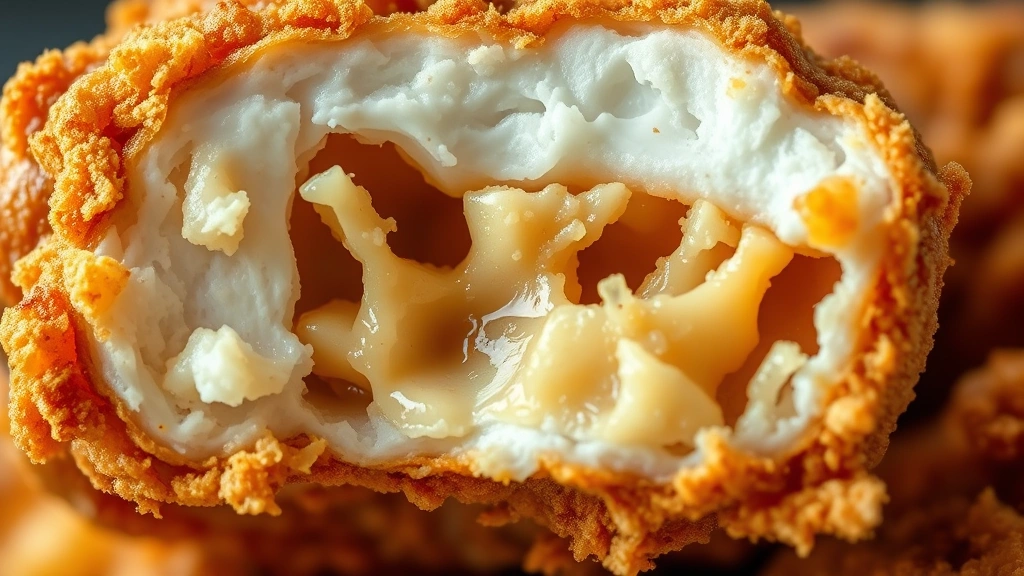
- Gently place the breaded chicken into the hot oil, being careful not to splash. Fry for 12-15 minutes, depending on the thickness of your breasts, until the breading is golden brown and the internal temperature reaches 165°F when measured with a meat thermometer at the thickest part.
- Using tongs or a slotted spoon, carefully remove the cooked chicken from the oil and place it on a paper towel-lined plate to drain excess oil. Season immediately with a light sprinkle of salt while still hot.
- Repeat the breading and frying process with the remaining three chicken breasts, allowing the oil to return to 350°F between batches if needed.
- While the chicken cooks, butter your sandwich buns lightly on the inside and toast them in a skillet over medium heat for about 2-3 minutes until golden and fragrant.
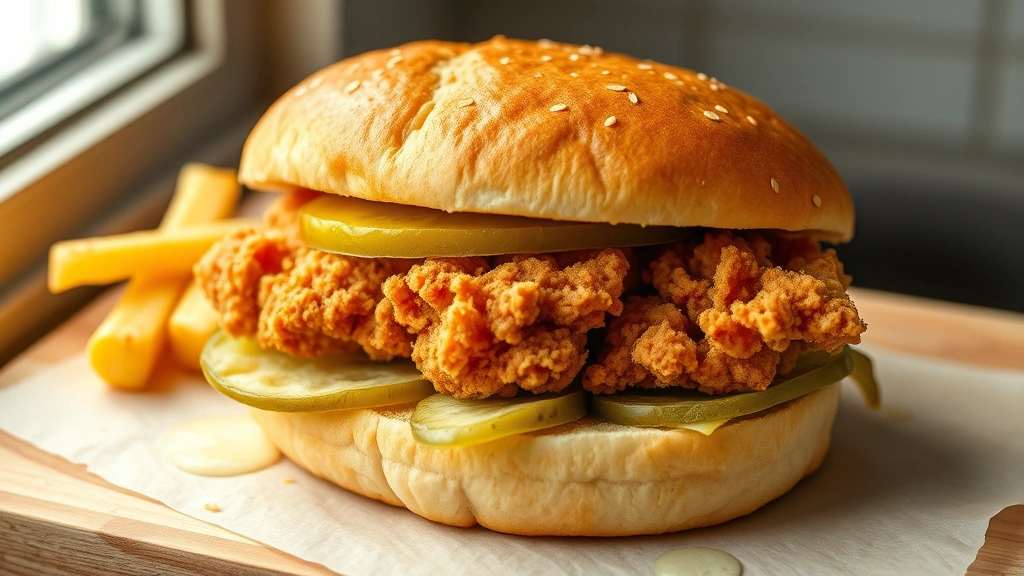
- To assemble your sandwiches, place one chicken breast on the bottom of each toasted bun, top with a dill pickle chip, and crown with the top bun. Serve immediately while the chicken is still hot and crispy.
Pro Tips
Brining Duration: While 4 hours is the minimum recommended brining time, you can brine your chicken for up to 24 hours without any negative effects. In fact, longer brining times produce even juicier results. This is a great make-ahead step for busy weeknights.
Chicken Selection: Look for chicken breasts that are roughly the same thickness and size so they cook evenly. If you find particularly thick breasts, don’t hesitate to pound them thinner—this creates a more tender final product that mimics the Chick-fil-A texture.
Breading Technique: For extra-crispy chicken, you can double-dredge by dipping the breaded chicken back into the buttermilk for a few seconds, then re-coating in the seasoned flour. This creates an extra-thick, crunchy crust.
Oil Selection: Vegetable and peanut oils are ideal for frying because they have high smoke points. Avoid olive oil or butter for frying, as these will burn at these temperatures.
Make-Ahead Options: You can brine the chicken up to 24 hours in advance, and you can bread the chicken and refrigerate it for up to 4 hours before frying. This makes meal prep incredibly convenient.
Serving Suggestions: Serve with your favorite sides like pickled red onions, waffle fries, coleslaw, or a fresh chickpea salad.
Baked Alternative: If you prefer a lighter version, you can bake the breaded chicken at 400°F for 20-25 minutes until golden, though the texture won’t be quite as crispy as fried.
Storage: Leftover chicken can be refrigerated for up to 3 days and reheated in a 350°F oven for about 10 minutes to restore crispiness.