
There’s nothing quite like homemade chili oil to elevate your everyday dishes from ordinary to absolutely extraordinary. This quick and easy chili oil recipe is a game-changer in the kitchen, and once you make it yourself, you’ll never go back to store-bought versions. The beauty of making your own chili oil is that you have complete control over the heat level, flavor profile, and ingredients—no mystery additives or preservatives needed.
Chili oil has become a staple in kitchens everywhere, and for good reason. It’s versatile, delicious, and adds that perfect touch of heat and richness to everything from pasta dishes to soups, salads, and even breakfast eggs. The best part? You probably already have most of the ingredients in your pantry right now. In just minutes, you can create a restaurant-quality chili oil that will have everyone asking for your secret.
This recipe is incredibly flexible, which is what makes it so special. You can customize the heat level by adjusting the amount of dried chilies, experiment with different types of peppers to create unique flavor combinations, and even add aromatics like garlic, ginger, or Sichuan peppercorns for extra depth. Whether you’re a spice lover or prefer a milder kick, this chili oil recipe can be tailored to your taste preferences.
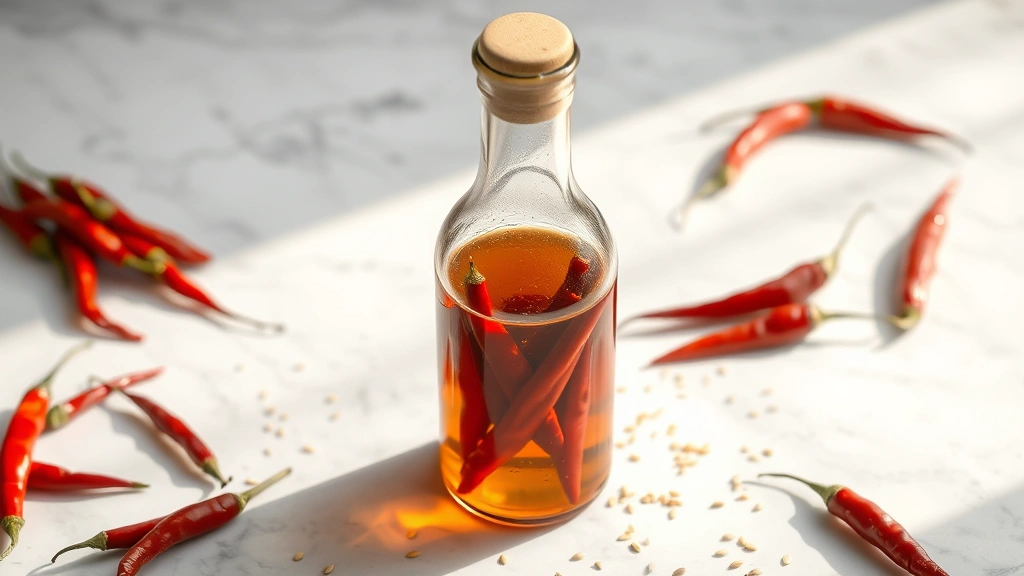
The infusion process is simple but requires a bit of patience and attention. By gently heating the oil with your chosen chilies and aromatics, you’re essentially creating an infusion that captures all those beautiful flavors and heat compounds. The result is a gorgeous, glossy oil that’s packed with flavor and looks absolutely stunning in a glass bottle on your kitchen shelf. It’s also a wonderful homemade gift for friends and family who love to cook.
One of my favorite ways to use this chili oil is drizzled over a homemade chickpea salad, where it adds both heat and richness. It’s also incredible on creamy pasta dishes or stirred into rich cream sauces. I also love drizzling it over pickled red onions for an extra flavor boost. The possibilities are truly endless.
Let me walk you through exactly how to make this best chili oil recipe. I’ve tested this method countless times and refined it to perfection, so you’ll get consistent, delicious results every single time. The key is using quality ingredients and not rushing the infusion process.
Ingredients
- 1 cup neutral oil (vegetable, canola, or light olive oil)
- 4-6 dried red chilies (adjust based on desired heat level)
- 3-4 cloves garlic, thinly sliced
- 1 teaspoon Sichuan peppercorns (optional but recommended)
- 1/2 teaspoon red pepper flakes
- 1/4 teaspoon sea salt
- 2-3 sprigs fresh thyme or rosemary (optional)
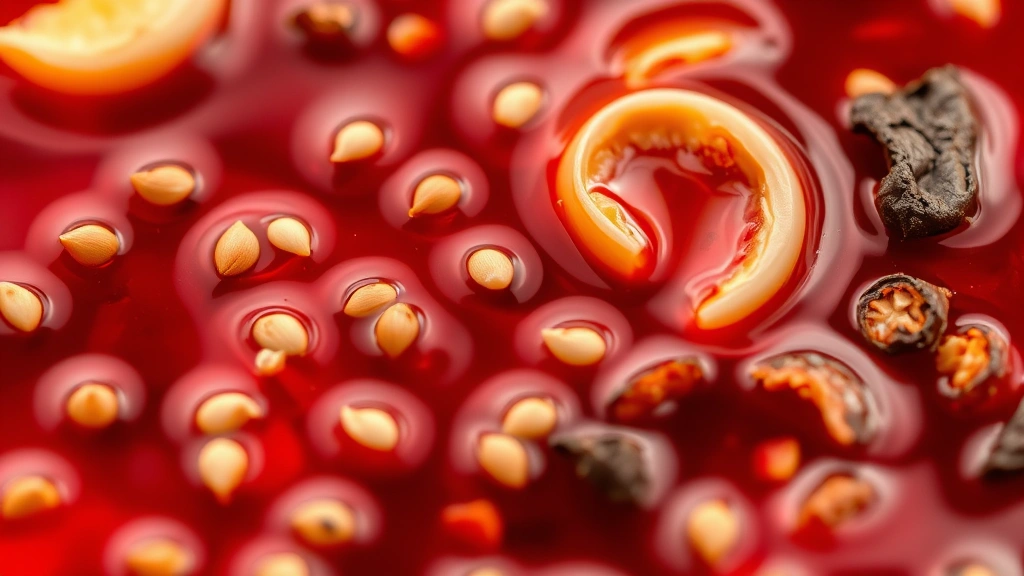
- 1 teaspoon white sesame seeds
- 1/2 teaspoon black sesame seeds
- 1 bay leaf
Instructions
- Place a small saucepan over medium-low heat and add your neutral oil. You want to gently warm it, not make it smoking hot—we’re infusing, not frying.
- While the oil is warming, prepare your dried chilies by removing the stems and seeds if you prefer a milder oil. For more heat, leave the seeds intact. Break or crush the chilies into 1-2 inch pieces.
- Add the dried chilies to the warm oil along with the sliced garlic, Sichuan peppercorns if using, red pepper flakes, and bay leaf.
- Reduce the heat to low and let the mixture gently warm for 10-15 minutes. You should see small bubbles forming around the ingredients, but the oil should never be smoking or aggressively simmering.
- Monitor the oil carefully during this time. You’re looking for the dried chilies to darken slightly and the garlic to become light golden in color. If the garlic starts to brown too quickly, remove from heat immediately.
- After the infusion time, add the sea salt and both white and black sesame seeds. Stir gently to combine.
- Remove the saucepan from heat and let the oil cool to room temperature. This is an important step as it allows the flavors to continue developing while the oil naturally cools.
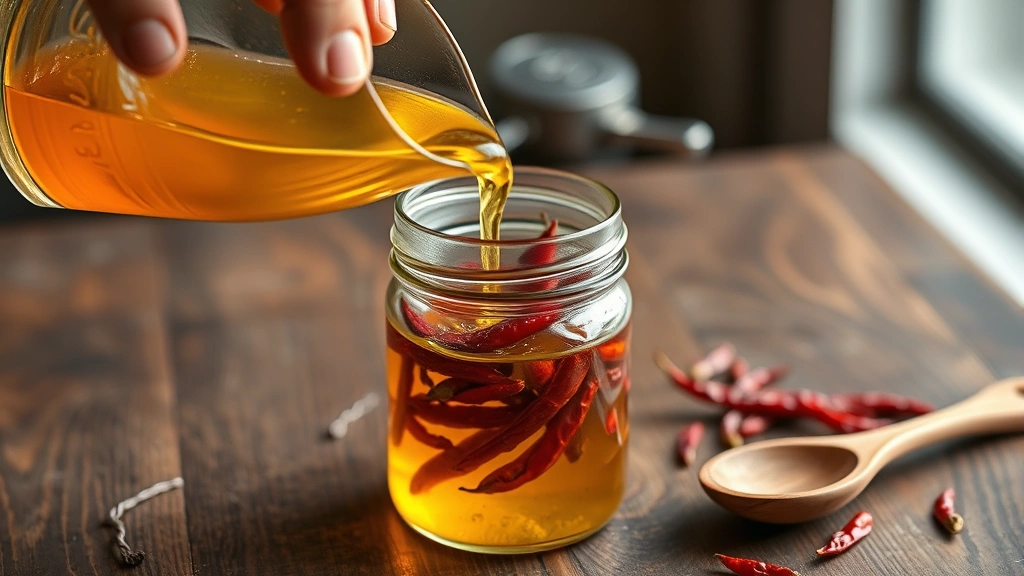
- Once cooled completely, carefully pour the chili oil into a clean glass jar or bottle using a funnel if needed, making sure to include some of the solids for maximum flavor.
- Let the chili oil sit in a cool, dark place for at least 24 hours before using to allow the flavors to fully develop and meld together.
- Store in an airtight glass container away from direct sunlight. Your homemade chili oil will keep for up to 2 weeks at room temperature or up to 1 month in the refrigerator.
Pro Tips
Heat Level Customization: The heat level of your chili oil depends on the type and amount of dried chilies you use. Thai bird’s eye chilies are very hot, while Calabrian or Korean red chilies are milder. Start with fewer chilies and work your way up to your preferred heat level.
Fresh vs Dried: Always use dried chilies for this recipe rather than fresh. Dried chilies have a more concentrated flavor and won’t introduce excess moisture that could cause the oil to spoil more quickly.
Sesame Seed Magic: Don’t skip the sesame seeds! They add wonderful texture, visual appeal, and a subtle nutty flavor that complements the heat beautifully. Toast them lightly in a dry pan first for extra depth if desired.
Storage Tips: Store your chili oil in the refrigerator if you notice any condensation forming in the jar, which could indicate moisture. The oil may solidify slightly when cold—simply let it come to room temperature before using.
Flavor Additions: Experiment with adding whole star anise, fennel seeds, or a small piece of kombu for umami depth. You can also add a thin strip of lemon zest for brightness or a few crushed peppercorns for complexity.
Usage Ideas: Drizzle over pizza, soups, roasted vegetables, grilled fish, or use as a dipping oil for bread. It’s also incredible in vinaigrettes, mayo-based sauces, or swirled into hummus.
Make Ahead: This recipe is perfect for meal prep. Make a big batch at the beginning of the week and use it throughout the week on various dishes.
Gift Giving: Pour into decorative bottles and label with the date and ingredients for a thoughtful homemade gift. Include suggested uses on a tag.