
There’s nothing quite like biting into a warm, buttery chocolate chip cookie fresh from the oven—that perfect combination of crispy edges and chewy centers is simply irresistible. But what if you don’t have brown sugar on hand? Don’t worry! You can absolutely make the BEST chocolate chip cookies without it, and they’ll taste just as delicious, if not better.
Brown sugar is traditionally used in chocolate chip cookies because it adds moisture and a subtle molasses flavor that enhances the overall taste. However, there are several easy substitutes that work beautifully, and some bakers actually prefer the texture and flavor profile you get without it. The key is understanding how to adjust your ingredients to maintain that perfect balance of chewiness and structure.
In this comprehensive guide, I’m sharing my foolproof method for making incredible chocolate chip cookies without brown sugar. Whether you’re using white sugar with molasses, honey, or maple syrup, you’ll discover that these cookies are every bit as delightful as the traditional version. I’ve tested multiple variations to bring you the most reliable recipe that delivers consistent, bakery-quality results every single time.
These cookies are perfect for any occasion—whether you’re baking for a family gathering, holiday celebration, or simply treating yourself to a homemade dessert. They also make wonderful gifts when packaged beautifully in a jar or box. The beauty of this recipe is its flexibility; you can customize it with different mix-ins like nuts, white chocolate, or even flavor variations to suit your preferences.
I’ve been perfecting this recipe for years, and I’m thrilled to share all my secrets with you. From the importance of room temperature butter to the exact baking time for that ideal texture, every detail matters. So grab your mixing bowls and let’s create some cookie magic together!
For more baking inspiration and tips on perfecting your dessert game, check out Bon Appétit’s baking section and Serious Eats’ dessert guides. You’ll find incredible resources for taking your baking skills to the next level.
Let me also recommend exploring complementary dessert recipes and other baking tutorials on our site. And if you’re looking for ways to balance your diet with some savory options, our healthy recipe collection has wonderful options.
For additional expert advice on cookie baking techniques, visit The New York Times Cooking section for professional tips and tricks from renowned pastry chefs.
Ingredients
- 2 1/4 cups all-purpose flour
- 1 teaspoon baking soda
- 1 teaspoon sea salt
- 1 cup (2 sticks) unsalted butter, room temperature
- 3/4 cup granulated white sugar
- 1/4 cup honey or maple syrup
- 2 large eggs, room temperature
- 2 teaspoons pure vanilla extract
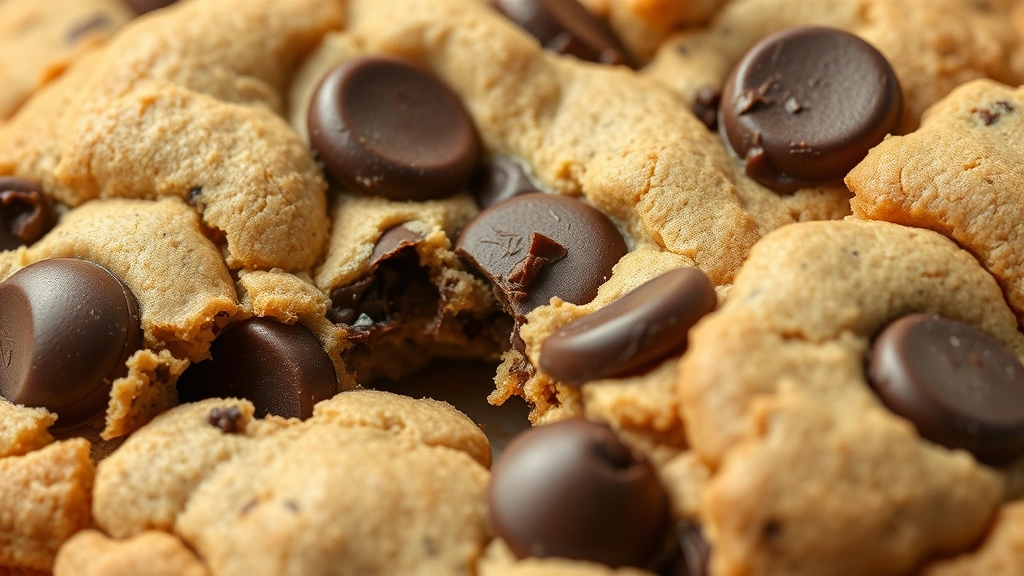
- 2 cups high-quality chocolate chips (semi-sweet or dark chocolate)
- 1/2 cup chopped walnuts or pecans (optional)
- 1 tablespoon molasses (optional but recommended for deeper flavor)
Instructions
- Preheat your oven to 375°F (190°C). Line baking sheets with parchment paper or silicone baking mats, ensuring you have at least two sheets ready.
- In a medium bowl, whisk together the all-purpose flour, baking soda, and sea salt. Set this dry mixture aside—this step is crucial for even distribution of the leavening agent throughout your cookies.
- In a large mixing bowl, cream together the softened butter and granulated white sugar using an electric mixer on medium speed for about 3-4 minutes until the mixture becomes light, fluffy, and pale in color. This process incorporates air into the dough, which helps create that coveted chewy-yet-structured texture.
- Add the honey (or maple syrup) to the butter and sugar mixture, beating on medium speed for 1-2 minutes until fully combined. If using molasses for extra depth of flavor, add it now and mix thoroughly.
- Add the eggs one at a time, beating well after each addition. Make sure each egg is fully incorporated before adding the next one. This ensures a homogeneous dough with proper structure.
- Pour in the vanilla extract and mix on medium speed until everything is well combined, about 30 seconds.
- Reduce the mixer speed to low and gradually add the flour mixture to the wet ingredients. Mix just until the flour is incorporated and no dry streaks remain—be careful not to overmix, as this can result in tough cookies.
- Fold in the chocolate chips and nuts (if using) by hand using a spatula or wooden spoon. Stir until the chocolate chips are evenly distributed throughout the dough.
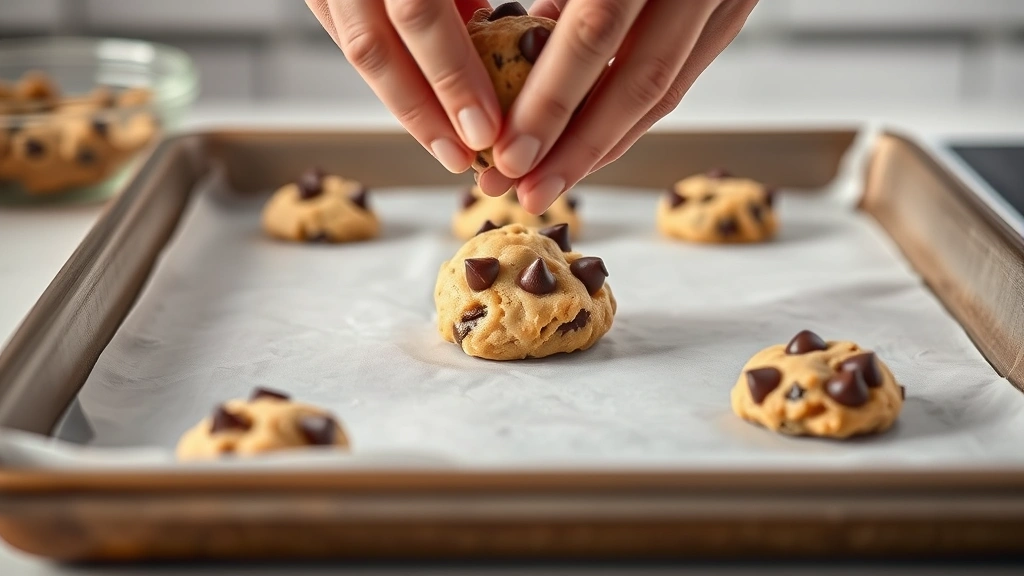
- Using a cookie scoop or tablespoon, drop rounded portions of dough onto your prepared baking sheets, spacing them about 2 inches apart to allow for spreading during baking.
- Bake in the preheated oven for 11-13 minutes, until the edges are golden brown but the centers still appear slightly underdone. This is the secret to achieving that perfect chewy center with crispy edges.
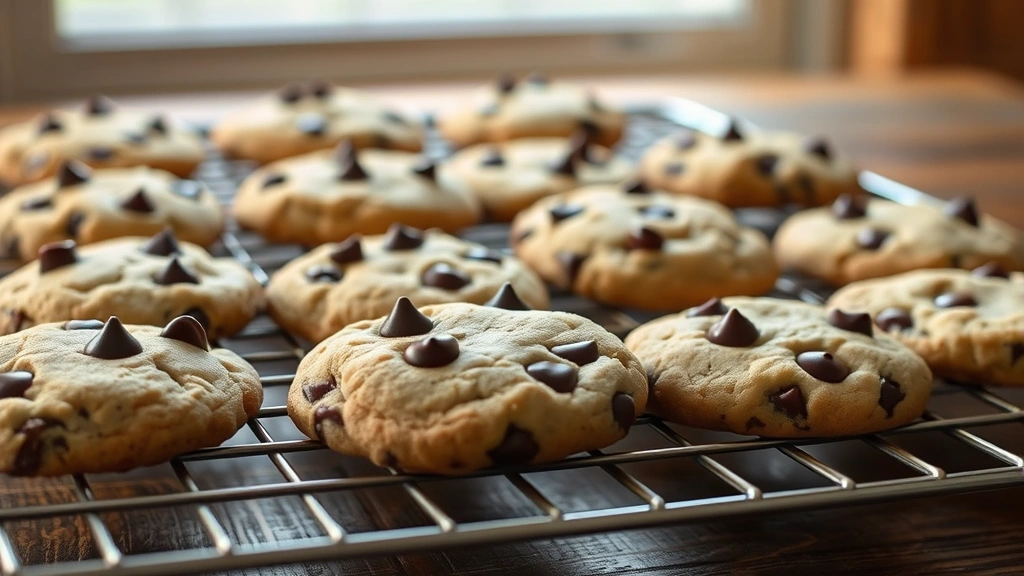
- Remove the baking sheets from the oven and allow the cookies to cool on the sheet for 5 minutes. This resting period allows them to set properly without becoming too hard.
- Transfer the cookies to a wire cooling rack to cool completely. Resist the urge to eat them immediately—they’ll continue to cook slightly as they cool and will reach their optimal texture.
Pro Tips
- BROWN SUGAR SUBSTITUTES: If you don’t have brown sugar, combining white granulated sugar with honey, maple syrup, or molasses creates a similar moisture content and depth of flavor. The honey or maple syrup replaces the molasses component while adding natural sweetness and a subtle complexity to your cookies.
- ROOM TEMPERATURE INGREDIENTS: This cannot be overstated. Room temperature butter, eggs, and even flour (if it’s been in a cool pantry) will mix together more smoothly and incorporate air more effectively, resulting in better texture and rise.
- CHOCOLATE CHIP SELECTION: Quality matters tremendously here. Invest in good chocolate chips—they should contain real cocoa butter, not vegetable oil. The difference in flavor between premium and budget brands is immediately noticeable in the final cookie.
- BAKING TIME PRECISION: Every oven is different, so watch your cookies carefully during the final 2-3 minutes of baking. The centers should still jiggle slightly when you gently shake the pan; they’ll firm up as they cool. Overbaking results in dry, hard cookies.
- STORAGE TIPS: Once completely cooled, store your cookies in an airtight container at room temperature for up to 5 days. For longer storage, freeze them in a freezer-safe container for up to 3 months. You can even freeze the dough balls before baking and pop them directly into the oven for fresh cookies anytime.
- CUSTOMIZATION OPTIONS: These cookies are wonderfully versatile. Add sea salt flakes on top before baking for a sweet-and-salty twist, incorporate white chocolate chips alongside dark chocolate, or mix in dried cranberries or coconut flakes for different flavor profiles.
- SPREAD CONTROL: If your cookies spread too much during baking, your butter may have been too soft or your dough too warm. Refrigerate the dough for 30 minutes before baking if needed. Conversely, if they don’t spread enough, your dough might be too cold or your oven temperature inaccurate.
- MOLASSES MAGIC: While molasses is optional, I highly recommend including it. Just one tablespoon adds a subtle depth and richer flavor that mimics the brown sugar experience without actually using brown sugar. It also contributes to a slightly chewier texture.
- VANILLA QUALITY: Use pure vanilla extract, never imitation. The flavor difference is substantial, and it elevates the entire cookie experience. Real vanilla contains hundreds of flavor compounds that simply cannot be replicated by synthetic alternatives.
- SCOOPING CONSISTENCY: Using a cookie scoop ensures uniform cookie sizes, which means they’ll all bake at the same rate. This is essential for achieving consistent results across all your cookies rather than having some overdone and others underbaked.