
Chow chow relish is a beloved Southern staple that brings bright, tangy flavor to any table. This classic preserve combines crisp vegetables with a perfect balance of sweet and savory notes, making it the ideal condiment for creamy pasta dishes or alongside grilled meats. The beauty of homemade chow chow lies in its versatility—serve it alongside hot dogs, barbecue, or even charred peppers for an elevated twist on traditional sides.
What makes the best chow chow relish recipe stand out is the quality of ingredients and the careful balance of flavors. Unlike store-bought versions that can taste overly processed, homemade chow chow captures the essence of fresh vegetables at their peak. This recipe uses a combination of cabbage, green tomatoes, onions, and bell peppers, all suspended in a gorgeous golden-hued vinegar brine infused with warm spices like mustard seed, turmeric, and celery seed.
The process is surprisingly simple, though it does require some patience as the vegetables soften and the flavors meld together. Many home cooks find that making chow chow is one of the most rewarding preservation projects, as the results are shelf-stable and only improve with time. Whether you’re canning for the first time or you’re a seasoned preserver, this recipe will guide you through every step to create restaurant-quality results.
I’ve refined this recipe over years of experimentation, testing different vegetable ratios and spice combinations to achieve the perfect balance. The key is using fresh, crisp vegetables and not overcooking them—you want them to maintain a slight crunch even after the relish has been canned. The vinegar base provides the necessary acidity for safe preservation while adding that signature tangy punch that makes chow chow so addictive.
This recipe makes enough to fill several jars, making it perfect for gifting to friends and family or storing for your own use throughout the year. Serve it alongside shrimp scampi, with pickled red onions on charcuterie boards, or even spooned over cream cheese for an easy appetizer. For more preservation inspiration, check out Serious Eats’ preservation guides.
The process begins with preparing your vegetables, which involves careful chopping to ensure even cooking and consistent texture throughout the relish. You’ll combine everything in a large pot with a vinegar-based brine seasoned with mustard seed, turmeric, and other warming spices. The mixture simmers gently until the vegetables are tender but still maintain their structure, then it’s ladled into sterilized jars and processed in a boiling water bath for shelf stability.
One of the best things about making your own chow chow is customization. While this recipe follows the traditional Southern formula, you can adjust the heat level by adding jalapeños or red pepper flakes, incorporate more vegetables like carrots or celery, or even experiment with different vinegars for unique flavor profiles. Some regional variations include more sugar for a sweeter relish, while others reduce it for a more savory version.
For detailed canning instructions and troubleshooting tips, the New York Times cooking section offers excellent resources. Whether you’re preserving for the first time or refining your technique, understanding proper canning procedures ensures your chow chow stays fresh and safe for months of enjoyment.
Ingredients
- 1 medium head green cabbage, finely chopped (about 8 cups)
- 4 large green tomatoes, finely chopped (about 6 cups)
- 3 large sweet onions, finely chopped (about 4 cups)
- 2 large red bell peppers, finely chopped (about 2 cups)
- 2 large green bell peppers, finely chopped (about 2 cups)
- 3 tablespoons pickling salt
- 3 cups apple cider vinegar
- 1½ cups granulated sugar
- 2 tablespoons yellow mustard seeds
- 1 tablespoon celery seeds
- 1 tablespoon whole black peppercorns
- 1 tablespoon turmeric
- 1 teaspoon red pepper flakes
- ½ teaspoon ground cloves
- 4 whole garlic cloves, peeled
- Water as needed
Instructions
- Prepare your vegetables by washing them thoroughly under cool running water. Pat dry with clean kitchen towels and chop each ingredient finely—you want uniform pieces about ¼-inch in size for consistent cooking and texture.
- Place all chopped vegetables in a large, non-reactive pot (stainless steel or enameled cast iron works best). Sprinkle the pickling salt evenly over the vegetables and stir well to distribute it throughout.
- Let the salted vegetables sit at room temperature for 2-3 hours, stirring occasionally. This draws out excess moisture from the vegetables, which helps them maintain their crispness and prevents the finished relish from being too watery.
- After the resting period, drain the vegetables through a colander, pressing gently to remove excess liquid. Return the drained vegetables to the pot.
- Add the apple cider vinegar and granulated sugar to the pot with the vegetables. Stir well to combine, ensuring the sugar begins to dissolve in the vinegar.
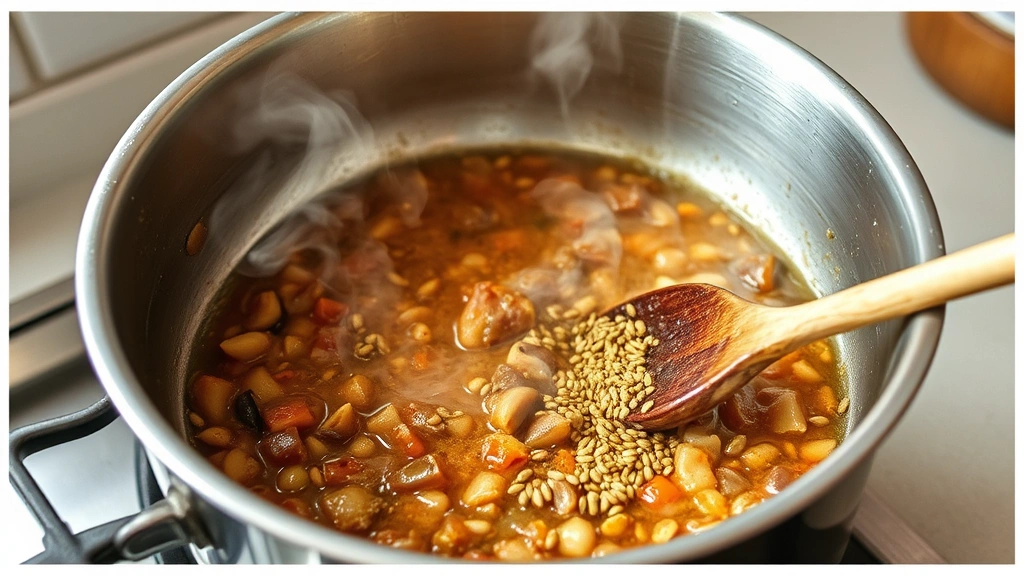
- In a small bowl, combine the mustard seeds, celery seeds, black peppercorns, turmeric, red pepper flakes, and ground cloves. Add these spices to the pot along with the whole garlic cloves.
- Place the pot over medium-high heat and bring the mixture to a gentle boil, stirring occasionally to ensure the sugar fully dissolves and flavors distribute evenly.
- Once boiling, reduce the heat to medium and simmer for 20-25 minutes, stirring every few minutes. The vegetables should become tender while maintaining a slight firmness—they should not become mushy.
- While the relish simmers, prepare your canning jars by washing them in hot soapy water and rinsing thoroughly. Sterilize them by placing in a boiling water bath for 10 minutes, then remove and keep warm.
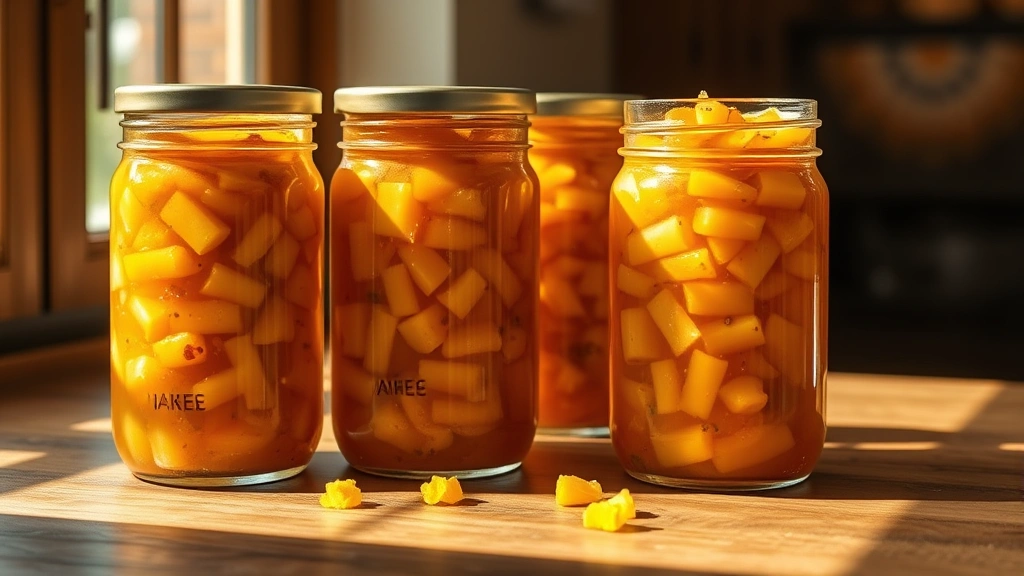
- Using a clean kitchen towel, remove the jars from the hot water and place them upright on a clean surface. You’ll need about 6-8 pint jars depending on how much liquid remains in your relish.
- Carefully ladle the hot chow chow relish into the prepared jars, filling each to about ½ inch from the top. Use a clean knife or bubble remover to release any air pockets trapped in the relish.
- Wipe the rims of each jar with a clean, damp cloth to ensure no relish particles interfere with the seal.
- Place sterilized lids on each jar and screw the bands on fingertight—not too tight, as steam needs to escape during processing.
- Place the filled jars into a boiling water bath canner, ensuring they are covered by at least 1 inch of water. Bring the water to a rolling boil.
- Process the jars for 15 minutes at a rolling boil (adjust time if you’re at high altitude—add 1 minute for every 1,000 feet above sea level).
- Carefully remove the jars from the boiling water bath using a jar lifter and place them on a clean kitchen towel, spacing them apart so air can circulate.
- Allow the jars to cool completely at room temperature—do not move them or tighten the bands. As they cool, you should hear the satisfying ‘ping’ of the lids sealing.
- Once completely cool (about 12 hours), check the seals by pressing the center of each lid. If it stays depressed and doesn’t pop back, the jar is properly sealed. Any unsealed jars should be refrigerated and used within a few weeks.
- Label your jars with the contents and date, then store in a cool, dark place for up to one year. Refrigerate after opening and use within 3-4 weeks.
Pro Tips
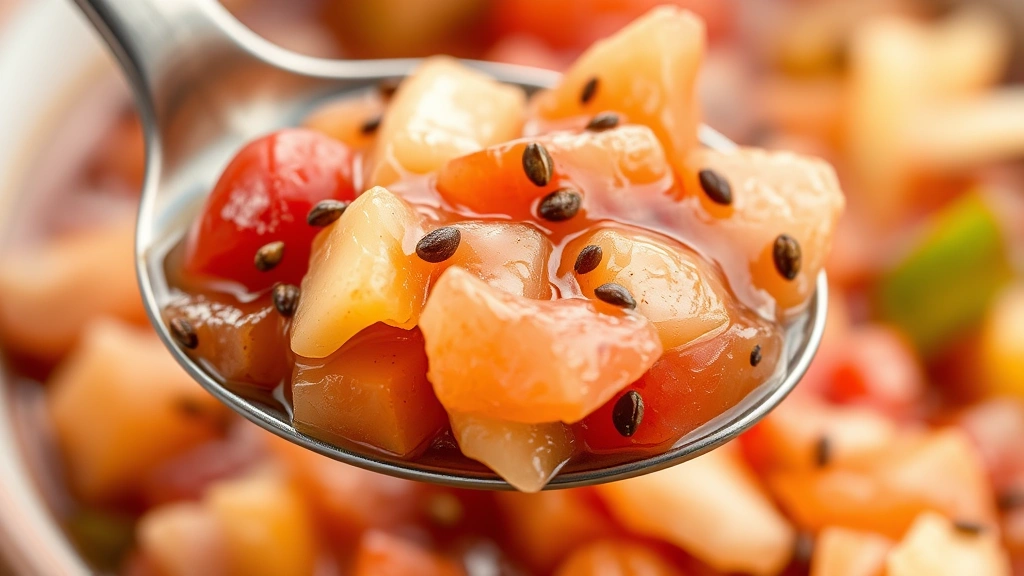
- Chow chow relish is best served as a condiment alongside hot dogs, barbecue, pulled pork sandwiches, or grilled meats. It also pairs beautifully with cheese and crackers on a charcuterie board.
- For a spicier version, increase the red pepper flakes to 1½-2 teaspoons or add fresh jalapeños to the chopped vegetables. For a sweeter relish, increase the sugar to 2 cups.
- The vegetables will continue to soften slightly as the relish sits after canning, so don’t be concerned if they’re slightly firmer than you’d like immediately after cooking—they’ll reach perfect texture within a few days.
- If you prefer a thicker relish, drain additional liquid through a fine-mesh strainer before canning. This also makes it easier to fit everything into jars.
- This recipe can be made without canning by storing it in sterilized jars in the refrigerator for up to 3 months. Simply skip the water bath processing step.
- The mustard seeds add both flavor and visual appeal—their bright yellow color becomes more pronounced as the relish ages. Don’t skip them.
- Different vinegars will produce slightly different flavors: white vinegar creates a cleaner taste, while rice vinegar adds subtle sweetness. Apple cider vinegar provides the most traditional Southern flavor profile.
- Always use fresh, crisp vegetables for the best results. Older vegetables may release too much water and create a runny relish.
- When gifting jars, include serving suggestions and storage instructions. The relish is shelf-stable for up to one year unopened, but flavor peaks within the first 6 months.
- If you notice any cloudiness or unusual odors when opening a jar, discard it immediately. Properly processed and sealed jars should remain shelf-stable and safe to eat.