
There’s something absolutely magical about homemade Christmas candy that simply cannot be replicated by store-bought versions. The aroma of butter and sugar caramelizing in your kitchen, the anticipation as you’re pulling taffy or tempering chocolate, and that first bite of candy you’ve created with your own two hands—it’s the essence of holiday magic wrapped up in sweetness.
I’ve been making Christmas candy for decades now, and I can confidently say that the best candies are the ones made with love, patience, and quality ingredients. Whether you’re a seasoned candy maker or attempting your first batch this season, this guide will walk you through creating show-stopping confections that’ll have your family and friends asking for the recipe.
What makes Christmas candy special isn’t just the taste—it’s the tradition. These recipes have been passed down through generations, perfected over countless holiday seasons, and they deserve a place on your festive table. The beauty of homemade candy is that you control exactly what goes into each piece, ensuring that every single bite is bursting with genuine flavor and quality ingredients.
Let me share my favorite go-to Christmas candy recipe that never fails to impress. This recipe combines classic technique with modern convenience, making it accessible for anyone who wants to try their hand at candy making. The key to success is understanding the science behind sugar, temperature control, and patience. I’ll walk you through every step, from preparing your ingredients to packaging your finished candy beautifully for gifting.
Before we dive in, I want to mention that candy making is as much about the journey as it is the destination. Don’t be intimidated by the process—with proper guidance and the right tools, you’ll create candy that tastes like it came straight from an upscale confectionery shop. And honestly, homemade candy makes such a thoughtful, personal gift during the holiday season. Your loved ones will cherish it far more than anything store-bought.
Check out my Best Heavy Cream Alfredo Sauce Recipe if you’re planning a full holiday menu, and don’t miss my Easy Chicken Alfredo Recipe for a festive dinner. For dessert inspiration, my Delicious Heavy Cream Pasta Recipe offers unique flavor combinations. And if you want to round out your holiday spread, try my Best Pickled Red Onion Recipe or my Best Chickpea Salad Recipe for sides that’ll complement your holiday meal beautifully.
For additional inspiration and techniques, check out Bon Appétit’s candy collection, explore Serious Eats candy guides, and visit New York Times Cooking for additional holiday recipes and techniques. These resources offer wonderful complementary recipes and professional tips that can elevate your candy-making game even further.
Ingredients
- 2 cups granulated sugar
- ¾ cup light corn syrup
- ¾ cup water
- ¼ teaspoon cream of tartar
- ¼ teaspoon salt
- 3 tablespoons butter
- 1 teaspoon vanilla extract
- ½ teaspoon peppermint extract (or 1 teaspoon for stronger flavor)
- ½ cup powdered sugar for dusting
- ¼ teaspoon peppermint oil (optional, for extra flavor)
- Red or green gel food coloring (optional)
- Cooking spray or butter for greasing
- 1 pound white chocolate for coating (optional)
- 2 tablespoons coconut oil (if using chocolate coating)
Instructions
- Gather all your ingredients and equipment before beginning. You’ll need a candy thermometer, a heavy-bottomed saucepan, a wooden spoon, parchment paper, and a 9×13 inch baking dish. Prepare your workspace by covering counters with parchment paper—this candy can get sticky.
- Lightly grease your 9×13 inch baking dish with cooking spray or butter. Line it with parchment paper, allowing some overhang on the sides for easy removal. Set aside.
- In your heavy-bottomed saucepan, combine the granulated sugar, light corn syrup, water, cream of tartar, and salt. Stir these ingredients together over medium heat until the sugar dissolves completely, about 3-5 minutes.
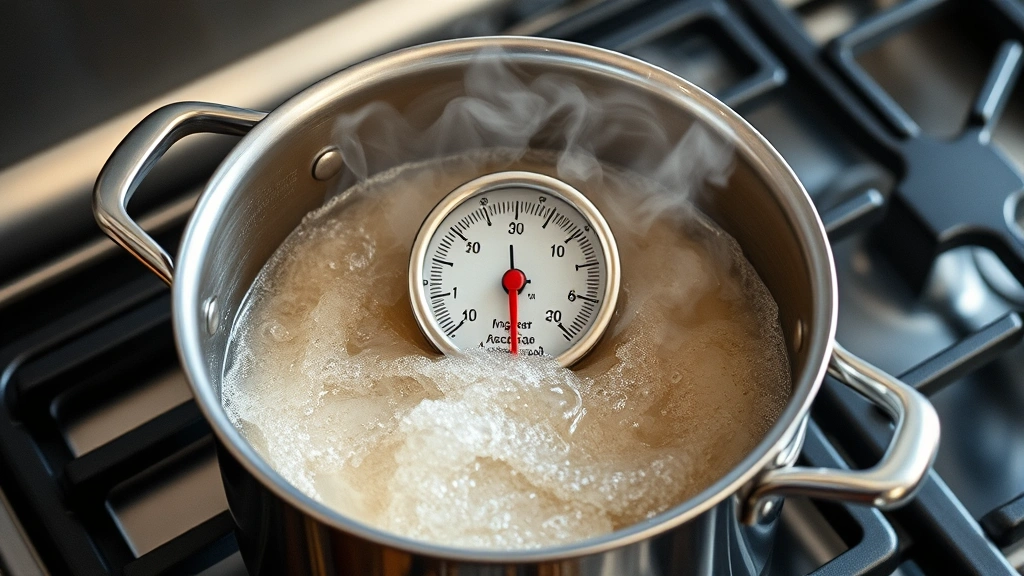
- Once the sugar mixture is dissolved, stop stirring. Insert your candy thermometer into the mixture, ensuring the bulb is submerged but not touching the bottom of the pan. Increase heat to medium-high.
- Allow the mixture to cook without stirring, watching the temperature carefully. You’re aiming for the hard-crack stage, which is 300-310°F. This typically takes 15-20 minutes. You may notice the mixture bubbling—this is normal and expected.
- While the candy is cooking, add the butter, vanilla extract, and peppermint extract to a small bowl. Have this ready but don’t add it to the hot mixture yet. If using food coloring, add just 2-3 drops to this mixture for a subtle color.
- When the candy reaches 300°F, immediately remove the saucepan from heat. Working quickly but carefully, pour the hot mixture into your prepared baking dish. Do not scrape the bottom of the pan, as this can cause crystallization.
- Allow the candy to cool at room temperature for at least 2-3 hours, or until it’s completely hardened and no longer tacky to the touch. You can speed this up slightly in a cool location, but avoid the refrigerator.
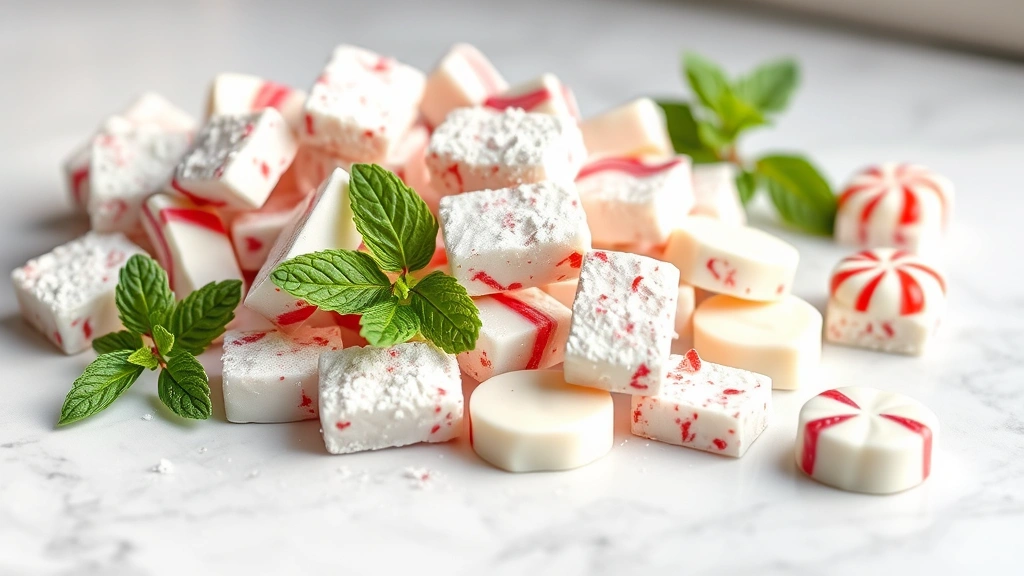
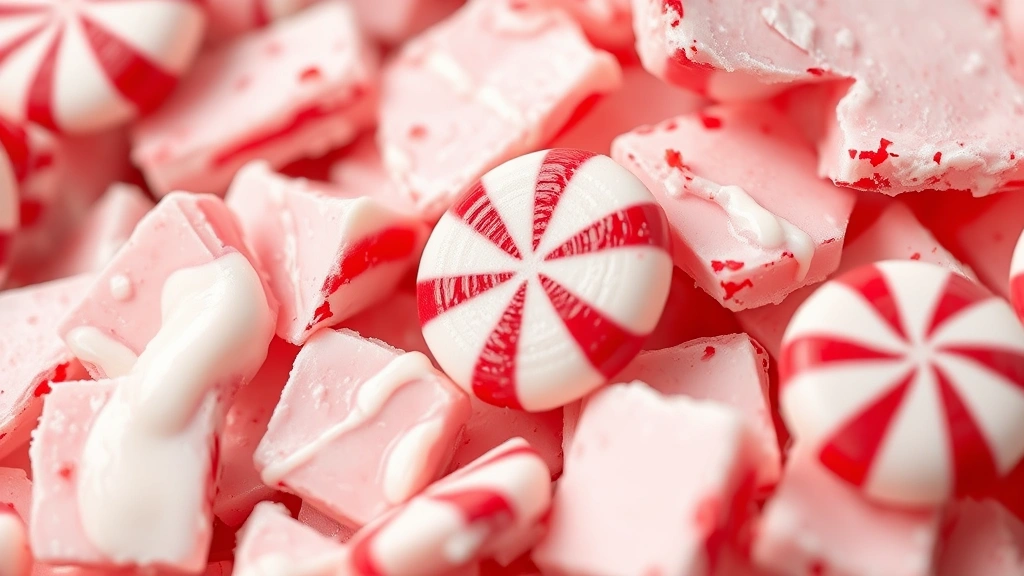
- Once hardened, remove the candy from the baking dish using the parchment paper overhang. Place it on a cutting board and break it into bite-sized pieces using your hands or a candy hammer.
- If making chocolate-coated peppermint candy, melt your white chocolate with coconut oil in a double boiler over low heat, stirring frequently until completely smooth.
- Dip each piece of peppermint candy into the melted white chocolate, allowing excess to drip off. Place coated pieces on a fresh sheet of parchment paper to set.
- For dusting without chocolate, toss pieces in powdered sugar mixed with a pinch of salt and extra peppermint extract for enhanced flavor.
- Store finished candy in an airtight container at room temperature, separating layers with parchment paper. Properly stored candy will keep for up to 2 weeks, though it rarely lasts that long during the holiday season!
Pro Tips
Cream of tartar is essential in this recipe as it prevents the sugar from crystallizing and becoming grainy. Don’t skip this ingredient, as it’s crucial to achieving that smooth, glassy texture.
Timing is everything when working with hot sugar. Once you reach the hard-crack stage, work quickly but safely. The mixture will harden rapidly, so have your workspace completely prepared before you begin cooking.
For a less intense peppermint flavor, use just the ½ teaspoon peppermint extract. If you prefer a more robust flavor, increase to 1 full teaspoon or add the optional peppermint oil.
This candy makes an absolutely gorgeous gift when packaged in clear cellophane bags tied with festive ribbon. Layer different colored pieces if you make multiple batches with food coloring for a stunning presentation.
If your candy turns out sticky or doesn’t harden properly, the temperature likely didn’t reach the hard-crack stage. This is a common beginner mistake. Invest in an accurate thermometer and monitor closely.
For chocolate-coated versions, allow the chocolate coating to set completely before storing. If pieces stick together, separate them gently and store with parchment between layers.
This recipe is naturally gluten-free and dairy-free if you omit the butter and use dairy-free white chocolate for coating. However, the butter adds wonderful flavor and helps with texture.
Peppermint candy can be made in advance and stored for several weeks, making it perfect for holiday preparation. Make batches throughout December and build your gift stash.
If you’re nervous about candy making, start with this recipe. It’s forgiving, reliable, and the results are consistently delicious. Once you’ve mastered this technique, you’ll have the confidence to try other candy recipes.
Pingback: How to make the BEST Hobo Casserole Recipe – So Easy! – Simple Recipe Finder