
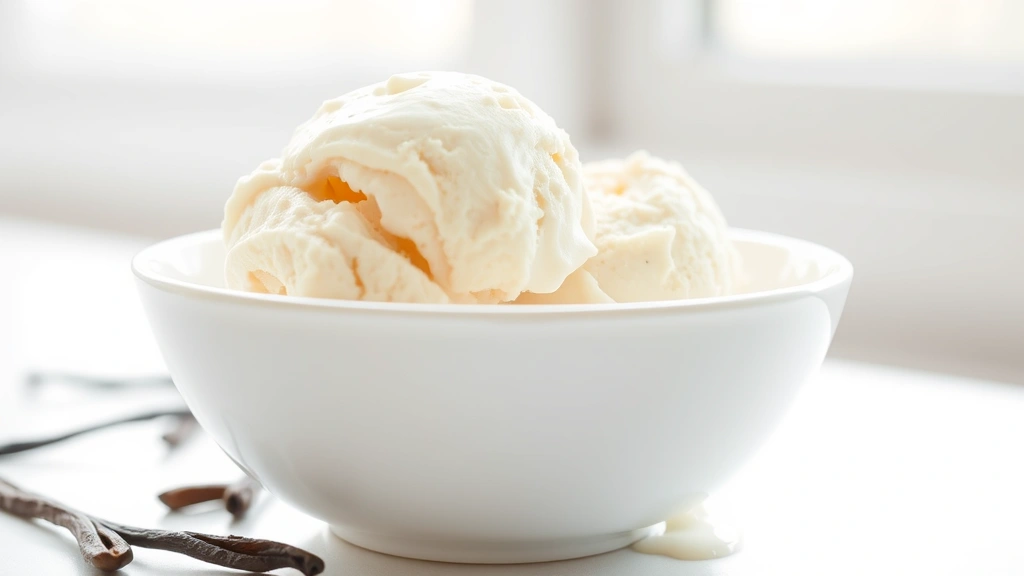
There’s something absolutely magical about homemade vanilla ice cream, especially when you make it in a Cuisinart ice cream maker. This recipe is the real deal – creamy, dreamy, and so much better than anything you’ll find in a store. The secret? Using quality vanilla extract, fresh eggs, and letting your custard base chill properly before churning.
I’ve been making ice cream at home for years, and honestly, investing in a Cuisinart ice cream maker was one of the best kitchen decisions I ever made. It takes the guesswork out of churning and gives you that perfect soft-serve consistency that’s just *chef’s kiss*. This vanilla ice cream is my go-to recipe for everything from simple sundaes to topping warm pie.
What makes this recipe special is the balance of flavors and the technique. We’re using a custard base, which means cooking the egg yolks with sugar until they’re pale and fluffy, then tempering them with hot cream. This method creates an incredibly smooth, luxurious texture that’s impossible to achieve any other way. The vanilla is where you don’t want to skimp – use pure vanilla extract or, if you’re feeling fancy, real vanilla beans scraped fresh.
One thing I always tell people is that patience is key here. Your custard base needs to chill thoroughly (I recommend overnight) before churning. This ensures the best texture and helps your Cuisinart work its magic more efficiently. The colder the base, the faster it’ll freeze, and the better your ice cream will turn out.
This recipe makes enough for a dinner party or family gathering, and it keeps beautifully in your freezer for up to a week. You can serve it plain with fresh berries, use it as a base for dessert toppings, or get creative with mix-ins. I’ve even made accompaniments that pair beautifully with homemade vanilla ice cream for special occasions.
If you’re new to making ice cream at home, this vanilla recipe is the perfect starting point. It teaches you the fundamentals while delivering restaurant-quality results. Once you master this, you’ll be making creative variations and experimenting with all sorts of flavors. For more inspiration on making the most of cream in your kitchen, check out this heavy cream pasta recipe.
Ready to make the best vanilla ice cream of your life? Let’s get started! This recipe is foolproof, elegant, and absolutely delicious. Your Cuisinart ice cream maker is about to become your favorite appliance, and you’re going to be making this over and over again. For even more dessert inspiration, explore this recipe collection to round out your entertaining menu.
Ingredients
- 2 cups heavy cream
- 1 cup whole milk
- 1 vanilla bean or 2 teaspoons pure vanilla extract
- 5 large egg yolks
- 3/4 cup granulated sugar
- 1/4 teaspoon sea salt
- 2 tablespoons vodka or corn syrup (optional, prevents crystallization)
Instructions
- Pour the heavy cream and whole milk into a medium saucepan. If using a vanilla bean, split it lengthwise and scrape out the seeds, adding both the seeds and the bean to the cream mixture. Heat over medium heat, stirring occasionally, until the mixture just begins to steam and small bubbles form around the edges (do not let it boil). Remove from heat and let it steep for 15-20 minutes if using a vanilla bean, or simply set aside if using extract.
- While the cream mixture steeps, prepare an ice bath by filling a large bowl with ice and a small amount of water. Place a medium metal bowl on top of the ice bath and set aside.
- In another medium bowl, whisk together the egg yolks and granulated sugar. Whisk vigorously for 2-3 minutes until the mixture becomes pale, thick, and ribbony. This step is crucial for creating a smooth, creamy ice cream.
- Slowly pour about 1/2 cup of the hot cream mixture into the egg yolk mixture while whisking constantly. This tempers the eggs and prevents them from scrambling. Continue whisking as you add the cream.
- Pour the tempered egg mixture back into the saucepan with the remaining cream, whisking constantly. Cook over medium heat, stirring frequently with a wooden spoon or silicone spatula, for 8-10 minutes until the mixture reaches 160°F on an instant-read thermometer and coats the back of the spoon (when you run your finger across the spoon, it should leave a trail).
- Remove from heat and stir in the sea salt. If using vanilla extract, add it now and stir well. Pour the custard through a fine-mesh strainer into the metal bowl set in the ice bath to remove any cooked egg bits and to cool the mixture quickly.
- Let the custard cool in the ice bath for 10-15 minutes, stirring occasionally, until it reaches room temperature. If desired, add the vodka or corn syrup at this point (this helps prevent ice crystals from forming).
- Transfer the cooled custard to an airtight container and refrigerate for at least 8 hours or overnight. The colder the base, the better your ice cream will turn out.
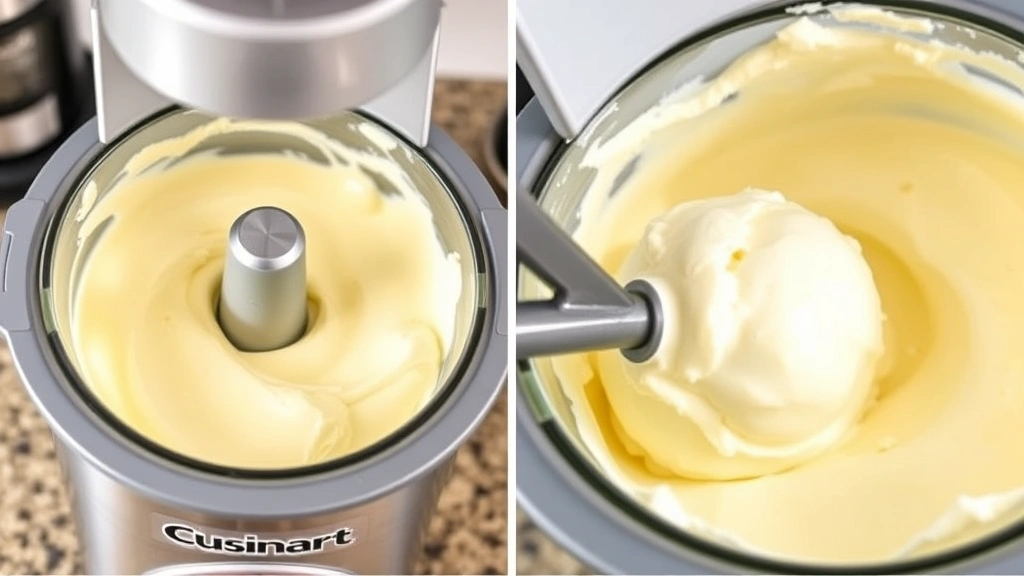
- Remove your Cuisinart ice cream maker’s freezer bowl from the freezer (it should have been freezing for at least 24 hours). Insert the dasher and pour the chilled custard into the bowl.
- Turn on the machine and let it churn for 20-25 minutes, until the ice cream reaches a soft-serve consistency. You’ll know it’s ready when the mixture is thick and holds soft peaks.
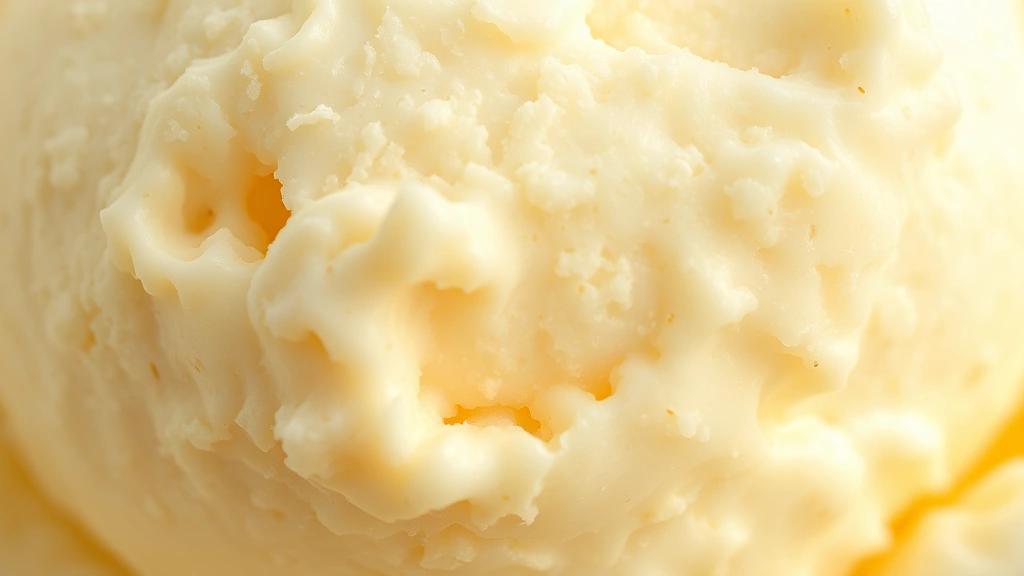
- Serve immediately for soft-serve consistency, or transfer to an airtight container and freeze for an additional 4-6 hours for scoopable ice cream.
- To serve, let the ice cream sit at room temperature for 5 minutes before scooping for easier portioning.
Pro Tips
Use high-quality vanilla extract or fresh vanilla beans if possible. The difference in flavor is remarkable and worth the investment.
The tempering step (slowly adding hot cream to eggs) is essential to prevent scrambled eggs in your ice cream. Go slowly and whisk constantly.
If you don’t have an instant-read thermometer, the custard should coat the back of a spoon and feel slightly thick when you run your finger across it.
Don’t skip the overnight chilling step. The custard needs to be very cold before churning for the best texture and consistency.
Add vodka or corn syrup if desired – these prevent the formation of large ice crystals and create a smoother, creamier texture. Vodka won’t freeze at typical freezer temperatures.
For vanilla bean ice cream, don’t discard the bean pod after steeping – it adds wonderful flecks and authentic appearance to the final product.
You can customize this recipe by adding mix-ins during the last 2-3 minutes of churning – try crushed cookies, brownie pieces, or caramel swirls.
Store your finished ice cream in an airtight container to prevent freezer burn and off-flavors. It keeps beautifully for up to one week.
If your custard breaks or separates, strain it through cheesecloth and try again – most issues can be resolved.
For a lighter version, use 1.5 cups heavy cream and 1.5 cups milk instead of the traditional 2:1 ratio.
Room temperature matters – if your kitchen is very warm, work quickly and keep all bowls and utensils chilled.
Pingback: How to Make Simple Stewed Apples Recipe (So Tasty!) – Simple Recipe Finder