
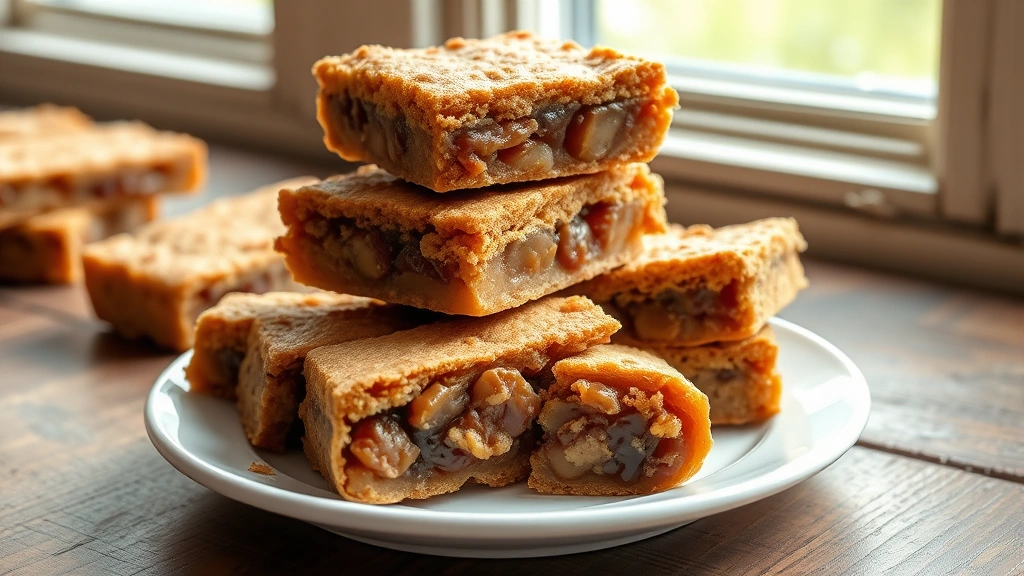
There’s something absolutely magical about date bars – they’re the perfect balance of chewy, buttery, and subtly sweet that makes them impossible to stop eating! I’ve been making these for years, and I’m so excited to share my foolproof method with you today.
Date bars are one of those classic treats that deserve a permanent spot in your dessert rotation. They’re incredibly versatile, naturally sweetened, and packed with wholesome dates that provide natural fiber and nutrients. What I love most about this recipe is how simple the ingredient list is – no fancy techniques or hard-to-find items required. Just pure, delicious comfort in every bite.
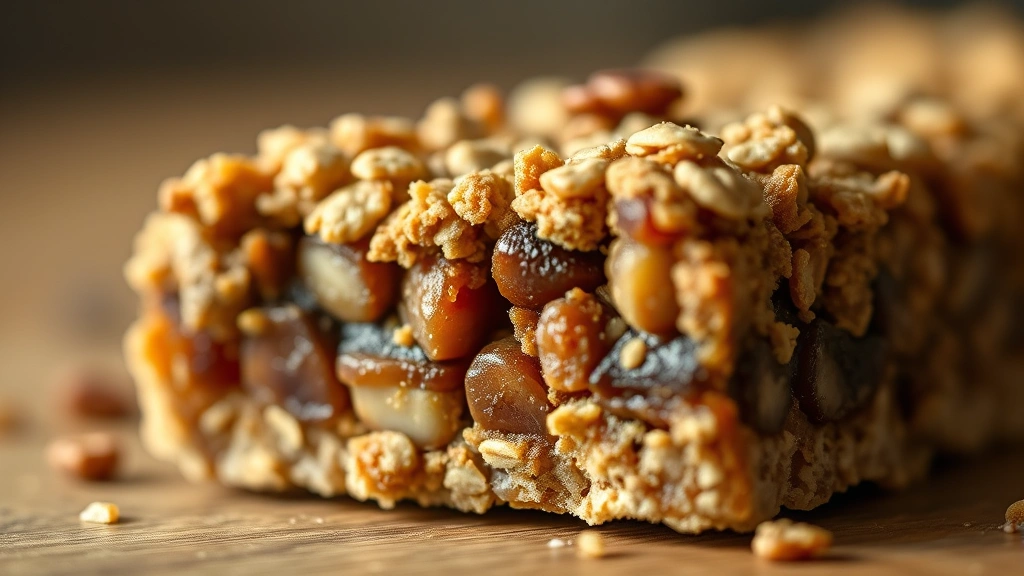
The secret to the BEST date bars lies in a few key components: perfectly soft dates that create a luscious filling, a buttery oat crust that’s both crispy and tender, and the ideal ratio of filling to base. I’ve tested this recipe countless times to get it just right, and I’m confident you’ll agree these are absolutely incredible.
What makes these date bars stand out is the combination of textures and flavors. The oat base provides a wonderful nutty backbone, while the date filling offers natural sweetness and a luxurious texture. It’s like biting into a cloud of dates wrapped in a buttery oat blanket – pure heaven! These bars are perfect for lunch boxes, afternoon snacks, or when you want something sweet without feeling overly indulgent.
If you’re looking for easy dessert recipes that actually impress, these date bars are your answer. They’re also wonderfully adaptable – you can add spiced oat bars by incorporating cinnamon and nutmeg, or make brown butter date bars for extra depth of flavor. For more inspiration on dates in baking, check out Bon Appétit’s dessert collection and Serious Eats baking guides.
These bars also make fantastic gifts during the holidays – just wrap them up in parchment paper and tie with twine for a homemade touch that everyone will adore. I promise once you make these, you’ll be making them on repeat. Let’s get baking!
Ingredients
- 2 cups pitted dates (about 1 pound), roughly chopped
- 1 cup hot water
- 1 teaspoon vanilla extract
- 1/2 teaspoon baking soda
- 2 cups old-fashioned rolled oats
- 1 1/2 cups all-purpose flour
- 3/4 cup light brown sugar, packed
- 1/2 teaspoon salt
- 1/2 teaspoon cinnamon (optional but recommended)
- 1 cup (2 sticks) unsalted butter, softened
- 2 tablespoons honey or maple syrup
Instructions
- Preheat your oven to 350°F (175°C). Line a 9×13 inch baking pan with parchment paper, leaving some overhang on the sides for easy removal later – this is a game-changer!
- In a medium bowl, combine the chopped dates, hot water, vanilla extract, and baking soda. Stir well and let sit for about 5 minutes until the dates soften and absorb the liquid. The mixture should become thick and paste-like.
- Using an immersion blender or regular blender, blend the date mixture until it reaches your desired consistency – I like mine slightly chunky but spreadable, not completely smooth. Set aside to cool slightly.
- In a large bowl, whisk together the oats, flour, brown sugar, salt, and cinnamon if using. Make sure to break up any brown sugar clumps so everything combines evenly.
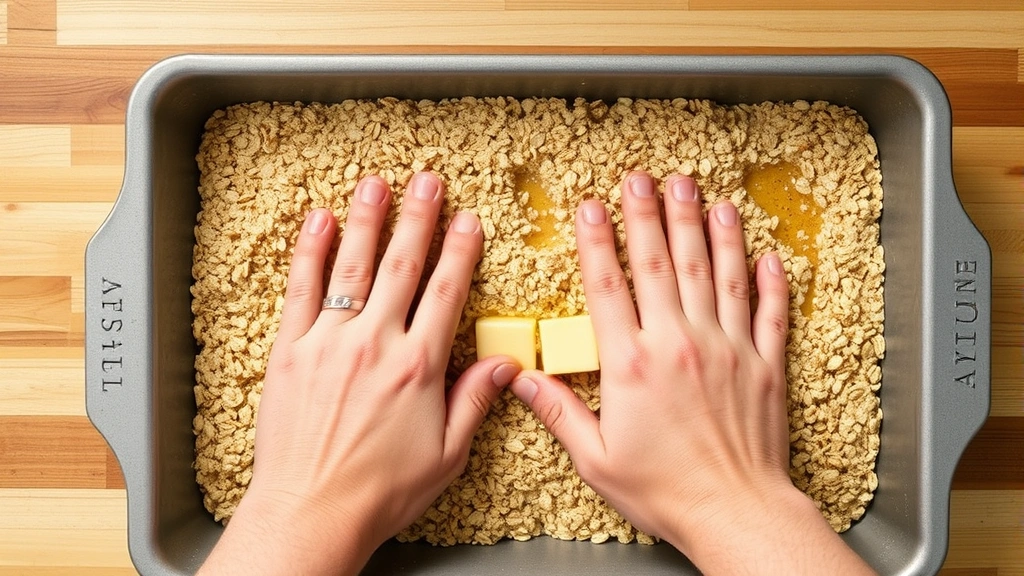
- Add the softened butter to the oat mixture and use a pastry cutter, two forks, or your fingertips to work the butter into the dry ingredients until the mixture resembles coarse breadcrumbs with some pea-sized pieces of butter remaining.
- Measure out about 3 cups of the oat mixture and firmly press it into the prepared baking pan, creating an even base layer. This will be your crust.
- Gently spread the cooled date filling evenly over the oat base, leaving about a 1/4 inch border. Use an offset spatula or the back of a spoon to smooth it out.
- Sprinkle the remaining oat mixture evenly over the date filling, then gently press down with your palms to create a cohesive top layer – not too hard or the bars will be dense.
- Drizzle the honey or maple syrup over the top layer for extra richness and a beautiful finish.
- Bake for 30-35 minutes until the top is golden brown and the edges are just beginning to pull away from the sides of the pan. The center should be set but still have a slight give when gently pressed.
- Remove from the oven and let cool in the pan for at least 15 minutes – this is crucial for clean cuts! If you’re patient, cooling completely is ideal.
- Using the parchment paper overhang, carefully lift the entire bar out of the pan and transfer to a cutting board. Cut into 12-16 bars using a sharp knife dipped in hot water and wiped clean between cuts for neat edges.
- Store the bars in an airtight container at room temperature for up to 5 days, or freeze for up to 3 months. These taste amazing straight from the freezer too!
Pro Tips
- **Date Selection Matters**: Use soft, fresh dates like Medjool or Deglet Noor for the best results. If your dates are on the dry side, increase the hot water to 1 1/4 cups.
- **Texture Tips**: If you prefer a chunkier filling, pulse the dates rather than fully blending. For a completely smooth filling, blend longer. Both versions are delicious!
- **Brown Butter Upgrade**: For an elevated version, brown your butter before incorporating it into the oat mixture. This adds incredible depth of flavor that takes these bars to the next level.
- **Spice Variations**: Add 1/4 teaspoon cardamom, 1/8 teaspoon nutmeg, or a pinch of black pepper to the oat mixture for sophisticated flavor notes.
- **Cutting Secrets**: A serrated bread knife works wonderfully for cutting these bars. Dip it in hot water and wipe between cuts for the cleanest edges. Alternatively, use dental floss in a sawing motion.
- **Make-Ahead Magic**: You can prepare the date filling and oat mixture separately up to 24 hours ahead. Assemble and bake when ready – perfect for meal prep or entertaining.
- **Freezer Friendly**: These bars freeze beautifully for up to 3 months. Wrap individually in plastic wrap then place in a freezer bag. Thaw at room temperature for 30 minutes before serving.
- **Flavor Pairings**: These bars pair beautifully with black coffee, herbal tea, or a cold glass of milk. They’re also wonderful alongside vanilla ice cream for an indulgent dessert.
- **Dietary Adaptations**: Substitute rolled oats with gluten-free oats for a gluten-free version. Use coconut oil instead of butter for dairy-free bars.
- **Shelf Life**: Stored properly in an airtight container, these will keep for 5-7 days at room temperature, up to 10 days in the refrigerator, or 3 months frozen.
Pingback: How to Make the Perfect Roasted Duck Recipe! – Simple Recipe Finder