
Dave’s Hot Chicken has taken the nation by storm with its perfectly crispy, impossibly juicy fried chicken coated in a signature spicy sauce. The beauty of this restaurant favorite is that you can absolutely recreate it at home with the right technique and ingredients. This recipe captures that iconic flavor profile—the addictive heat, the tender chicken, and those crispy edges that keep you coming back for more.
The secret to nailing Dave’s Hot Chicken recipe lies in three key components: a well-seasoned brine that keeps the chicken moist, a perfectly balanced spice blend in the coating, and the iconic hot sauce that ties everything together. What makes this recipe so special is how the heat builds gradually, starting with a subtle kick and developing into a satisfying burn that’s more about flavor than pure spice.
What I love about making this at home is the control you have over every element. You can adjust the heat level to your preference, use the freshest chicken possible, and customize the toppings to match your cravings. Whether you’re serving this to a crowd or meal-prepping for the week, this Dave’s Hot Chicken recipe delivers restaurant-quality results that will impress everyone at your table.
I recommend serving this with pickled red onions for brightness and acidity that cuts through the richness, or pair it with a fresh chickpea salad for a lighter side. The contrast of cool, crisp sides against the hot, tender chicken creates the ultimate eating experience. If you’re looking to make it a full meal, creamy sides like coleslaw or ranch dipping sauce are absolute must-haves.
For more fried chicken inspiration, check out Serious Eats’ chicken guides and Bon Appétit’s technique articles. You can also explore the New York Times Cooking section for additional fried chicken variations and Serious Eats’ recipe collection for complementary sides.
Ingredients
- 2 pounds boneless, skinless chicken breasts or 3 pounds bone-in, skin-on thighs
- 2 cups buttermilk
- 3 tablespoons salt
- 2 tablespoons brown sugar
- 1 tablespoon garlic powder
- 1 tablespoon onion powder
- 1 teaspoon cayenne pepper
- 1 teaspoon paprika
- 1 cup all-purpose flour
- 2 tablespoons cornstarch
- 1 tablespoon garlic powder (for coating)
- 1 tablespoon onion powder (for coating)
- 2 teaspoons cayenne pepper (for coating)
- 1 teaspoon paprika (for coating)
- 1 teaspoon salt (for coating)
- ½ teaspoon black pepper (for coating)
- Oil for frying (vegetable or peanut oil)
- 6 tablespoons unsalted butter
- 4 teaspoons cayenne pepper (for sauce)
- 2 teaspoons garlic powder (for sauce)
- 1 teaspoon paprika (for sauce)
- ½ teaspoon onion powder (for sauce)
- ¼ teaspoon salt (for sauce)
- 2 tablespoons hot sauce (Frank’s RedHot or similar)
- 1 tablespoon honey
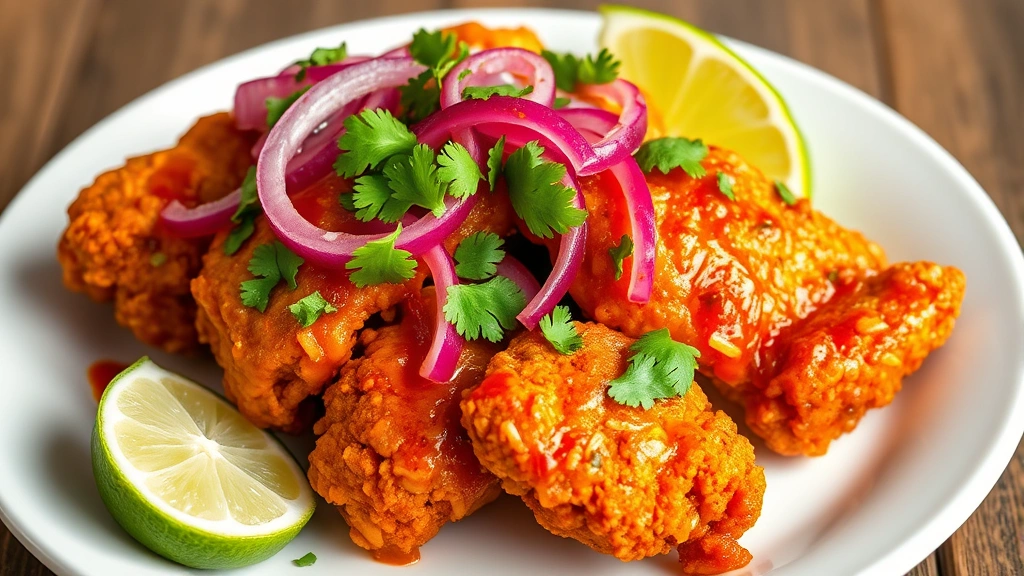
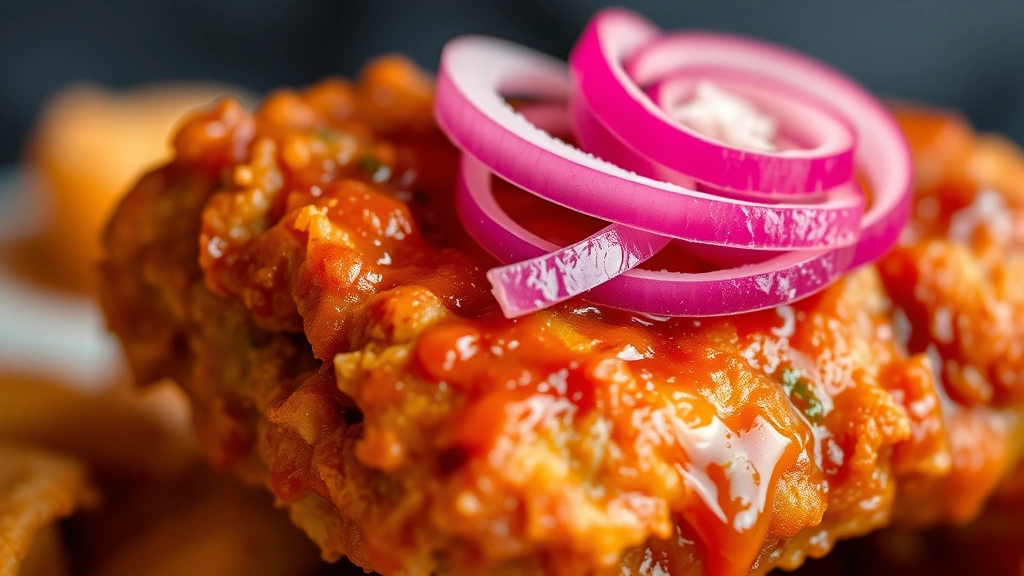
- Pickled red onions for serving
- Fresh cilantro or parsley for garnish
- Lime wedges for serving
Instructions
- Make the brine by combining buttermilk, salt, brown sugar, garlic powder, onion powder, cayenne pepper, and paprika in a large bowl, whisking until the sugar and salt are completely dissolved.
- Place your chicken pieces in a large zip-top bag or container and pour the brine over them, ensuring all pieces are fully submerged. If needed, use a plate to weigh down the chicken.
- Cover and refrigerate for at least 8 hours, but preferably overnight. This step is crucial for keeping the chicken incredibly moist during frying.
- Remove the chicken from the brine 30 minutes before frying to bring it closer to room temperature.
- In a shallow bowl, whisk together flour, cornstarch, garlic powder, onion powder, cayenne pepper, paprika, salt, and black pepper. This dry coating mixture is what creates that signature crispy exterior.
- Working with one piece at a time, remove the chicken from the brine, allowing excess brine to drip back into the container. Do not pat dry—the moisture helps the coating adhere.
- Coat each piece thoroughly in the flour mixture, pressing gently so the coating adheres. Shake off any excess flour and place on a clean plate.
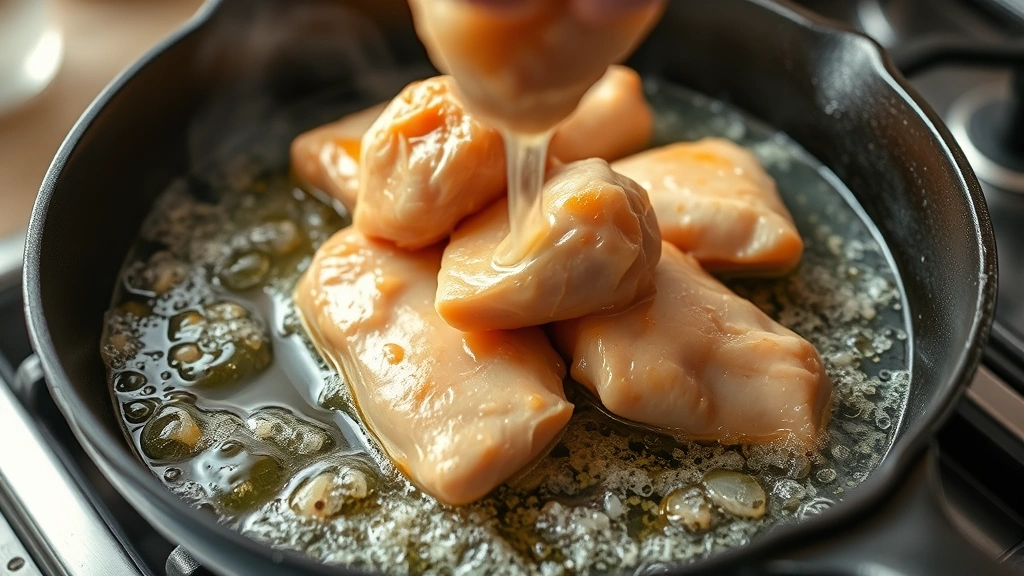
- Heat oil to 350°F in a heavy-bottomed pot or deep skillet. Use a thermometer to ensure accurate temperature—this is essential for crispy chicken that’s cooked through.
- Carefully place chicken pieces into the hot oil, being cautious of splashing. Work in batches to avoid overcrowding, which drops the oil temperature and causes greasy chicken.
- Fry for 12-15 minutes, depending on thickness, until the internal temperature reaches 165°F and the coating is deep golden brown.
- Remove chicken with a slotted spoon and place on a wire rack set over a paper towel-lined baking sheet.
- While the chicken is still hot, make the signature sauce by melting butter in a small saucepan over medium heat.
- Add cayenne pepper, garlic powder, paprika, onion powder, and salt to the melted butter, stirring constantly for about 1 minute until fragrant.
- Remove from heat and stir in hot sauce and honey, mixing until completely combined.
- Toss the hot chicken in the sauce immediately after frying, or brush the sauce onto each piece for a lighter application.
- Serve immediately topped with pickled red onions, fresh cilantro, and lime wedges on the side.
Pro Tips
The buttermilk brine isn’t just for flavor—the lactic acid in buttermilk breaks down the proteins in the chicken, making it incredibly tender and juicy. Don’t skip this step or try to rush it. Even 4 hours makes a difference, but overnight is ideal.
For extra crispy chicken, double-dredge by dipping brined chicken in flour, then back in the brine, then in flour again. This creates an incredibly crunchy crust that rivals the restaurant version.
The spice blend is completely customizable. If you prefer less heat, reduce the cayenne and add more paprika for color. For more heat, increase the cayenne or add a pinch of ghost pepper powder or habanero powder.
You can make the dry coating mixture ahead of time and store it in an airtight container for up to one week. The sauce can also be made ahead and gently reheated when needed.
Bone-in, skin-on chicken thighs are slightly more forgiving than breasts and stay juicier, but both work beautifully with this recipe. If using thighs, they may need an extra 2-3 minutes of frying time.
Leftovers can be refrigerated for up to four days and reheated in a 375°F oven for about 10 minutes to restore crispness.