
There’s nothing quite like the crisp, tangy bite of a homemade dill pickle—and honestly, once you learn how to make them yourself, you’ll wonder why you ever bought store-bought versions. This best dill pickle recipe is incredibly easy, requires minimal ingredients, and delivers that perfect balance of salty, sour, and herbaceous flavors that’ll have everyone asking for your secret.
Making dill pickles at home is one of those kitchen projects that feels fancy but is actually so simple. You don’t need any special equipment or canning knowledge—just fresh cucumbers, quality vinegar, aromatic dill, and a few pantry staples. Whether you’re a pickling novice or a seasoned pro, this recipe will become your go-to method for creating crispy, delicious pickles every single time.
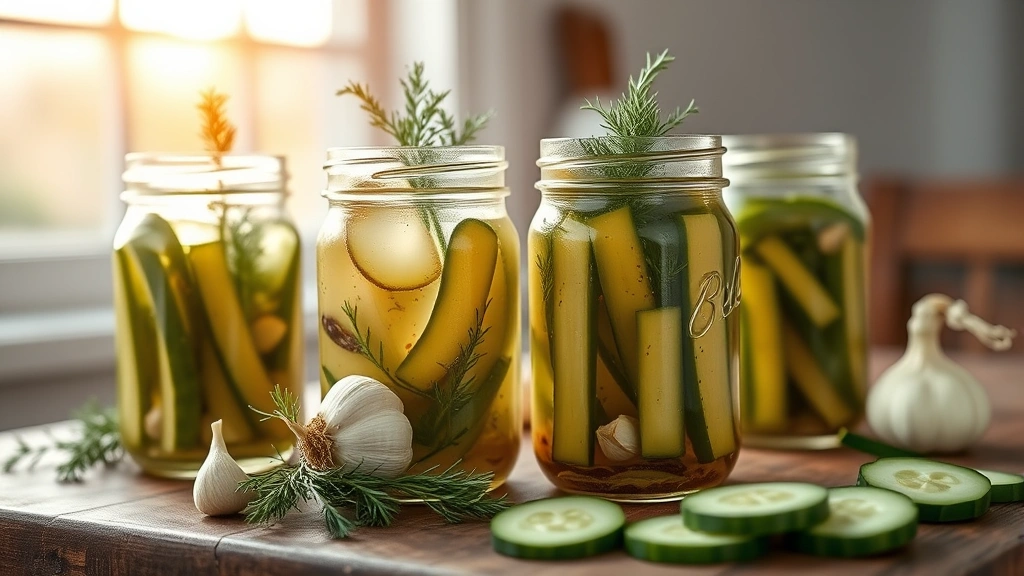
What makes this recipe truly the best is the combination of fresh dill (never dried—trust me on this), the perfect vinegar ratio, and the addition of grape leaves, which contain tannins that keep your pickles wonderfully crisp. The overnight refrigerator method means you’ll have ready-to-eat pickles by tomorrow, with no canning required. Plus, these pickles are incredibly versatile—serve them alongside Quick Tasty Bacon Carbonara for a light, brined counterpoint, add them to Best Chickpea Salad for extra tang, or enjoy them straight from the jar as a satisfying snack.
The beauty of homemade pickles is that you control every element. Want them spicier? Add red pepper flakes and jalapeños. Prefer them less acidic? Adjust the vinegar slightly. This recipe is your canvas, and once you master the basic formula, you can experiment endlessly. I’ve also included tips for variations and storage so your pickles stay perfectly crisp for weeks.
For more preservation techniques, check out our Easy Pickled Red Onion Recipe, which uses a similar vinegar-based method. The fundamental pickling principle applies across different vegetables—it’s all about achieving that perfect brine consistency and flavor balance.
According to Serious Eats’ comprehensive pickle guide, the key to crispy pickles lies in the presence of tannins and avoiding overcooking the cucumbers. This recipe incorporates both those principles for guaranteed results. Ready to become a pickle-making expert? Let’s get started!
Ingredients
- 2 pounds small to medium Kirby cucumbers (about 3-4 inches long), washed and trimmed
- 4 cups white vinegar or apple cider vinegar
- 2 cups water
- 3 tablespoons pickling salt or kosher salt (not iodized)
- 6-8 fresh dill heads or 12-15 fresh dill sprigs
- 4-6 garlic cloves, smashed
- 2 teaspoons black peppercorns
- 1 teaspoon red pepper flakes (optional, for heat)
- 4-6 bay leaves
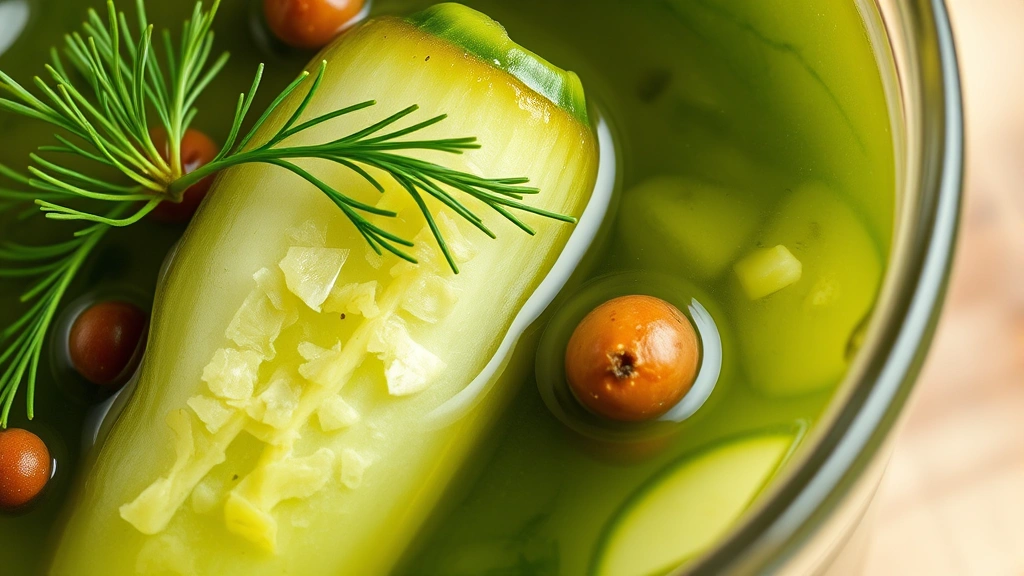
- 6-8 grape leaves or horseradish leaves (optional but recommended for crispness)
- 2-3 fresh tarragon sprigs (optional, for subtle flavor)
- 1 teaspoon mustard seeds (optional)
- 1 teaspoon coriander seeds (optional)
Instructions
- Prepare your cucumbers by washing them thoroughly under cool water and trimming off any blossom ends (the end opposite the stem). The blossom end contains enzymes that can make pickles softer, so removing it is crucial. Pat them dry with clean kitchen towels and set aside.
- Gather two clean quart-sized glass jars (or one 2-quart jar if you prefer). Wash them in hot soapy water and rinse thoroughly, or run them through the dishwasher. This step is important for food safety and extends your pickles’ shelf life.
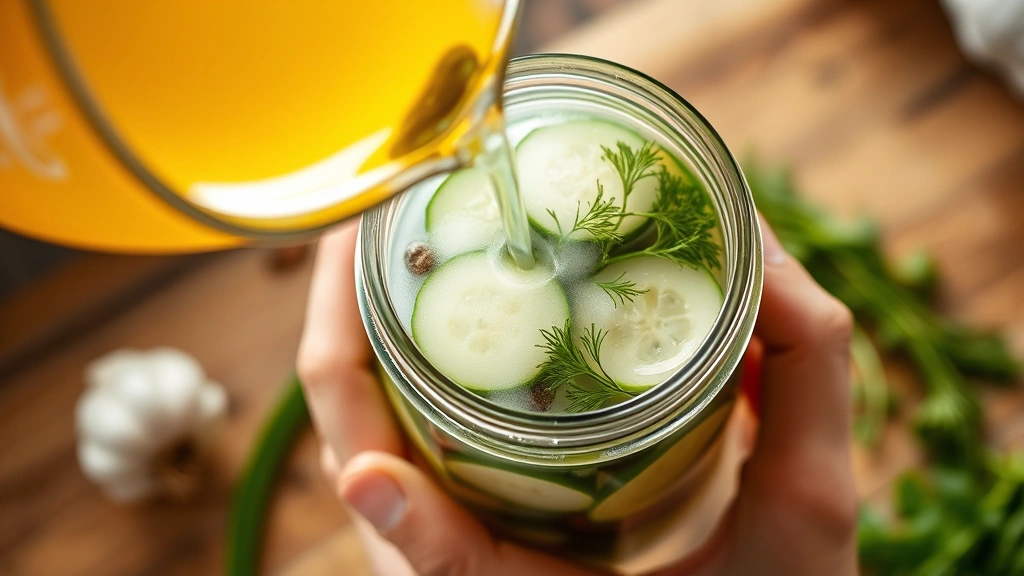
- In a large stainless steel pot, combine the vinegar, water, and pickling salt. Bring the mixture to a boil over medium-high heat, stirring occasionally to ensure the salt dissolves completely. This brine is your pickling liquid, and the salt is essential for both flavor and preservation.
- While the brine heats, prepare your jar inserts. Divide the fresh dill, smashed garlic cloves, black peppercorns, bay leaves, and grape leaves evenly between your jars. If using optional ingredients like red pepper flakes, tarragon, mustard seeds, or coriander seeds, distribute them now as well.
- Once the brine is boiling, carefully pack your clean cucumbers into the jars, standing them upright and packing them fairly tightly (they’ll soften slightly as they pickle). Leave about 1 inch of headspace at the top of each jar.
- Slowly pour the hot brine over the cucumbers in each jar, making sure all cucumbers are completely submerged. Use a clean spoon to press them down if needed. The brine should cover everything, as any exposed cucumber will potentially soften or develop mold.
- Allow the jars to cool to room temperature on your kitchen counter, which will take about 2-3 hours. Do not refrigerate them yet—they need time to absorb the brine and flavors while still warm.
- Once completely cooled, cover the jars with their lids and refrigerate for at least 12 hours before tasting. The pickles will continue to develop flavor over the next few days, reaching peak deliciousness around day 3-4.
- After 12 hours, open a jar and test one pickle for flavor and crispness. They should be crisp, tangy, and aromatic. If you prefer them more intensely pickled, give them another day or two in the refrigerator.
- Store your finished dill pickles in the refrigerator, where they’ll keep for up to 3-4 weeks. The brine will become cloudier over time due to natural fermentation—this is completely normal and doesn’t affect quality.
Pro Tips
- **Cucumber Selection Matters**: Use small to medium Kirby cucumbers or pickling varieties specifically bred for pickling. Regular slicing cucumbers contain more water and won’t achieve the same crispness. If Kirbys aren’t available, look for any small, firm cucumbers at farmers markets.
- **The Grape Leaf Secret**: Grape leaves contain tannins that help maintain pickle crispness by strengthening cell walls. Horseradish or oak leaves work similarly. If unavailable, skip them, but your pickles may be slightly softer. Check specialty markets or order online if you can’t find them locally.
- **Salt is Non-Negotiable**: Use pickling salt or kosher salt (Diamond Crystal brand if possible). Table salt contains anti-caking agents that will make your brine cloudy. Sea salt works but may also cloud the brine.
- **Vinegar Selection**: White vinegar produces classic clear pickles with bright acidity. Apple cider vinegar adds subtle sweetness and fruitiness. Rice vinegar creates milder pickles. Avoid cleaning vinegars or anything below 5% acidity.
- **Fresh Dill Only**: Dried dill loses its essential oils and won’t deliver the same vibrant flavor. Buy fresh dill from the produce section and use it immediately for best results.
- **Avoid Boiling Your Cucumbers**: The brine should be hot when poured, but the cucumbers themselves should never be boiled. Boiling breaks down cell walls and creates mushy pickles instead of the crisp texture we’re after.
- **Customization Ideas**: Add sliced jalapeños for spice, fresh tarragon for elegance, smashed ginger for warmth, or even a cinnamon stick for a sweet-savory twist. Each addition changes the flavor profile.
- **Fermentation vs. Quick Pickling**: This recipe uses quick refrigerator pickling (no fermentation). If you want naturally fermented pickles with probiotics, use less salt and let them sit at room temperature for several days instead.
- **Make it Spicy**: Add 1-2 teaspoons red pepper flakes, fresh jalapeño slices, or even a pinch of cayenne pepper directly to the jars.
- **Storage Container**: Glass jars preserve flavor best. Avoid plastic containers, which can absorb pickle odors and flavors.
- **Batch Pickling**: This recipe doubles or triples easily. Make several batches at once and refrigerate for consistent supply throughout the season.
- **Leftover Brine**: The brine can be re-used once (add fresh cucumbers and heat again), but discard after the second use for food safety.
- **Perfect Pairings**: Serve alongside sandwiches, charcuterie boards, burgers, or as a side to rich dishes. They’re especially complementary to creamy sauces like Best Heavy Cream Alfredo Sauce.