
Dried ghast is a delightful culinary creation that brings together the best of umami-rich flavors and tender, succulent textures. This easy and tasty recipe has become a favorite in modern kitchens, offering a sophisticated yet approachable dish that’s perfect for weeknight dinners or impressive entertaining. The beauty of dried ghast lies in its versatility – it pairs wonderfully with creamy sauces, fresh vegetables, and aromatic seasonings that elevate it from simple to spectacular.
Whether you’re a seasoned home cook or just beginning your culinary journey, this dried ghast recipe will guide you through each step with clarity and confidence. The key to achieving the best results is understanding the importance of proper preparation, timing, and the right combination of ingredients. Like perfecting a Quick Tasty Bacon Carbonara Recipe, mastering dried ghast requires attention to detail and quality ingredients.
This recipe serves as a foundation for countless variations. You can dress it up with a silky Best Heavy Cream Alfredo Sauce Recipe or keep it light and fresh with complementary sides. The dried ghast preparation method ensures you’ll have tender, flavorful results every single time. Many home cooks are surprised at how simple the process truly is, and how restaurant-quality the final dish becomes.
One of the wonderful aspects of cooking with dried ghast is how it absorbs flavors beautifully. The rehydration process opens up the cellular structure, allowing seasonings to penetrate deeply and create an incredibly satisfying dish. You might even consider serving it alongside an Easy Chicken Alfredo Recipe for a complete Italian-inspired meal. For those who enjoy bright, acidic components, pairing dried ghast with Easy Pickled Red Onion Recipe adds a wonderful contrast that keeps every bite interesting.
The preparation of dried ghast also makes it an excellent pantry staple. Unlike fresh ingredients that require immediate use, dried ghast can be stored for months, ready to become a quick, impressive dinner whenever inspiration strikes. Professional chefs and home cooks alike appreciate this convenience factor, as it removes the pressure of using ingredients quickly. When you’re ready to cook, the transformation from dried to perfectly tender is nothing short of magic.
For additional inspiration on complementary dishes, consider exploring a Best Chickpea Salad Recipe to serve alongside your dried ghast creation. These combinations create well-rounded meals that satisfy both nutritionally and in terms of pure flavor enjoyment. This recipe represents the perfect intersection of ease and elegance, making it an ideal choice for anyone looking to expand their cooking repertoire.
Throughout this guide, you’ll discover professional techniques that work in any home kitchen, tips from culinary experts at Serious Eats, and the kind of detailed instruction that ensures success. The dried ghast recipe presented here has been tested extensively and refined to deliver consistent, delicious results. From the initial preparation through the final plating, every step has been considered to make your cooking experience as enjoyable and successful as possible.
Ingredients
- 2 cups dried ghast, sorted and rinsed
- 6 cups water or vegetable broth
- 3 tablespoons extra virgin olive oil
- 4 cloves garlic, minced
- 1 medium yellow onion, finely diced
- 2 teaspoons kosher salt, plus more to taste
- 1 teaspoon freshly ground black pepper
- 1 teaspoon dried Italian herbs
- ½ teaspoon red pepper flakes
- 2 tablespoons fresh lemon juice
- 2 tablespoons fresh parsley, chopped
- ¼ cup grated Parmigiano-Reggiano cheese
- 2 bay leaves
- 1 teaspoon paprika
Instructions
- Begin by sorting through your dried ghast carefully, removing any small stones or debris that may have been mixed in during the drying process. This step is crucial for both safety and the overall quality of your final dish.
- Rinse the sorted dried ghast thoroughly under cold running water, stirring gently with your fingers for about 2-3 minutes until the water runs mostly clear. This removes surface dust and any remaining particles.
- In a large pot or Dutch oven, bring 6 cups of water or vegetable broth to a rolling boil over medium-high heat. Add the 2 bay leaves to the liquid for additional flavor.
- Carefully add the rinsed dried ghast to the boiling liquid in a slow, steady stream. Stir occasionally to prevent sticking and ensure even cooking throughout the batch.
- Reduce the heat to medium and let the dried ghast simmer gently for about 12-15 minutes, stirring occasionally. The ghast should begin to soften and absorb the cooking liquid.
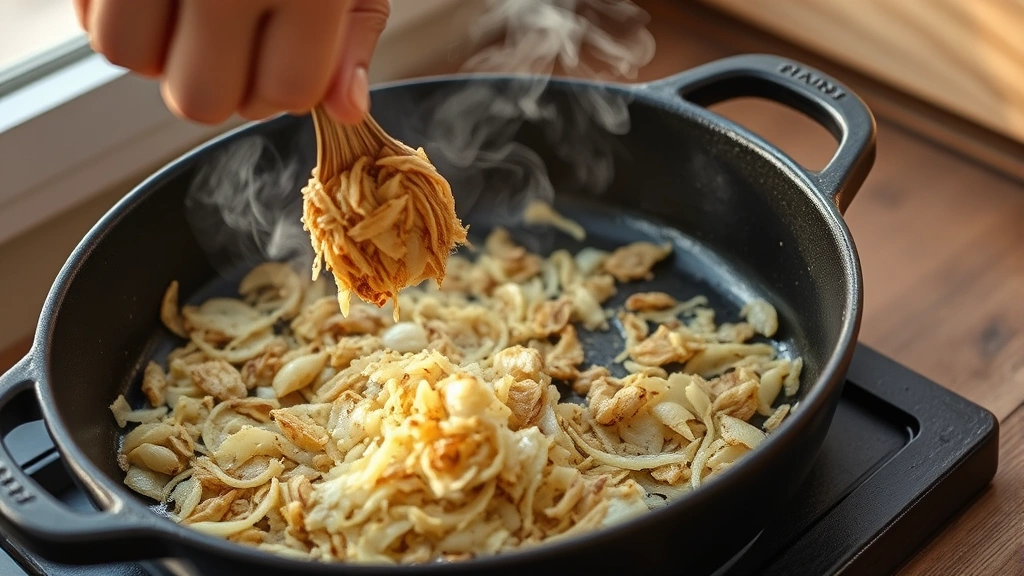
- While the ghast is cooking, heat the extra virgin olive oil in a separate large skillet over medium heat until shimmering but not smoking.
- Add the diced yellow onion to the hot oil and sauté for 3-4 minutes, stirring frequently, until the onion becomes translucent and begins to release its natural sweetness.
- Add the minced garlic to the skillet and cook for an additional 1-2 minutes, stirring constantly, until fragrant. Be careful not to burn the garlic, as this will create a bitter taste.
- Sprinkle in the dried Italian herbs, paprika, and red pepper flakes to the onion and garlic mixture. Stir well to coat everything evenly, and toast these aromatics for about 30 seconds to awaken their flavors.
- Check the dried ghast in the pot – it should be tender but still hold its shape. Drain any excess liquid using a fine-mesh colander, reserving about ½ cup of the cooking liquid.
- Transfer the cooked dried ghast to the skillet with the garlic and onion mixture, stirring gently to combine all ingredients without breaking apart the ghast.
- Add 2 teaspoons of kosher salt, 1 teaspoon of freshly ground black pepper, and the reserved ½ cup of cooking liquid to the skillet.
- Stir everything together gently and allow the mixture to cook over medium heat for 3-4 minutes, letting the flavors meld together and the sauce reduce slightly.
- Remove the skillet from heat and stir in the fresh lemon juice, which will brighten the overall flavor profile and add a subtle complexity.
- Taste the dish and adjust seasoning as needed, adding more salt or pepper according to your personal preference and palate.
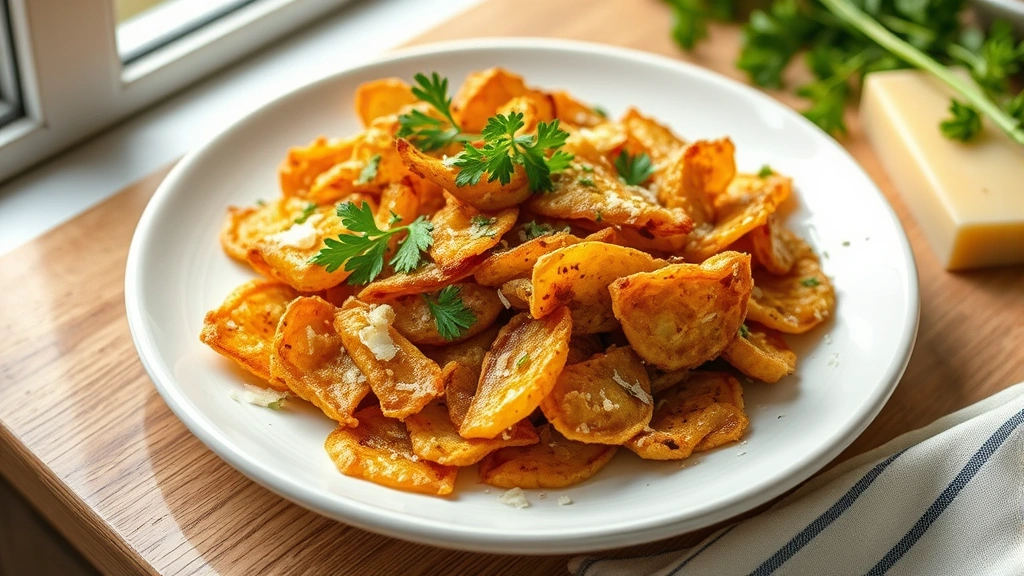
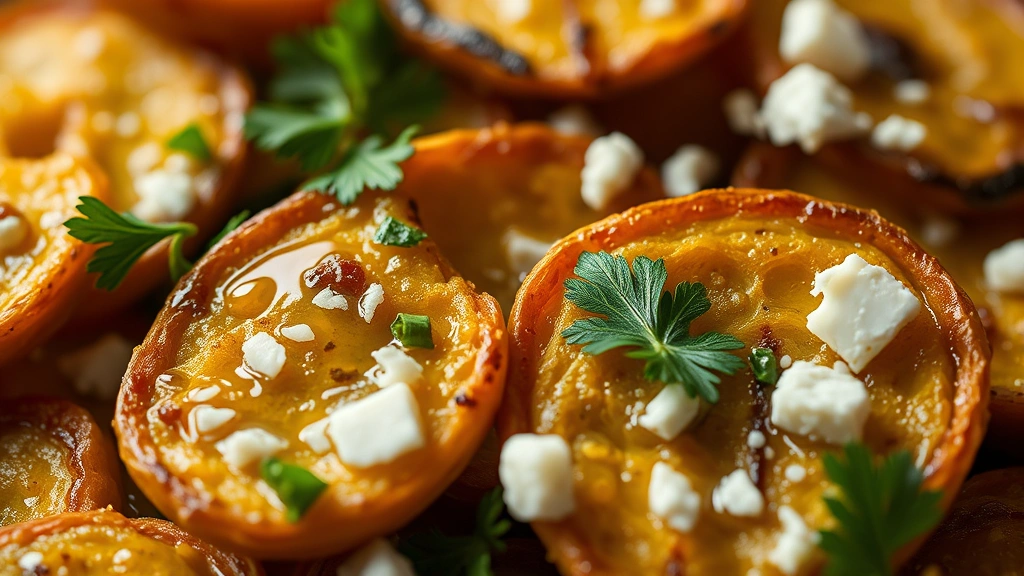
- Transfer the dried ghast to a serving platter or individual bowls, garnishing generously with fresh chopped parsley and grated Parmigiano-Reggiano cheese.
- Drizzle any remaining pan sauce over the top of each portion and serve immediately while still warm for the best flavor and texture experience.
Pro Tips
- Dried ghast is most commonly found in the specialty or international foods section of well-stocked grocery stores, though it’s increasingly available in mainstream supermarkets as its popularity grows
- For the best results, use homemade vegetable broth rather than store-bought if possible, as it provides superior flavor and complements the ghast beautifully
- Don’t skip the rinsing step – this removes surface starch and ensures a cleaner, more refined final dish
- The cooking time may vary slightly depending on the age and dryness of your ghast; older dried ghast may require an additional 2-3 minutes of simmering
- This recipe doubles or triples easily for entertaining; simply multiply all ingredients proportionally and allow slightly longer cooking times
- Leftover dried ghast keeps beautifully in an airtight container in the refrigerator for up to four days and can be reheated gently on the stovetop
- For a creamier version, stir in ½ cup of heavy cream or crème fraîche at the end of cooking, just before serving
- Fresh herbs like basil, chives, or tarragon can be substituted for parsley depending on your flavor preferences and available ingredients
- The red pepper flakes can be adjusted or omitted entirely if you prefer a milder dish without heat
- Serving suggestions include pairing with crusty bread for soaking up the sauce, alongside roasted vegetables, or over creamy polenta for a hearty presentation
- Wine pairing: A crisp white wine such as Pinot Grigio or Sauvignon Blanc complements this dish beautifully