

There’s nothing quite like a perfectly baked English scone fresh from the oven – golden, fluffy, and absolutely divine with clotted cream and jam. This is my go-to recipe that never fails, and I’m thrilled to share all my secrets with you today!
English scones are a beloved classic that deserve a special place in your baking repertoire. Unlike American biscuits, these are slightly sweeter and more delicate, with a tender crumb that practically melts in your mouth. The key to achieving that perfect texture is all about technique – keeping your ingredients cold, handling the dough minimally, and not overworking it. I’ve spent years perfecting this recipe, and I can confidently say this is the best version I’ve ever made.
What makes these scones truly special is the balance of buttery richness with just enough sweetness, plus that light, airy interior that contrasts beautifully with a slightly crispy exterior. Serve them warm with clotted cream and your favorite jam for an authentic British tea experience. Whether you’re hosting a fancy afternoon tea or simply want to treat yourself, this recipe is absolutely foolproof.
I absolutely love making these for weekend entertaining because they’re elegant enough to impress guests, yet simple enough that even beginner bakers can achieve beautiful results. The secret is in the cold butter and the gentle touch – treat your dough with respect and it will reward you with scones that rival any bakery!
For more baking inspiration, check out this heavy cream pasta recipe and this chicken alfredo recipe for your next dinner party. And if you’re planning a full tea service, don’t miss our chickpea salad recipe for a light lunch option.
For more scone inspiration and techniques, I recommend checking out Serious Eats and New York Times Cooking for their excellent baking guides. You can also find wonderful variations on Bon Appétit.
Ingredients
- 2 cups all-purpose flour
- 1/4 cup granulated sugar
- 1 tablespoon baking powder
- 1/2 teaspoon salt
- 6 tablespoons cold unsalted butter, cubed
- 1/2 cup heavy cream, plus more for brushing
- 1/4 cup whole milk
- 1 large egg yolk
- 1 teaspoon vanilla extract
- Zest of 1 lemon (optional)
- Clotted cream for serving
- Jam for serving
Instructions
- Preheat your oven to 400°F (200°C). Line a baking sheet with parchment paper and set aside.
- In a large mixing bowl, whisk together the flour, sugar, baking powder, salt, and lemon zest if using. Make sure everything is evenly combined.
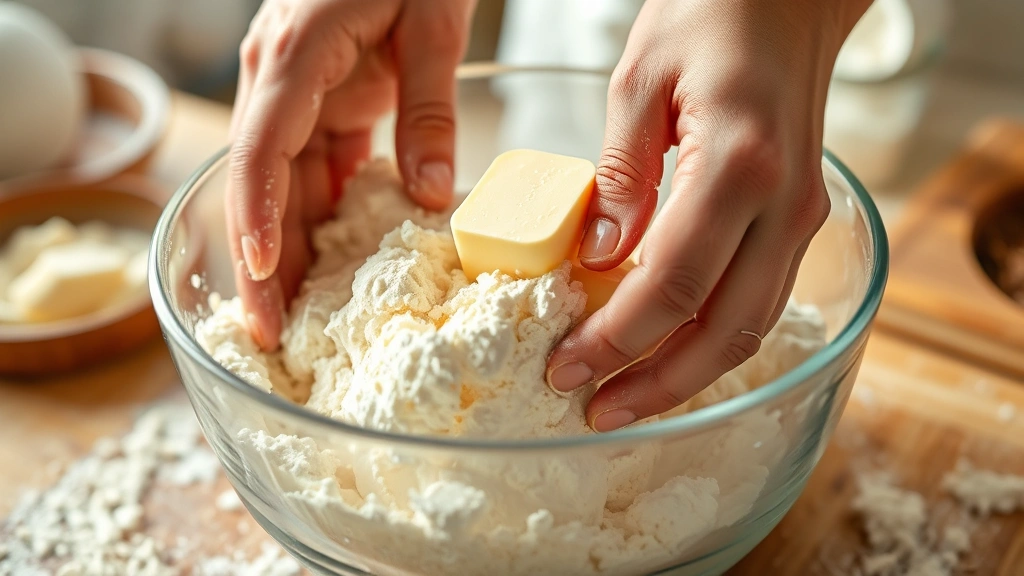
- Add the cold cubed butter to the flour mixture. Using a pastry cutter, two knives, or your fingertips, work the butter into the flour until the mixture resembles coarse breadcrumbs. This step is crucial – the butter pieces should remain distinct and cold.
- In a small bowl, whisk together the heavy cream, milk, egg yolk, and vanilla extract until well combined.
- Create a well in the center of the dry ingredients and pour the wet mixture into it. Using a fork or a wooden spoon, gently fold the wet ingredients into the dry until just combined. Do not overmix – the dough should look slightly shaggy and should just come together.
- Turn the dough out onto a lightly floured surface and gently bring it together with your hands, being very careful not to overwork it. Pat the dough into a disk about 3/4 inch thick.
- Using a sharp knife or a biscuit cutter, cut the dough into 12 scones. For classic triangles, cut the disk into quarters, then cut each quarter in half diagonally. For rounds, use a 2-inch biscuit cutter.
- Place the scones on the prepared baking sheet, leaving about 2 inches between each one.
- In a small bowl, beat together 1 egg yolk with 1 tablespoon of water to create an egg wash. Brush the tops of each scone lightly with the egg wash.
- Bake for 12-15 minutes, or until the scones are risen and the tops are golden brown. They should feel light when you pick one up.
- Remove from the oven and let cool on the baking sheet for 2-3 minutes, then transfer to a wire rack to cool slightly.
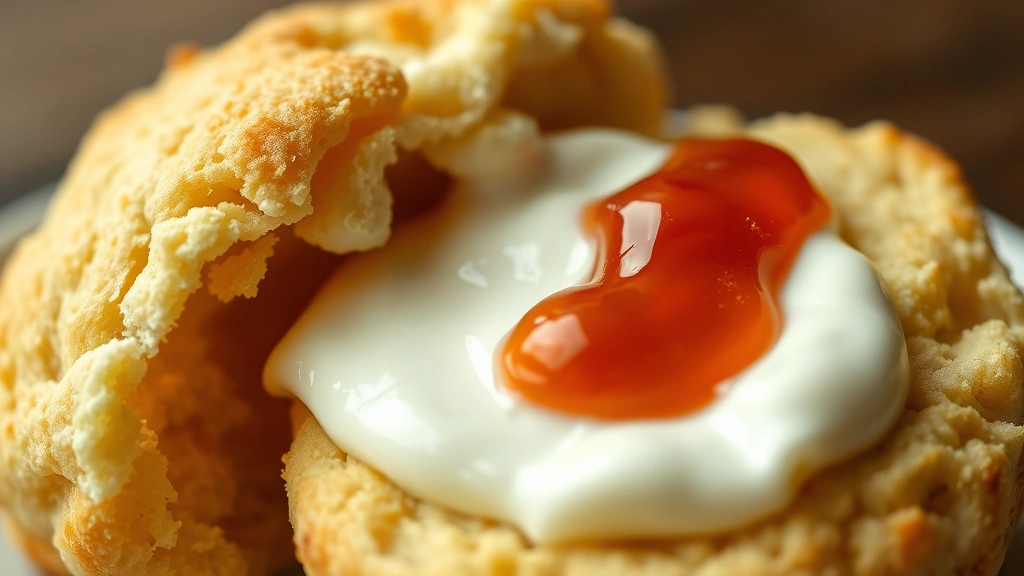
- Serve the scones warm with clotted cream and jam on the side. The traditional way is to split the scone and spread each half with cream first, then top with jam.
Pro Tips
- The most important tip for perfect scones is keeping all your ingredients cold, especially the butter. Cold butter creates steam pockets that help the scones rise and become fluffy rather than dense. If your kitchen is warm, chill your mixing bowl and even your flour before starting.
- Do not overmix the dough! This is the number one mistake people make. Once the wet and dry ingredients are combined, stop immediately. A few small lumps of flour are perfectly fine and will actually result in a better texture. Overmixing develops gluten, which makes tough, dense scones.
- You can prepare the dry ingredients the night before and store them in an airtight container. When you’re ready to bake, simply add the cold wet ingredients and proceed with the recipe. This is perfect for hosting because most of the prep work is already done.
- If you don’t have heavy cream, you can substitute with a combination of milk and butter or use Greek yogurt mixed with milk. However, heavy cream gives the best results because of its richness and fat content.
- For the most authentic English scones, serve them warm with clotted cream and jam. The traditional order is cream first, then jam, though some regions prefer jam first. Either way is delicious!
- These scones are best eaten on the day they’re made, but you can store them in an airtight container for up to 2 days. Reheat them gently in a 300°F oven for about 5 minutes to restore their warmth and fluffiness.
- You can customize these scones by adding dried fruit (like currants or sultanas), fresh berries, or even a tablespoon of honey to the dough. Just fold them in gently at the end.
- If your scones aren’t rising as much as you’d like, check that your baking powder hasn’t expired. Baking powder loses its potency over time, so always check the date on your container.
- For a more indulgent version, brush the warm scones with a mixture of melted butter and a pinch of sugar immediately after removing them from the oven.
Pingback: How to make the BEST Shredded Chicken Recipe – So Easy! – Simple Recipe Finder