
Listen, I know what you’re thinking – gluten-free AND dairy-free pasta? Isn’t that just sad, mushy noodles with no flavor? Absolutely not, my friend! This is genuinely the best gluten-free dairy-free pasta recipe I’ve ever made, and I’m not exaggerating. I’ve been making this for years now, and it’s become such a staple in my kitchen that I actually prefer it to traditional pasta. The secret is in choosing the right flour blend and using quality ingredients that actually taste good.
When I first went gluten-free and dairy-free, I thought I was saying goodbye to creamy, delicious pasta dishes forever. But then I discovered that with the right technique and ingredients, you can create something that’s not just acceptable – it’s genuinely delicious. The key is understanding that gluten-free and dairy-free doesn’t mean flavorless. It means being intentional about every ingredient you use.
I love using a blend of rice flour, tapioca starch, and chickpea flour for my pasta base. This combination gives you the perfect texture – not too grainy, not too mushy, with just enough structure to hold up to your favorite sauces. And for the creamy component? Coconut milk, cashew cream, or even oat milk can create something absolutely magical. I’m going to share my favorite version today, which uses a gorgeous dairy-free cream sauce that’s so rich and luxurious you won’t believe it’s free from dairy.
This recipe is perfect for weeknight dinners, meal prep, or even impressing guests who have dietary restrictions. It comes together in about 30 minutes, and the homemade pasta is worth every single minute. Plus, once you’ve mastered this basic recipe, you can adapt it with your favorite cream sauces or toss it with roasted vegetables for endless variety.
The beautiful thing about this recipe is that it proves you don’t have to compromise on taste or texture just because you’re avoiding gluten and dairy. Whether you’re making this for yourself or feeding a family with mixed dietary needs, this pasta is going to make everyone at the table happy. I promise you, once you try this, you’ll be making it again and again. Let me walk you through exactly how I make it, step by step.
Ingredients
- 1 cup brown rice flour
- ½ cup tapioca starch
- ½ cup chickpea flour
- 1 teaspoon sea salt
- 3 large eggs (or 3 flax eggs for vegan option)
- 2 tablespoons olive oil
- 2-3 tablespoons warm water (as needed)
- 2 tablespoons olive oil for cooking
- 3 cloves garlic, minced
- 1 cup raw cashews, soaked in hot water for 15 minutes
- 1 cup vegetable broth
- ½ cup unsweetened coconut milk
- 2 tablespoons nutritional yeast
- 1 tablespoon fresh lemon juice
- ½ teaspoon sea salt
- ¼ teaspoon white pepper
- ¼ teaspoon nutmeg
- Fresh basil and parsley for garnish
- Lemon zest for serving
Instructions
- In a large mixing bowl, whisk together the brown rice flour, tapioca starch, chickpea flour, and 1 teaspoon of sea salt. Create a well in the center of the flour mixture, similar to how you’d make traditional pasta dough.
- Crack the eggs directly into the well (or prepare your flax eggs by mixing 3 tablespoons ground flaxseed with 9 tablespoons water and letting sit for 5 minutes for vegan option). Add 2 tablespoons of olive oil to the eggs.
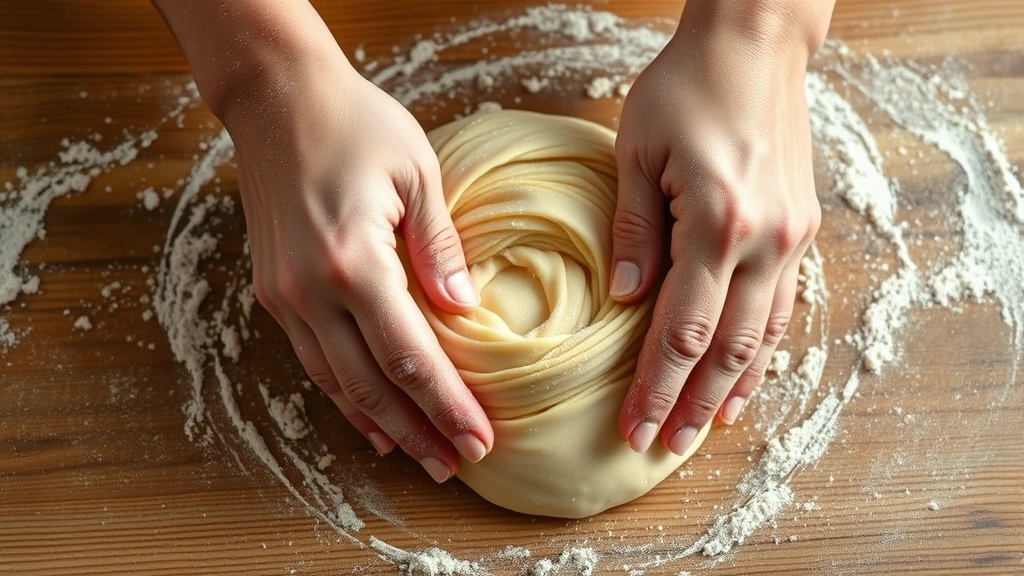
- Using a fork, gently beat the eggs together, then slowly incorporate the flour mixture into the egg mixture, starting from the inner edges of the well and working outward. Mix until a shaggy dough forms.
- Knead the dough for about 5-7 minutes, adding 1 tablespoon of warm water at a time if the dough is too dry. The dough should be smooth and slightly elastic, not sticky. This step is crucial for gluten-free pasta because you’re developing the structure that gluten would normally provide.
- Wrap the dough in plastic wrap and let it rest for at least 10 minutes at room temperature. This resting period allows the starches to hydrate and makes the dough much easier to work with.
- After resting, divide the dough into 4 equal portions. Working with one portion at a time (keep the others wrapped), roll out the dough between two pieces of parchment paper using a rolling pin until it’s thin enough to see light through it.
- Using a sharp knife or pizza cutter, cut the rolled dough into fettuccine-width noodles (about ¼ inch wide) or your preferred pasta shape. If making lasagna sheets, simply cut into rectangles.
- Lay the cut pasta on a parchment-lined baking sheet in a single layer, making sure the noodles don’t touch. You can cook them immediately or let them dry for 30 minutes at room temperature for slightly firmer noodles.
- Bring a large pot of salted water to a rolling boil. Add the fresh pasta and stir gently to prevent sticking. Fresh gluten-free pasta cooks much faster than dried pasta – it should be done in just 3-5 minutes. Taste at 3 minutes to check for doneness.
- While the pasta cooks, prepare the sauce. Drain the soaked cashews and add them to a high-speed blender along with the vegetable broth, coconut milk, nutritional yeast, lemon juice, sea salt, white pepper, and nutmeg.
- Blend on high speed for 2-3 minutes until completely smooth and creamy. You want the consistency to be pourable but rich, similar to heavy cream. If it’s too thick, add a splash more broth.
- Heat 2 tablespoons of olive oil in a large skillet over medium heat. Add the minced garlic and sauté for about 1 minute until fragrant, being careful not to burn it.
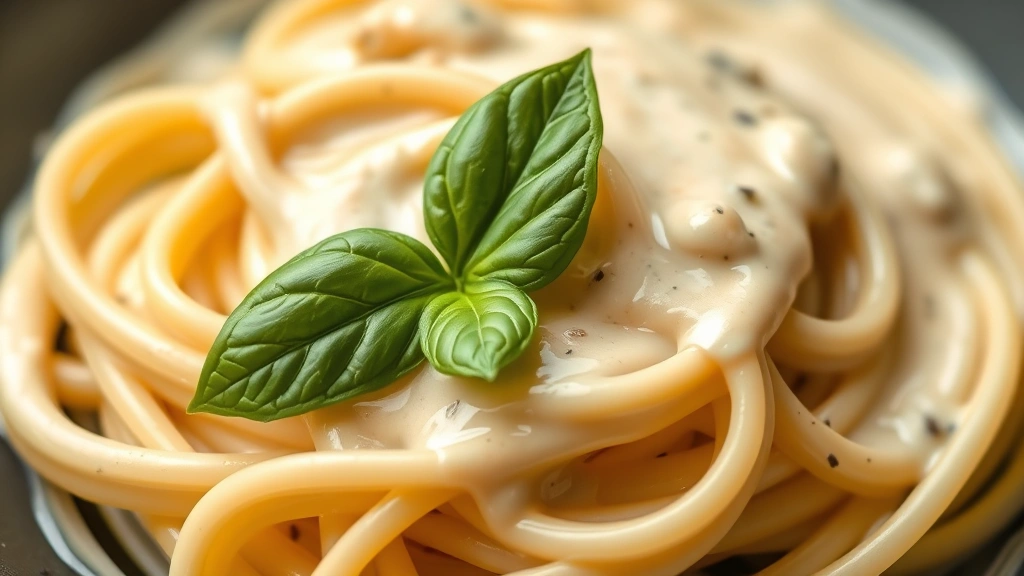
- Pour the cashew cream sauce into the skillet with the garlic and stir well to combine. Let it simmer gently for 2-3 minutes, stirring occasionally. Taste and adjust seasonings as needed.
- When the pasta is al dente, reserve 1 cup of pasta cooking water before draining. Add the drained pasta directly to the skillet with the sauce.
- Toss the pasta gently with the sauce, adding pasta water a splash at a time if needed to reach your desired consistency. The sauce should coat every strand of pasta beautifully.
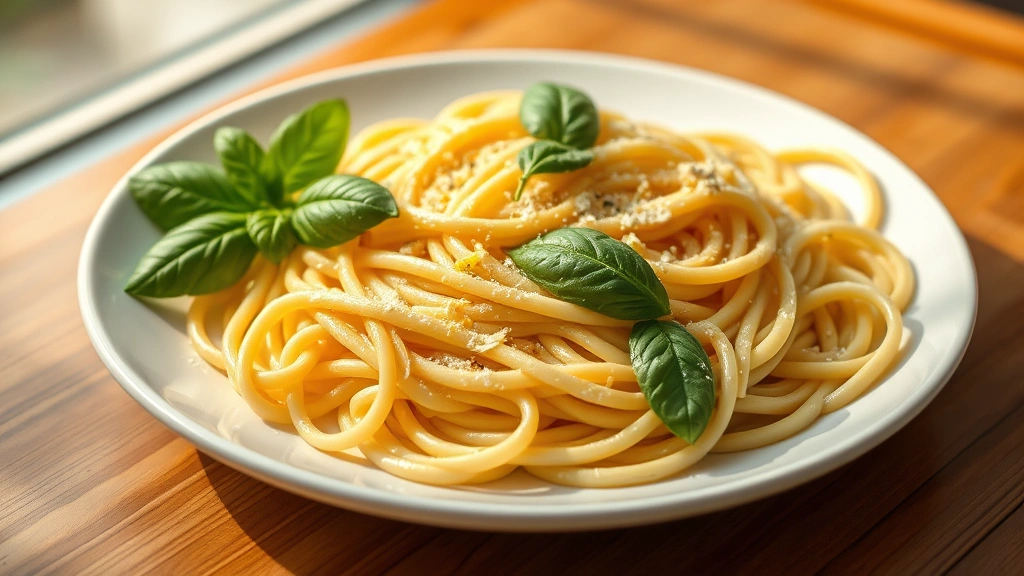
- Divide the pasta into serving bowls and garnish generously with fresh basil, parsley, and lemon zest. Serve immediately while hot.
- For a more substantial dish, consider adding roasted chicken or sautéed mushrooms. You can also top with crispy chickpeas for extra protein and texture.
Pro Tips
- **Make-Ahead Tips**: You can prepare the pasta dough up to 2 days in advance and store it wrapped in plastic wrap in the refrigerator. You can also roll and cut the pasta, then freeze it on a baking sheet for up to 3 months. Cook directly from frozen, adding just 1-2 minutes to the cooking time.
- **Flour Blend Explanation**: The combination of brown rice flour, tapioca starch, and chickpea flour creates the perfect texture for gluten-free pasta. Brown rice flour adds nutty flavor and structure, tapioca starch provides elasticity and chewiness, and chickpea flour adds protein and nutrition. Don’t substitute with all-purpose gluten-free flour blends as they often contain xanthan gum which can make the pasta gummy.
- **Sauce Variations**: This cashew cream base is incredibly versatile. Add sun-dried tomatoes for a pink sauce, blend in roasted red peppers for a red sauce, or stir in pesto for a green sauce. You can also use this as a base for dairy-free cream pasta dishes with any toppings you love.
- **Vegan Option**: Use flax eggs instead of regular eggs for a completely plant-based pasta. The ratio is 1 tablespoon ground flaxseed + 3 tablespoons water per egg. Let the mixture sit for 5 minutes to gel before adding to the flour.
- **Cooking the Pasta**: Fresh pasta cooks much faster than dried, so don’t walk away from the pot. Start checking at 3 minutes. Overcooked gluten-free pasta can become mushy, so timing is important. The pasta should have a slight firmness when bitten.
- **Texture Troubleshooting**: If your pasta is too crumbly when rolling, add more water one tablespoon at a time. If it’s too sticky, dust with a bit more tapioca starch. The dough should feel similar to traditional pasta dough – smooth, slightly elastic, and not sticky.
- **Cashew Cream Notes**: Always soak your cashews in hot water to soften them before blending. Raw cashews that aren’t softened won’t blend smoothly. If you don’t have a high-speed blender, soak the cashews for 30 minutes instead of 15 and blend longer. For a nut-free option, use silken tofu or white beans as your cream base.
- **Storage**: Leftover cooked pasta can be stored in an airtight container in the refrigerator for up to 3 days. Reheat gently in a skillet with a splash of broth or plant milk to restore creaminess. Store uncooked fresh pasta on a parchment-lined baking sheet in the freezer for up to 3 months.
- **Serving Suggestions**: This pasta pairs beautifully with a simple green salad dressed with lemon vinaigrette. For a heartier meal, add roasted vegetables like asparagus, broccoli, or zucchini. The pasta is also wonderful with sautéed mushrooms, sun-dried tomatoes, or fresh herbs stirred in just before serving.
- **Nutritional Information**: This recipe is naturally gluten-free and dairy-free, making it suitable for those with celiac disease or dairy allergies. The chickpea flour adds significant protein, making this a more complete meal than traditional pasta dishes.
Pingback: How to Make the Perfect Slow Cooker Short Rib Recipe! – Simple Recipe Finder