
Hatch chile enchiladas are an absolute dream during late summer and early fall when these magical peppers are in season! There’s something so special about roasting fresh Hatch chiles and turning them into a silky, smoky sauce that makes these enchiladas absolutely irresistible. This recipe brings together the best of New Mexican cuisine with that preppy, approachable style we all love.
The beauty of Hatch chiles is their mild heat combined with a deep, complex flavor that’s almost impossible to replicate with other peppers. When you roast them yourself, your kitchen will smell absolutely incredible—trust me, your family will come running! These enchiladas are perfect for dinner parties, family gatherings, or even a cozy weeknight meal when you want something a little more special.
I’ve been making these enchiladas for years, and I’ve finally perfected the technique to ensure the chiles are perfectly roasted, the sauce is velvety smooth, and the enchiladas stay moist and delicious. The combination of chicken, cheese, and that gorgeous Hatch chile sauce is truly unbeatable. If you love creamy sauces like I do, you’ll absolutely adore this recipe.
What I love most about this dish is how versatile it is! You can use rotisserie chicken to save time, or make your own from scratch. You can prep the chiles ahead of time and store them in the freezer—honestly, I always buy extra during Hatch season and freeze them for winter cooking. This recipe makes enough for a crowd, but it also freezes beautifully, so don’t hesitate to make a double batch.
For the best results, I recommend seeking out fresh Hatch chiles at your local farmers market or specialty grocery store during late August through September. If you can’t find them fresh, you can order them online or use frozen Hatch chiles, which work wonderfully. The key to amazing enchiladas is using quality ingredients and taking your time with the preparation—it’s absolutely worth it!
These enchiladas pair beautifully with cilantro lime rice, fresh Mexican crema, sliced radishes, and a crisp margarita or cold cerveza. You could also serve them alongside a fresh chickpea salad for a lighter option. Either way, you’re going to love this recipe as much as I do!
For more inspiration on pepper-based dishes, check out this amazing guide to shishito peppers for another fun way to enjoy seasonal produce. And if you’re interested in learning more about building incredible sauce foundations, my easy chicken alfredo recipe teaches similar techniques that you can apply to many different dishes.
I’m so excited for you to make these enchiladas! The combination of fresh Hatch chiles, creamy sauce, and perfectly cooked chicken is absolutely magical. This is the kind of recipe that becomes a family favorite and gets requested year after year. So grab some chiles, preheat that oven, and let’s make something absolutely delicious together!
Ingredients
- 8-10 fresh Hatch chiles, or 2 cups frozen roasted Hatch chiles
- 3 tablespoons unsalted butter
- 1 medium yellow onion, diced
- 4 cloves garlic, minced
- 1/4 cup all-purpose flour
- 2 cups chicken broth
- 1 cup heavy cream
- 1 teaspoon ground cumin
- 1/2 teaspoon dried oregano
- Salt and fresh cracked black pepper to taste
- 1/4 teaspoon cayenne pepper (optional, for extra heat)
- 3 cups shredded cooked chicken (rotisserie chicken works perfectly)
- 2 cups shredded Oaxaca cheese or mozzarella cheese
- 1 cup shredded sharp cheddar cheese
- 1/2 cup crumbled queso fresco
- 1/4 cup fresh cilantro, chopped
- 12 corn tortillas
- 2 tablespoons olive oil for the baking dish
- Fresh lime wedges for serving
- Mexican crema or sour cream for serving
- Sliced radishes for garnish
- Additional cilantro for garnish

Instructions
- If using fresh Hatch chiles, preheat your oven to 425°F. Place the whole chiles directly on the oven rack with a baking sheet on the rack below to catch any drippings. Roast for 20-25 minutes, turning halfway through, until the skins are charred and blistered all over.
- Remove the roasted chiles from the oven and place them in a large bowl. Cover tightly with plastic wrap or place in a paper bag and let them steam for 10 minutes—this makes them much easier to peel.
- Once cooled slightly, peel away the charred skin under cool running water, gently rubbing with your fingers. Remove the seeds and stem, being careful to keep the flesh intact. If using frozen Hatch chiles, simply thaw them first.
- Chop the peeled Hatch chiles into large chunks and set aside. You should have about 2 cups of prepared chiles.
- In a large saucepan, melt the butter over medium heat. Add the diced onion and cook for 3-4 minutes until softened and fragrant, stirring occasionally.
- Add the minced garlic and cook for another 1 minute until very fragrant, stirring constantly to prevent burning.
- Sprinkle the flour over the onion and garlic mixture, stirring constantly for 2 minutes to create a light roux. This will help thicken the sauce beautifully.
- Slowly whisk in the chicken broth, making sure there are no lumps. Stir constantly until the mixture begins to thicken, about 3-4 minutes.
- Add the heavy cream, chopped Hatch chiles, ground cumin, oregano, salt, pepper, and cayenne pepper if using. Stir well to combine.
- Reduce heat to low and simmer the sauce for 8-10 minutes, stirring occasionally, until it reaches a beautiful creamy consistency. Taste and adjust seasonings as needed.
- Preheat your oven to 350°F if you haven’t already. Lightly oil a 9×13 inch baking dish with olive oil.
- In a small bowl, combine the shredded Oaxaca cheese, sharp cheddar cheese, and fresh cilantro. Mix gently.
- Pour about 1 cup of the Hatch chile sauce into the bottom of the prepared baking dish, spreading it evenly.
- Warm the corn tortillas slightly by wrapping them in a damp paper towel and microwaving for 30 seconds—this makes them much easier to roll without tearing.
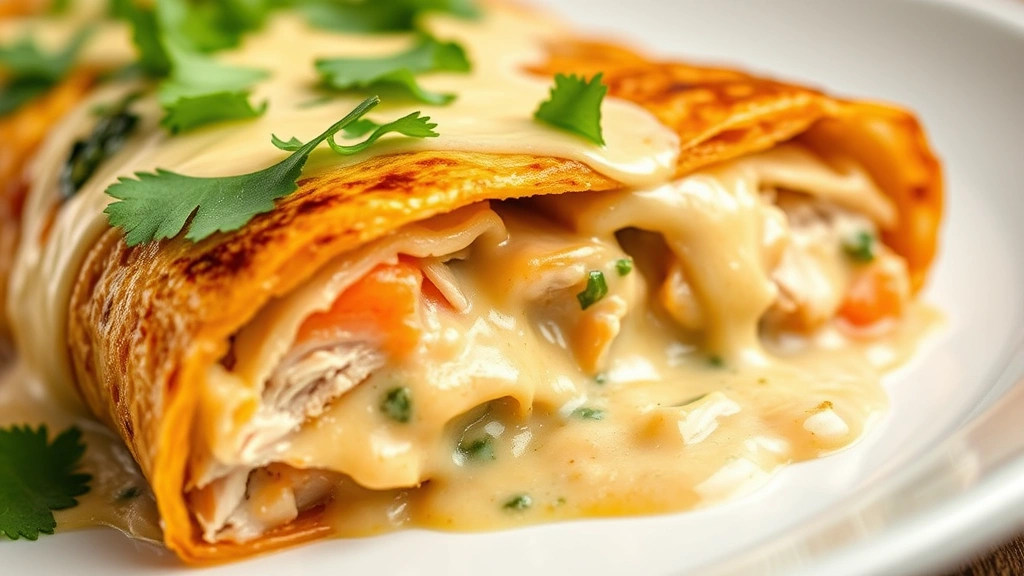
- Take one warm tortilla and place it on a flat surface. Spoon about 1/4 cup of shredded chicken down the center of the tortilla, then top with about 2 tablespoons of the cheese mixture.
- Roll the tortilla tightly around the filling and place it seam-side down in the prepared baking dish. Repeat with remaining tortillas and filling.
- Pour the remaining Hatch chile sauce evenly over all the enchiladas, making sure each one is well covered.
- Sprinkle the remaining cheese mixture and crumbled queso fresco over the top of the enchiladas.
- Cover the baking dish loosely with aluminum foil and bake for 25 minutes. Remove the foil and bake for an additional 10 minutes until the cheese is bubbly and golden.
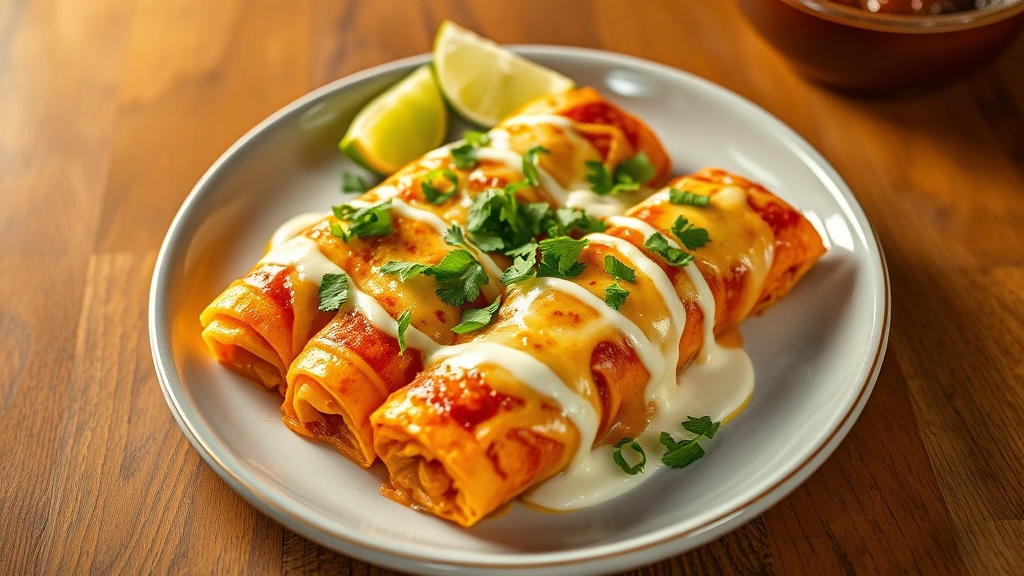
- Remove from the oven and let rest for 5 minutes before serving. Garnish with fresh cilantro, sliced radishes, and a drizzle of Mexican crema.
- Serve immediately with lime wedges on the side and additional crema for drizzling. These are best enjoyed fresh and hot!
Pro Tips
- Hatch chiles are typically available from late August through September, so plan accordingly! If you can’t find fresh ones, frozen roasted Hatch chiles are an excellent substitute and work beautifully in this recipe.
- When roasting the chiles, don’t be afraid of the charring—that’s where all the amazing flavor comes from! The darker the blistering, the better the final sauce will taste.
- If you don’t have a gas burner to roast chiles, the oven method works perfectly. You can also use a cast iron skillet over high heat, turning the chiles frequently until charred on all sides.
- Make this recipe ahead of time! Assemble the enchiladas completely, cover with plastic wrap, and refrigerate for up to 24 hours before baking. Just add 10-15 minutes to the baking time if baking from cold.
- These enchiladas freeze beautifully! Assemble them in a disposable aluminum pan, cover tightly with plastic wrap and foil, and freeze for up to 3 months. Bake directly from frozen, adding 20-25 minutes to the cooking time.
- For a lighter version, you can use Greek yogurt or Mexican crema instead of heavy cream in the sauce. The flavor will be slightly tangier but equally delicious.
- Rotisserie chicken is a total time-saver and works perfectly in this recipe. Shred it while it’s still warm for easier handling.
- If you prefer less heat, remove all the seeds from the Hatch chiles before chopping them. For more heat, keep some of the seeds or add the optional cayenne pepper.
- Oaxaca cheese has the most authentic flavor and melts beautifully, but fresh mozzarella works as a great substitute if you can’t find it.
- Don’t skip the resting period after baking! Those 5 minutes allow the sauce to set slightly, making the enchiladas much easier to serve without falling apart.
- These pair beautifully with cilantro lime rice, black beans, and a crisp green salad. A cold margarita or Mexican beer is the perfect beverage pairing.
- Leftover enchiladas reheat wonderfully in a 350°F oven covered with foil for about 15 minutes. You can also reheat individual portions in the microwave, though the oven method preserves the texture better.