
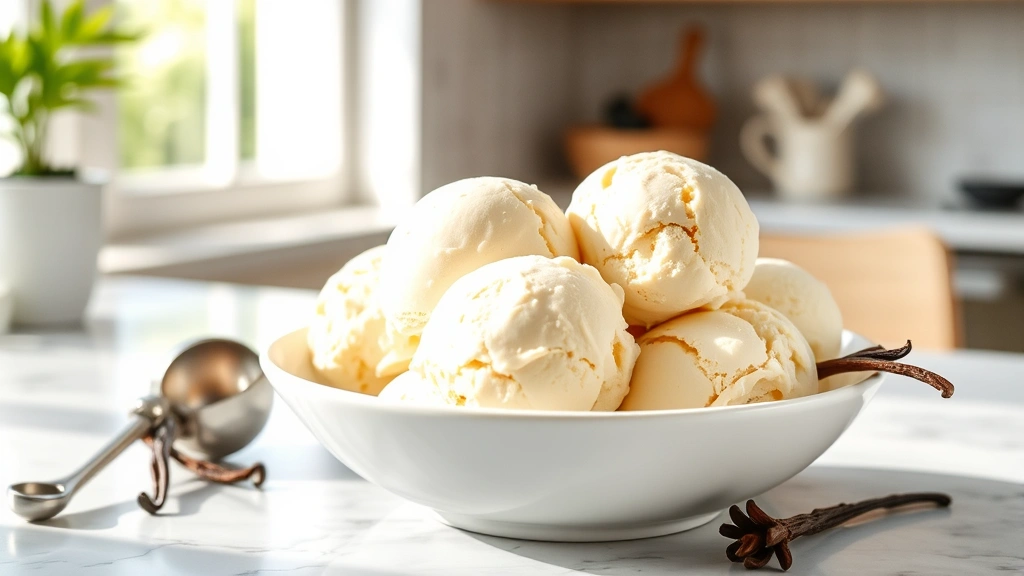
There’s truly nothing quite like homemade ice cream – that silky, luxurious texture and pure, unadulterated flavor is simply incomparable to store-bought versions. This is the ice cream recipe I’ve perfected over years of testing, and honestly, once you master this technique, you’ll never look back. The secret lies in using quality ingredients, achieving the perfect custard base, and understanding how to churn it to absolute perfection.
Making ice cream at home might seem intimidating, but I promise it’s easier than you think. This classic vanilla bean ice cream serves as the perfect foundation – you can enjoy it as-is or use it as a jumping-off point for endless flavor variations. I love serving this alongside fresh berries, homemade pie, or simply in a cone on a warm summer evening.
The key to the creamiest texture is using a combination of heavy cream and whole milk, along with egg yolks that create that signature custard richness. Some people worry about using raw eggs, but since we’re heating our custard base to the proper temperature, food safety isn’t a concern. This method has been used in classic French patisseries for generations, and for good reason – it works beautifully every single time.
I recommend investing in a quality ice cream maker if you don’t already have one. The churn really does make a difference in achieving that smooth, scoopable texture. You’ll also want to make sure your mixing bowl is thoroughly chilled before churning – this helps the ice cream freeze faster and creates smaller ice crystals, resulting in a creamier final product.
One of my favorite things about making ice cream at home is the ability to customize it completely. Once you’ve mastered this base recipe with quality cream, you can add extracts, liqueurs, fresh fruit purees, or even bold flavor elements. The possibilities are truly endless, and your friends and family will be absolutely amazed at what you’ve created in your own kitchen.
I also love how this recipe is perfect for special occasions or just because moments. Serve it in a beautiful bowl, with a sprinkle of fleur de sel on top, and suddenly you have a dessert that feels restaurant-quality. This is definitely a recipe worth mastering – it’s impressive, delicious, and honestly more affordable than you’d think. For more detailed techniques on working with cream-based recipes, check out this guide to cream preparation.
Ingredients
- 2 cups heavy cream
- 1 cup whole milk
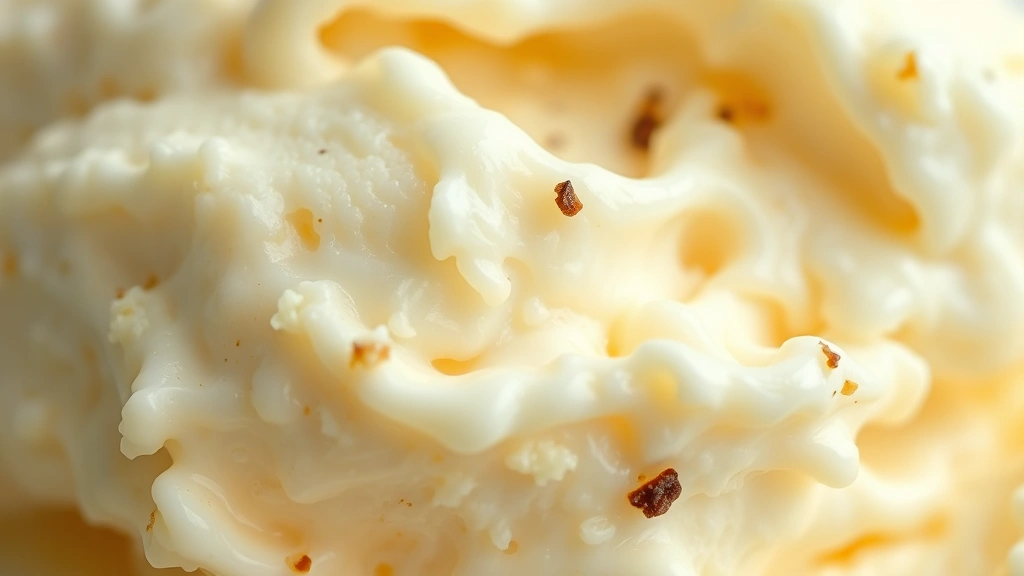
- 1 vanilla bean, split and scraped (or 2 teaspoons vanilla extract)
- 5 large egg yolks
- 3/4 cup granulated sugar
- 1/4 teaspoon sea salt
- 2 tablespoons bourbon or vanilla liqueur (optional)
Instructions
- Combine the heavy cream and whole milk in a heavy-bottomed saucepan. If using a vanilla bean, add the split bean and the scraped seeds to the cream mixture.
- Heat the cream mixture over medium heat, stirring occasionally, until it reaches about 170°F (just before it starts to simmer). You should see small bubbles forming around the edges.
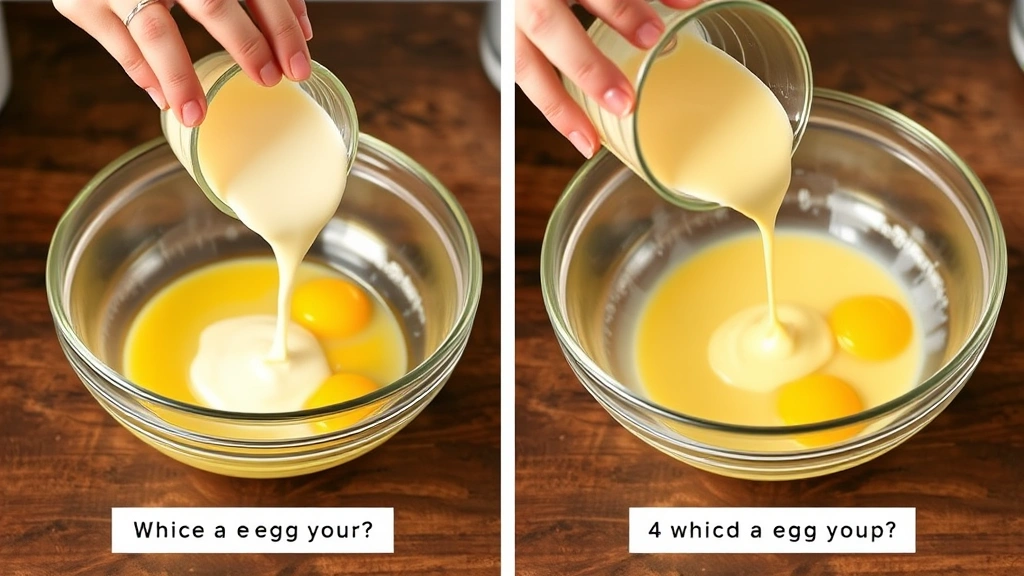
- While the cream heats, whisk together the egg yolks and granulated sugar in a large bowl until the mixture is pale yellow and thick, about 2-3 minutes of whisking.
- Slowly pour about 1 cup of the hot cream mixture into the egg yolk mixture while whisking constantly. This tempers the eggs and prevents them from scrambling.
- Once combined, pour the egg mixture back into the saucepan with the remaining cream, whisking constantly to combine.
- Return the saucepan to medium heat and cook, stirring frequently with a wooden spoon or heat-resistant spatula, until the mixture reaches 160°F on an instant-read thermometer. This should take about 5-7 minutes.
- Strain the custard through a fine-mesh sieve into a clean bowl to remove any cooked egg bits and the vanilla bean pod.
- Stir in the sea salt and vanilla extract (if not using fresh vanilla bean), along with any optional liqueur.
- Place the bowl in an ice bath (a larger bowl filled with ice and water) and stir occasionally until the custard has cooled to room temperature, about 15-20 minutes.
- Once cooled, cover the custard and refrigerate for at least 4 hours, or preferably overnight. This chilling time is crucial for developing flavor and achieving the best texture.
- When ready to churn, pour the chilled custard into your ice cream maker and churn according to manufacturer’s instructions, usually about 20-25 minutes.
- Transfer the churned ice cream to a freezer-safe container and freeze for at least 2 hours before scooping and serving.
Pro Tips
Vanilla bean versus extract: Fresh vanilla bean gives the most luxurious flavor and those beautiful specks, but quality vanilla extract works beautifully too. If using extract, add it after cooking to preserve the delicate vanilla notes.
The ice bath step: This is non-negotiable for food safety and texture. It ensures the custard cools quickly without any bacteria concerns and helps develop a smoother final product.
Churning time: Don’t over-churn or the ice cream will become too hard and grainy. It should look like soft-serve consistency when it comes out of the machine.
Freeze-ahead tip: Making this a day or two ahead allows the flavors to deepen and develop beautifully. Plus, it’s one less thing to worry about on serving day.
Flavor variations: Once you master the base, try adding 1/2 cup of fresh fruit puree, 1/4 cup of cocoa powder mixed with extra sugar, or a tablespoon of your favorite extract.
Scoop hack: Dipping your scoop in hot water between scoops makes serving much easier and creates those beautiful quenelle shapes.
Storage: Homemade ice cream is best enjoyed within 1-2 weeks. Longer storage can lead to ice crystal formation and freezer burn.
Make it dairy-free: Substitute heavy cream with full-fat coconut cream and use unsweetened almond milk for a creamy vegan version that’s surprisingly delicious.
Pingback: How to make Tasty Shrimp Skewers Recipe (So Quick!) – Simple Recipe Finder
Pingback: Quick & Easy Thin Sliced Pork Chop Recipe – So Tasty! – Simple Recipe Finder
Pingback: How to make the BEST Miso Salad Dressing Recipe! – Simple Recipe Finder