
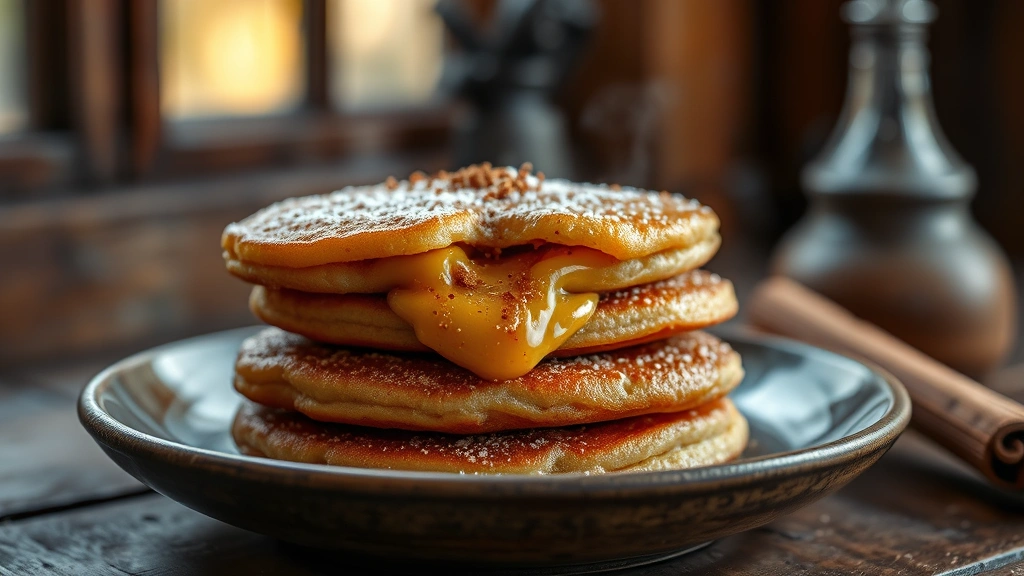
Hotteok is a beloved Korean street food that’s crispy on the outside and wonderfully gooey on the inside, filled with a sweet cinnamon-brown sugar mixture that melts as you bite into it. This recipe is easier than you might think, and once you master the technique, you’ll be making these delightful treats whenever the craving strikes!
These yeasted pastries are perfect for breakfast, dessert, or a late-night snack. The dough comes together quickly, and the filling is customizable to your taste preferences. What I love most about hotteok is how forgiving the recipe is—even if your first batch isn’t perfectly round, they’ll still taste absolutely delicious. The key is getting that perfect golden-brown exterior while keeping the interior soft and pillowy.
I first discovered hotteok during a food tour through Seoul, and I was immediately captivated by the contrast of textures and flavors. The crispy exterior gives way to a soft, chewy interior, and that warm cinnamon-sugar filling is pure comfort food. Now, I make them at home regularly, and my family goes crazy for them every single time.
What sets this recipe apart is the balance of technique and simplicity. You don’t need any special equipment or hard-to-find ingredients. If you enjoy making homemade comfort foods, you’ll definitely want to add hotteok to your rotation. The dough can even be made ahead and refrigerated, making this a convenient option for entertaining.
Before you start, gather all your ingredients and set up your work station. Having everything ready will make the process smooth and enjoyable. This recipe yields about 12-15 hotteok, depending on size, which is perfect for sharing with family or enjoying throughout the week.
For more Korean-inspired recipes and techniques, check out this guide to creating restaurant-quality dishes at home. You might also enjoy exploring other sweet and savory pastry recipes like pan-fried specialties for your next meal prep session.
One pro tip: don’t skip the resting periods in this recipe. They’re crucial for developing flavor and achieving that perfect texture. The initial rise allows the dough to develop structure, while the second rise ensures the hotteok puff up beautifully in the oil.
If you’re looking to expand your culinary horizons, consider pairing hotteok with other international recipes. The techniques you’ll learn here transfer well to other fried pastries and dough-based treats. For inspiration on flavor combinations, explore recipes like simple vegetable preparations that complement sweet and savory profiles.
The beauty of making hotteok at home is the ability to customize every element. Some people prefer more cinnamon, others love adding a touch of honey or maple syrup to their filling. You can even experiment with different nuts or seeds if you’d like. This recipe provides the perfect foundation for your own creative variations.
Looking for more fried appetizers and snacks? You might enjoy preparing other crowd-pleasing treats that work well for gatherings.
For detailed techniques on frying and oil temperature management, check out Serious Eats’ comprehensive frying guide. You’ll also find valuable insights on yeast dough preparation at Bon Appétit’s pastry fundamentals.
For more traditional Korean cooking techniques, The New York Times Cooking section offers excellent resources. Additionally, Serious Eats has detailed guides on Korean cooking methods.
Once you master this recipe, you’ll have a go-to treat that impresses everyone. The combination of crispy exterior, soft interior, and sweet filling is absolutely irresistible. Best of all, these can be made fresh throughout the day or even prepared ahead and reheated for maximum convenience.
Ingredients
- 2¼ teaspoons active dry yeast (about 1 packet)
- 1 cup whole milk, warmed to 110°F
- 3 tablespoons granulated sugar, divided
- 1 teaspoon salt
- 3 tablespoons vegetable oil, plus more for frying
- 3 cups all-purpose flour
- ½ cup brown sugar, packed
- 2½ tablespoons ground cinnamon
- 3 tablespoons unsalted butter, softened
- ¼ cup chopped walnuts or peanuts (optional)
- Oil for deep frying (vegetable or peanut oil works best)
- Pinch of sea salt for finishing
Instructions
- In a large mixing bowl, combine the warm milk, yeast, and 1 tablespoon of the granulated sugar. Let this mixture sit for 5 minutes until it becomes foamy and fragrant, indicating the yeast is active and ready to work.
- Add the remaining 2 tablespoons of granulated sugar, salt, and 3 tablespoons of vegetable oil to the yeast mixture and stir until well combined.
- Gradually add the all-purpose flour to the wet ingredients, one cup at a time, mixing with a wooden spoon or your hands until a shaggy dough begins to form.
- Transfer the dough to a clean, lightly oiled work surface and knead for 8-10 minutes until the dough becomes smooth, elastic, and slightly tacky. The dough should be soft but not sticky; add a tiny bit more flour if needed.
- Shape the kneaded dough into a smooth ball and place it in a lightly oiled bowl. Cover with a damp kitchen towel or plastic wrap and let it rise in a warm place for 1 hour, or until doubled in size.
- While the dough rises, prepare the filling by combining the packed brown sugar, ground cinnamon, and softened butter in a small bowl. Mix until well combined, breaking up any lumps. Stir in the chopped nuts if using.
- Once the dough has doubled, punch it down gently to release excess gas. Divide the dough into 12-15 equal pieces and roll each piece into a smooth ball.
- Place the balls on a parchment-lined baking sheet, cover loosely with a damp towel, and let them rest for 10 minutes to make them easier to work with.
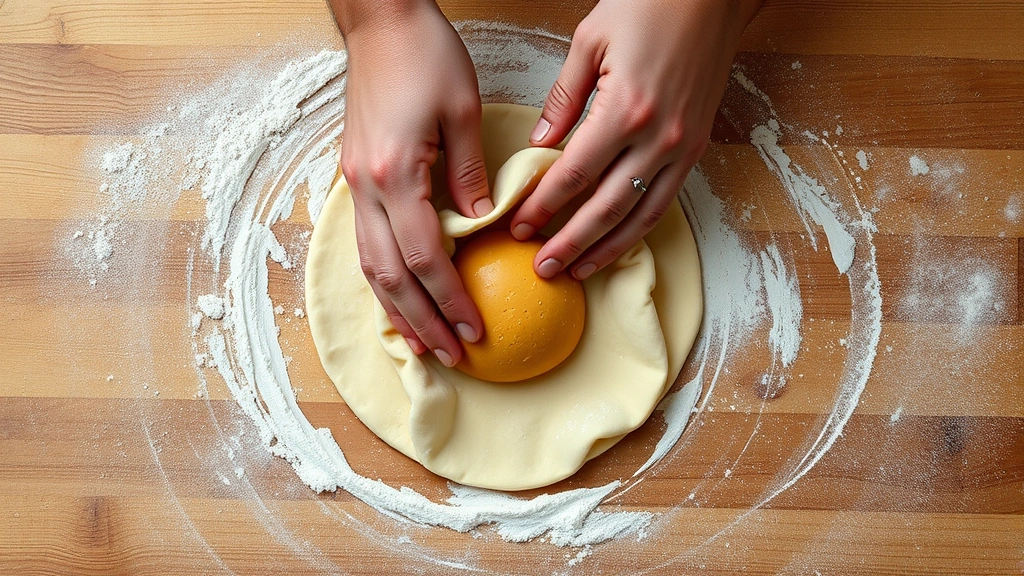
- Take one dough ball and gently flatten it into a thin circle about 4 inches in diameter, using your fingertips and palms. Be careful not to tear the dough.
- Place approximately 1 tablespoon of the cinnamon-brown sugar filling in the center of each flattened dough circle, leaving about ½ inch of dough around the edges.
- Carefully bring the edges of the dough up and around the filling, pinching them together at the top to seal. Gently flatten the sealed hotteok into a thick patty about ¾ inch thick, being careful not to let the filling escape.
- Arrange the filled and sealed hotteok on a parchment-lined baking sheet, cover loosely with a damp towel, and let them rest for 15-20 minutes. This second rise is important for achieving a pillowy texture.
- Heat about 2-3 inches of oil in a large, heavy-bottomed pot or deep skillet to 350°F. Use a thermometer to ensure accurate temperature; this is crucial for proper cooking.
- Carefully place 2-3 hotteok into the hot oil, being very careful to avoid splashing. Fry for about 2-3 minutes on the first side until golden brown and crispy.
- Using a slotted spoon or spider strainer, carefully flip each hotteok and fry for another 2-3 minutes on the second side until evenly golden brown and crispy all over.
- Remove the cooked hotteok from the oil using a slotted spoon and place them on a paper towel-lined plate to drain excess oil. Sprinkle lightly with sea salt while still warm.
- Repeat the frying process with the remaining hotteok, maintaining the oil temperature at 350°F throughout. Allow the oil to come back to temperature between batches.
- Serve the hotteok warm, preferably within 15 minutes of frying when they’re at their crispiest and the filling is most gooey. These are best enjoyed fresh and warm, though leftovers can be reheated in a 300°F oven for about 5 minutes.

Pro Tips
- Make-Ahead Instructions: The dough can be prepared up to 1 day in advance. After the first rise, punch it down, wrap it tightly in plastic wrap, and refrigerate. When ready to use, bring it to room temperature for about 30 minutes before dividing and filling.
- Filling Variations: Feel free to customize the filling! Try adding a tablespoon of honey, maple syrup, or vanilla extract for depth. Some people love adding sesame seeds, crushed pistachios, or even a pinch of ginger for warmth.
- Oil Temperature Control: This is the most critical factor for success. If the oil is too cool, the hotteok will absorb too much oil and become greasy. If too hot, the exterior will brown too quickly before the interior cooks through. Use a reliable thermometer for best results.
- Storage Tips: Leftover hotteok can be stored in an airtight container at room temperature for up to 2 days. Reheat in a 300°F oven for 5-7 minutes to restore crispiness. For longer storage, freeze uncooked, filled hotteok on a baking sheet, then transfer to freezer bags for up to 3 months. Fry directly from frozen, adding 1-2 minutes to cooking time.
- Dough Consistency: The dough should be soft and slightly tacky but not sticky. If it’s too dry, add milk a teaspoon at a time. If too wet, dust with a bit more flour. Getting this balance right makes shaping much easier.
- Sealing Technique: Make sure the edges are fully sealed to prevent filling from leaking out during frying. If you notice a small tear, pinch it closed before cooking.
- Serving Suggestions: Hotteok pairs beautifully with hot tea, coffee, or even a cold glass of milk. They’re delicious on their own or served alongside other Korean treats.
- Batch Frying: Don’t overcrowd the pot. Frying too many hotteok at once will lower the oil temperature too much and result in uneven cooking. Work in small batches and allow proper recovery time between batches.
- Nut Allergies: The nuts are optional and can be omitted entirely without affecting the recipe. You can also substitute with seeds like sesame or sunflower seeds.
- Scale This Recipe: This recipe doubles or triples easily if you’re serving a crowd. Just multiply all ingredients proportionally and allow extra rising time.