
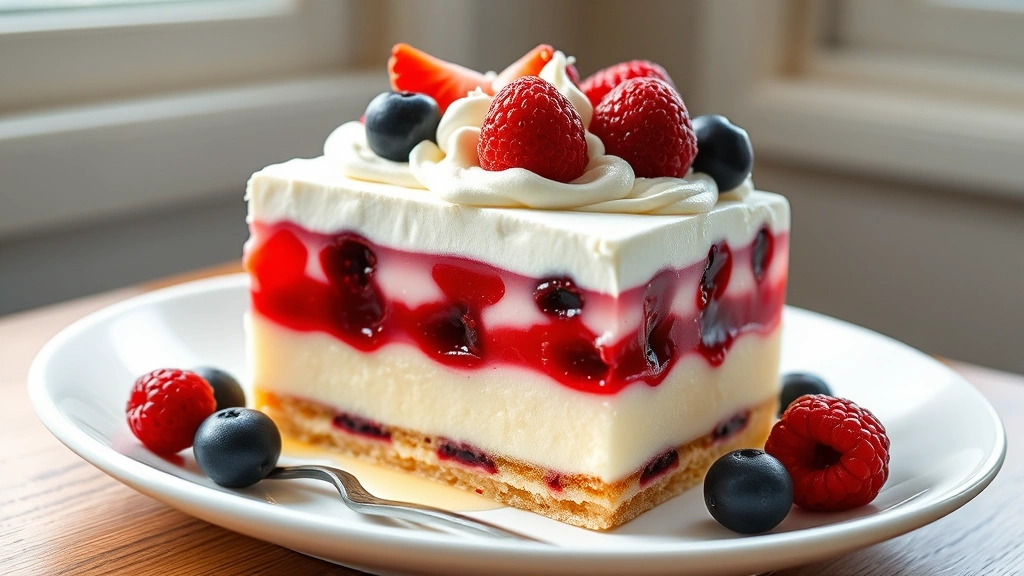
There’s something absolutely magical about a jello poke cake – it’s the kind of dessert that looks impressively fancy but comes together with such ease that you’ll find yourself making it again and again. This beloved classic combines a tender, homemade cake base with wiggly, flavorful jello that seeps into every delicious crevice, creating pockets of fruity goodness in every bite. The beauty of this dessert lies in its simplicity and versatility; whether you’re hosting a summer gathering, bringing a dish to a potluck, or simply craving something sweet and refreshing, a jello poke cake delivers every single time.
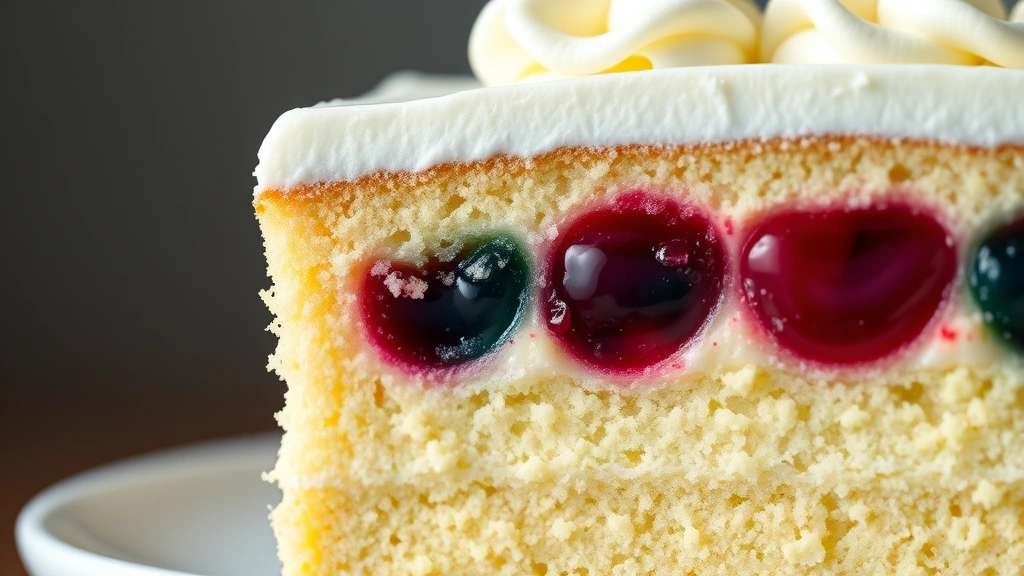
The magic of a poke cake happens when you perforate the cooled cake with a fork or skewer, creating tiny holes throughout. Then, you pour warm jello mixture over the entire surface, allowing it to seep down into those pockets. As the jello sets, it creates this wonderfully moist, flavorful cake that’s nothing short of spectacular. What makes this recipe so special is that it’s completely customizable – you can use any flavor of jello you love, pair it with complementary whipped cream toppings, and even add fresh fruit for extra freshness and color.
I absolutely love making this cake because it’s genuinely foolproof. Even if you’re new to baking, this recipe is forgiving and straightforward. The cake itself is a simple vanilla or butter cake, which provides the perfect canvas for whatever jello flavor you choose. The timing is wonderfully convenient too – you can bake the cake, poke it, pour the jello, refrigerate it, and then top it with whipped cream whenever you’re ready to serve. This makes it an excellent make-ahead dessert for entertaining.
The combination of textures in every forkful is absolutely divine. You get that tender, moist cake layer, the jiggly, flavorful jello pockets, and the light, creamy whipped cream topping all working together in perfect harmony. It’s refreshing without being too heavy, impressive without requiring advanced baking skills, and absolutely delicious no matter what flavor combination you choose. This is definitely a recipe you’ll want to bookmark and return to time and time again.
If you’re looking for other crowd-pleasing desserts, you might also enjoy exploring our collection of crowd favorite recipes or checking out other easy entertaining dishes. For more dessert inspiration and baking tips, Bon Appétit offers wonderful recipe collections, and Serious Eats provides detailed baking science explanations. You can also find more easy recipes for every occasion in our recipe collection.
Ingredients
- 1¾ cups all-purpose flour
- 1½ teaspoons baking powder
- ½ teaspoon salt
- ½ cup (1 stick) unsalted butter, softened
- 1 cup granulated sugar
- 2 large eggs, room temperature
- ½ cup whole milk, room temperature
- 2 teaspoons vanilla extract
- One 6-ounce package flavored jello (any flavor you prefer)
- 1 cup boiling water
- 1 cup cold water
- 2 cups heavy whipping cream
- 3 tablespoons granulated sugar (for whipped cream)
- 1 teaspoon vanilla extract (for whipped cream)
- Fresh fruit for garnish (optional: berries, fresh fruit that complements your jello flavor)

Instructions
- Preheat your oven to 350°F. Grease a 9×13 inch baking dish with butter or cooking spray, then line the bottom with parchment paper for easy removal.
- In a small bowl, whisk together the flour, baking powder, and salt. Set this dry mixture aside.
- In a large bowl, cream together the softened butter and sugar using an electric mixer on medium speed for 3-4 minutes until the mixture is light, fluffy, and pale in color.
- Add the eggs one at a time to the butter mixture, beating well after each addition and scraping down the bowl with a spatula to ensure even mixing.
- Add the vanilla extract to the mixture and beat until fully combined.
- Alternate adding the flour mixture and milk to the butter mixture, beginning and ending with the flour mixture. Add about one-third of the flour mixture, mix until just combined, then add half of the milk, mix, then add another third of the flour, mix, add the remaining milk, mix, and finally add the remaining flour mixture. Mix until just combined after each addition.
- Pour the batter into the prepared baking dish, smoothing the top with a spatula to ensure an even layer.
- Bake for 28-32 minutes, or until a toothpick inserted into the center comes out clean or with just a few moist crumbs. The cake should be golden brown on top.
- Remove the cake from the oven and allow it to cool in the baking dish for about 10-15 minutes until it’s cool enough to handle but still slightly warm.
- Using a fork or wooden skewer, pierce the entire surface of the cake with holes, spacing them about ½ inch apart. Be thorough – you want to create lots of little pockets for the jello to seep into.
- In a medium bowl, dissolve the jello in the boiling water, stirring for about 2 minutes until completely dissolved.
- Add the cold water to the jello mixture and stir well to combine.
- Slowly and carefully pour the jello mixture evenly over the entire surface of the poked cake. Pour slowly so the jello has time to seep into the holes rather than running off the sides.
- Allow the cake to cool to room temperature, then cover it with plastic wrap and refrigerate for at least 4 hours, or preferably overnight, until the jello is completely set and firm.
- In a large chilled bowl, pour the heavy whipping cream. Using an electric mixer on medium-high speed, whip the cream for about 2-3 minutes until soft peaks form.
- Add the sugar and vanilla extract to the whipped cream and continue beating for another 1-2 minutes until stiff peaks form. Do not overbeat or you’ll end up with butter.
- Spread or dollop the whipped cream over the top of the chilled jello poke cake, creating decorative swirls with the back of a spatula or an offset knife.
- Garnish with fresh fruit that complements your jello flavor if desired – berries are always lovely.
- Slice into squares and serve immediately. Store any leftovers covered in the refrigerator for up to 3 days.
Pro Tips
Flavor Combinations: Get creative with your jello flavors. Strawberry jello with fresh strawberries and whipped cream is classic, lime jello with whipped cream and fresh mint is refreshing, raspberry pairs beautifully with dark chocolate cake, orange jello creates a bright and citrusy version, or try cherry jello for a more traditional approach. The possibilities are endless.
Cake Base Variations: While this recipe uses a vanilla cake, you can certainly use a chocolate cake mix or homemade chocolate cake as your base. Just ensure you’re using a 9×13 inch baking dish and adjust baking time slightly if needed. A doctored cake mix is a convenient shortcut that works wonderfully for this recipe.
Poking Technique: The key to a successful poke cake is making enough holes so the jello can really penetrate throughout. Don’t be shy – aim for holes spaced about ½ inch apart across the entire surface. If you prefer larger pockets, you can use a wooden skewer instead of a fork, but be careful not to create holes so large that too much jello pools on top.
Jello Temperature: Make sure your jello mixture has cooled slightly before pouring it over the cake. If it’s too hot, it can cause the cake to become overly soggy. Let it sit at room temperature for about 5-10 minutes after mixing with cold water before pouring.
Whipped Cream Alternatives: If you prefer not to make fresh whipped cream, you can use store-bought whipped cream or even a whipped topping. However, homemade whipped cream has such a superior texture and taste that we highly recommend taking the few extra minutes to make it.
Storage and Serving: Keep this cake refrigerated at all times, as the jello and whipped cream need cool temperatures. It’s best served cold and should be consumed within 3-4 days of making. This dessert doesn’t freeze well due to the jello component.
Serving Size: This recipe generously serves 12 people, making it perfect for potlucks, family gatherings, or parties. If you need to feed fewer people, you can easily halve the recipe and use an 8-inch square baking dish, though you’ll need to reduce baking time slightly.
Cream Cheese Option: For extra richness, spread a thin layer of softened cream cheese mixed with a bit of powdered sugar on the cooled cake before pouring the jello. This adds a wonderful tangy element that complements most jello flavors beautifully.