
There’s something magical about creating ambiance with edible lanterns—delicate, glowing treats that transform any cozy night into an enchanting experience. These stunning lantern-shaped desserts combine the elegance of caramel work with the warmth of spiced flavors, creating both visual drama and delicious indulgence. Whether you’re hosting an intimate dinner party or simply want to add wonder to a quiet evening at home, these edible lanterns will illuminate your table with handcrafted beauty.
The concept of lantern recipes has grown increasingly popular among home bakers and pastry enthusiasts who appreciate the intersection of culinary artistry and functional decoration. Unlike traditional desserts that sit passively on a plate, these lantern creations actively participate in your tablescape, casting a warm glow (when filled with appropriate LED-safe elements) while serving as the grand finale to your meal. The technique draws inspiration from traditional sugar work and blown sugar techniques, but simplified for the home cook without requiring specialized equipment.
What makes this recipe particularly special is its versatility. The basic lantern structure can be filled with various mousses, custards, or creams, and the exterior can be customized with different glazes, colors, and flavor profiles. For a autumn-inspired version, incorporate warming spices like cinnamon and cardamom. For spring celebrations, consider delicate floral notes with rose or lavender. The lantern itself becomes a canvas for your creativity, making each version uniquely yours.
I’ve developed this recipe to be achievable for intermediate bakers while maintaining the sophisticated appearance that makes these lanterns so special. The key is understanding the behavior of caramel and how to work with it efficiently—once you master this technique, you’ll find yourself making these for every special occasion. The combination of structural caramel with creamy, flavorful filling creates textural contrast that keeps each bite interesting and memorable.
These lanterns are perfect for holiday gatherings, romantic dinners, or whenever you want to create a moment of genuine magic at the table. The preparation can be done ahead of time, with final assembly just before serving, making it manageable even for busy hosts. Your guests will be absolutely captivated by these edible works of art, and you’ll love the compliments that inevitably follow. For more inspiration on elegant plating techniques, check out this guide to dessert presentation, and explore additional special occasion dessert ideas.
Ingredients
- 2 cups granulated sugar, divided
- ¾ cup light corn syrup
- ½ cup water
- ¼ teaspoon cream of tartar
- ½ teaspoon vanilla extract
- ¼ teaspoon sea salt
- 2 tablespoons unsalted butter
- 1 cup heavy whipping cream, cold
- ½ cup whole milk
- 1 teaspoon vanilla extract
- 2 tablespoons powdered sugar
- ½ teaspoon ground cinnamon
- ¼ teaspoon ground cardamom
- Pinch of nutmeg
- 4 ounces high-quality dark chocolate, chopped
- 2 tablespoons coconut oil
- Edible gold leaf for garnish (optional)
- Fresh berries or candied citrus for filling (optional)
Instructions
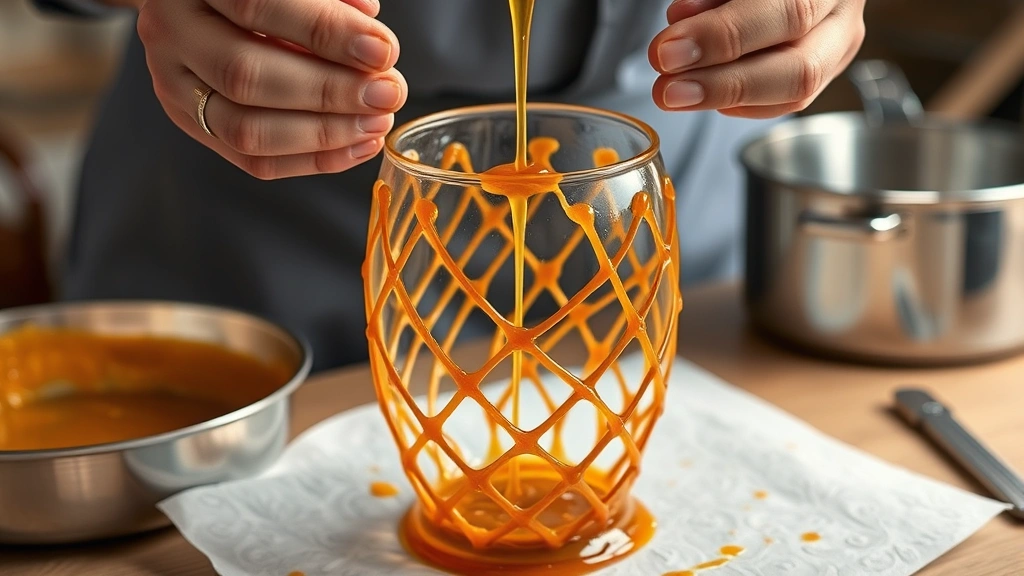
- Prepare your work surface by placing parchment paper on a baking sheet and arranging six small glass cups or ramekins (approximately 2-3 inches in diameter) upside down on the sheet, spacing them evenly. Lightly oil the outsides of each glass with neutral oil to prevent sticking. Have all other ingredients measured and ready before you begin, as caramel work moves quickly.
- Combine 1½ cups granulated sugar, corn syrup, water, and cream of tartar in a medium heavy-bottomed saucepan over medium heat. Stir gently until the sugar dissolves completely, then stop stirring and let the mixture cook undisturbed.
- Clip a candy thermometer to the side of the pan and watch carefully as the mixture heats. Once it reaches 300°F (hard crack stage), it will transform from clear to pale amber. This usually takes 12-15 minutes from when it starts boiling.
- Remove the pan from heat immediately when it reaches 300°F. Carefully stir in vanilla extract, sea salt, and butter until fully incorporated. The mixture will bubble slightly when you add cold ingredients—this is normal.
- Working quickly but carefully, use a fork or caramel dipping tool to create thin strands of caramel across the inverted glasses, building a lattice pattern. Start with vertical strands, then weave horizontal strands through them. Work in sections, allowing the caramel to cool slightly between applications so it holds its shape.
- Once you’ve created a complete latticed dome over each glass, allow the caramel to cool for 5-10 minutes until completely hardened. Gently twist and lift each glass away from the hardened caramel lantern structure. The lanterns should release cleanly if properly oiled.
- For the spiced cream filling, combine cold heavy cream, whole milk, powdered sugar, vanilla extract, cinnamon, cardamom, and nutmeg in a chilled bowl. Whip using an electric mixer on medium-high speed until soft peaks form, approximately 3-4 minutes.
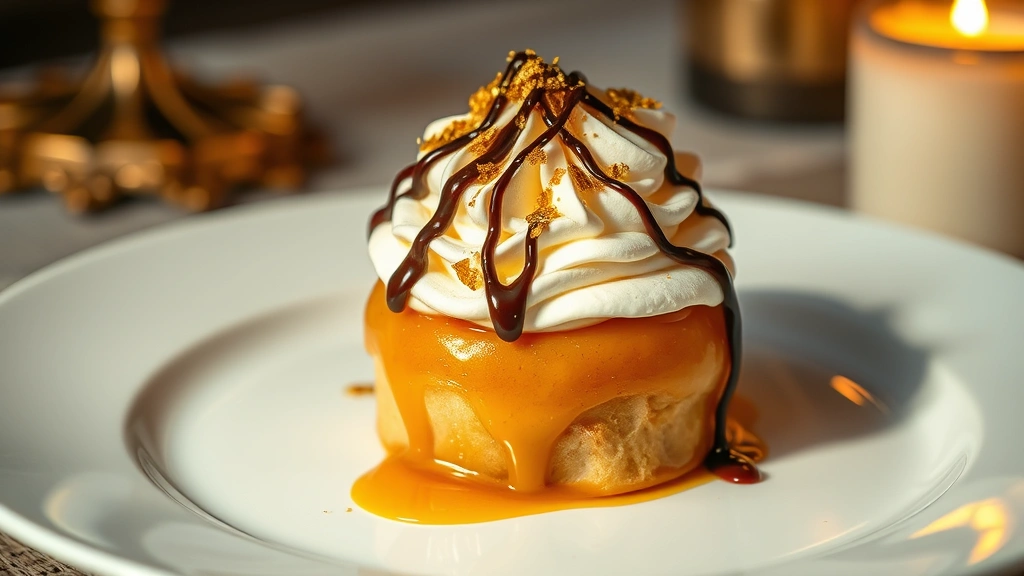
- Transfer the spiced whipped cream to a piping bag fitted with a medium star tip. Carefully pipe the cream into the center of each caramel lantern, creating a generous but stable mound that doesn’t spill over the sides.
- Melt the chopped dark chocolate with coconut oil in a microwave-safe bowl in 30-second intervals, stirring between each interval, until completely smooth and glossy. This should take about 1-2 minutes total.
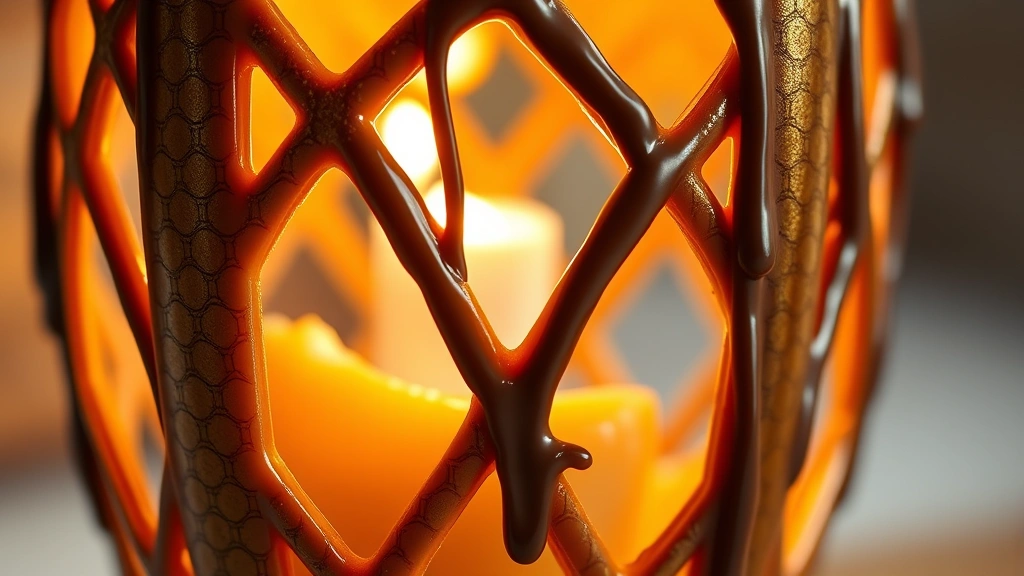
- Drizzle the melted chocolate decoratively over and around each lantern using a fork or by piping from a small squeeze bottle. The chocolate adds both visual contrast and complementary flavor to the sweet caramel and spiced cream.
- If using edible gold leaf, carefully apply small pieces to the caramel structure while the chocolate is still slightly tacky, pressing gently with a clean, dry brush or tweezers. The gold catches light beautifully and adds luxurious elegance.
- Top each lantern with fresh berries, candied citrus peel, or a single cookie for added height and visual interest. Refrigerate until serving, but remove from refrigeration 10 minutes before serving to allow flavors to fully develop and caramel to reach optimal texture.
- Serve each lantern on a small dessert plate with a spoon for breaking through the caramel structure. Encourage guests to experience the contrast between the crispy caramel, creamy filling, and rich chocolate together.
Pro Tips
- **Caramel Safety**: Working with caramel at 300°F requires careful attention. Keep a bowl of ice water nearby for emergencies, never touch hot caramel directly, and ensure children and pets are kept safely away from your work area. Always use a candy thermometer for accuracy—guessing by color can lead to unsafe temperatures.
- **Make-Ahead Options**: Caramel lanterns can be made up to 24 hours in advance and stored in an airtight container with parchment between layers. The filling should be prepared no more than 4 hours before serving to maintain optimal texture. Assemble completely just before serving for the best presentation.
- **Humidity Considerations**: Caramel is sensitive to humidity. Avoid making this recipe on very humid or rainy days, as moisture can cause the caramel to become sticky and collapse. If you must cook in humid conditions, work as quickly as possible and store finished lanterns in an airtight container with silica packets.
- **Flavor Variations**: Experiment with different spice combinations—try replacing the cardamom with ginger and cloves for a more traditional holiday spice profile, or use lavender and lemon zest for a delicate spring version. The filling can also be flavored with coffee extract, almond extract, or Earl Grey tea steeped into the cream.
- **Filling Alternatives**: Instead of spiced whipped cream, try a smooth chocolate mousse, a silky vanilla bean panna cotta, or a light passion fruit curd. For a more decadent option, use a whipped mascarpone cream sweetened with honey and flavored with vanilla or brandy.
- **Caramel Troubleshooting**: If your caramel crystallizes before reaching temperature, add a tablespoon of water and start over. If it burns (becomes very dark brown or black), discard it immediately and start fresh—burnt caramel cannot be salvaged and will taste bitter. If caramel hardens before you finish building all your lanterns, reheat it gently over low heat or in short microwave bursts.
- **Equipment Notes**: A candy thermometer is essential for success with this recipe. Avoid wooden spoons when stirring hot caramel, as they can absorb moisture and cause crystallization. Use heavy-bottomed pans to ensure even heat distribution.
- **Serving Suggestions**: These lanterns pair beautifully with a dessert wine like Moscato or a rich coffee. Serve on chilled plates for maximum visual impact, and consider dimming lights slightly to enhance the ‘lantern’ effect of the transparent caramel structure.
- **Dietary Adaptations**: For dairy-free versions, use coconut cream and non-dairy milk in the filling. For a nut-free option, this recipe is naturally accommodating—just ensure all decorative elements and toppings are nut-free. Vegan versions require replacing eggs and dairy with plant-based alternatives in the filling component.