There’s something absolutely magical about Magnolia Bakery’s famous banana pudding that keeps people coming back for more. This iconic New York dessert has become a beloved classic, and the good news is that you can recreate it right in your own kitchen! With its layers of creamy vanilla pudding, fresh bananas, and those perfectly crispy vanilla wafers, this dessert is the ultimate comfort food that tastes like pure nostalgia.
I’ve spent countless hours perfecting this recipe to match the bakery’s signature style, and I’m thrilled to share it with you today. The key to achieving that restaurant-quality result lies in using quality ingredients and taking your time with each layer. This isn’t a difficult dessert to make, but it does require attention to detail and patience—two things that are absolutely worth it when you see the delighted faces of your family and friends.
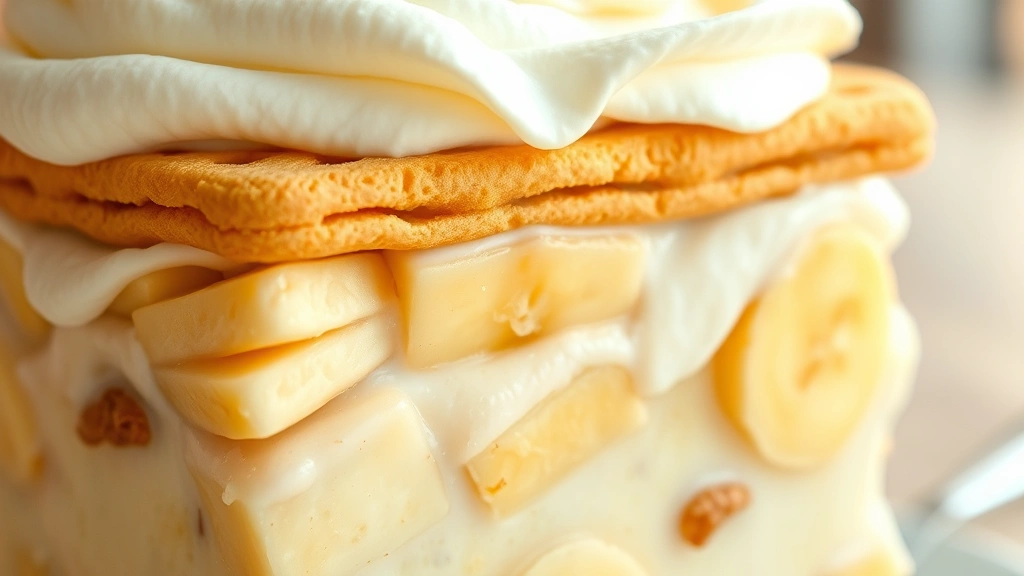
What makes this banana pudding so special is the balance of flavors and textures. The smooth, silky pudding contrasts beautifully with the slightly crispy vanilla wafers that soften just enough to become tender without falling apart. The fresh bananas add a natural sweetness and a beautiful golden hue throughout the layers. And then there’s that cloud of whipped cream on top—pure heaven!
Whether you’re preparing this for a dinner party, a potluck, or simply because you’re craving something sweet and satisfying, this recipe will not disappoint. I love making this dessert because it can be prepared ahead of time, which makes entertaining so much easier. You can assemble it the morning of your event, cover it with plastic wrap, and let it chill until you’re ready to serve. The flavors actually deepen and meld together beautifully during this resting time.
One of the things I adore about this recipe is its versatility. While the classic version is absolutely perfect on its own, you can get creative with it. Some people like to add a splash of vanilla extract or even a hint of rum for an adult version. Others enjoy garnishing with crushed vanilla wafers or a sprinkle of cinnamon. The beauty of homemade cooking is that you can make it your own!
I’ve also discovered some helpful tips and tricks over the years that help ensure success every single time. For instance, slicing your bananas just before assembly prevents them from browning and keeps them looking fresh and beautiful. Using room temperature ingredients for the pudding helps it come together more smoothly. And don’t skip the vanilla wafer layer on the bottom—it creates a delicious foundation for the entire dessert.
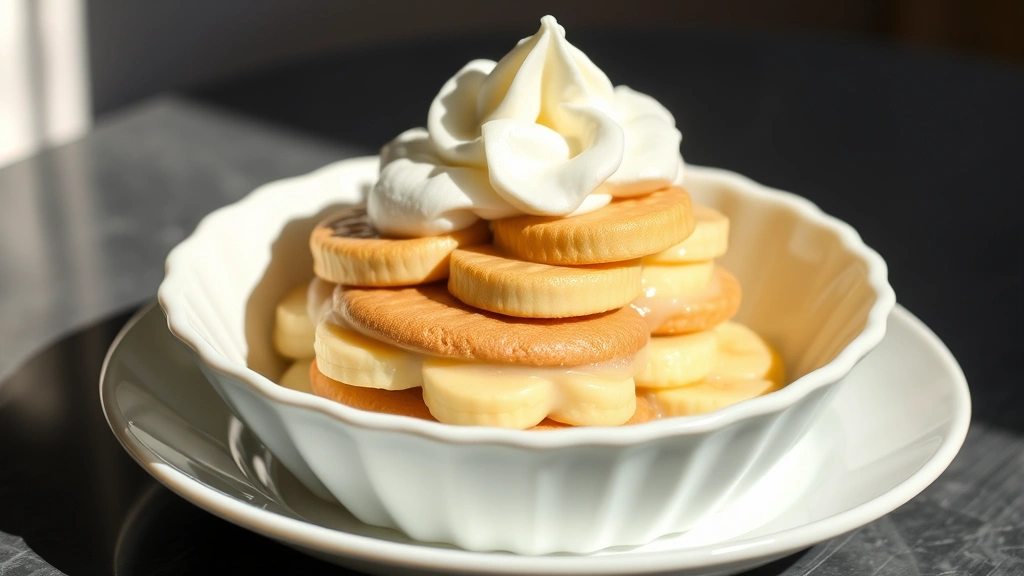
This recipe serves a generous crowd, making it perfect for feeding 8-10 people. If you’re looking for a smaller portion, you can easily halve the ingredients and use a smaller dish. The beauty of this dessert is that it’s forgiving and adaptable to your needs. I’ve made it in large baking dishes for parties, individual glasses for an elegant presentation, and everything in between.
The combination of homemade or quality store-bought vanilla pudding with fresh bananas and those iconic vanilla wafers is what elevates this dessert from ordinary to extraordinary. When you bite into a spoonful, you get layers of flavor and texture that dance on your palate. It’s creamy, it’s sweet, it’s indulgent, and it’s absolutely worth making at home.
I’m confident that once you try this recipe, it will become a staple in your dessert rotation. It’s the kind of dessert that brings people together, that creates memories, and that leaves everyone asking for the recipe. So grab your ingredients, roll up your sleeves, and let’s make some banana pudding magic together!
Ingredients
- 1 box (5.1 oz) instant vanilla pudding mix
- 3 cups cold whole milk
- 1 teaspoon vanilla extract
- 1 box (11 oz) vanilla wafers
- 5-6 fresh ripe bananas, sliced 1/4 inch thick
- 2 cups heavy whipping cream
- 3 tablespoons granulated sugar
- 1/2 teaspoon vanilla extract (for whipped cream)
- Pinch of salt
Instructions
- In a large mixing bowl, combine the instant vanilla pudding mix with 3 cups of cold milk. Whisk together for about 2 minutes until the pudding thickens and reaches a smooth, creamy consistency.
- Stir in 1 teaspoon of vanilla extract into the pudding mixture and set aside. The pudding will continue to thicken as it sits.
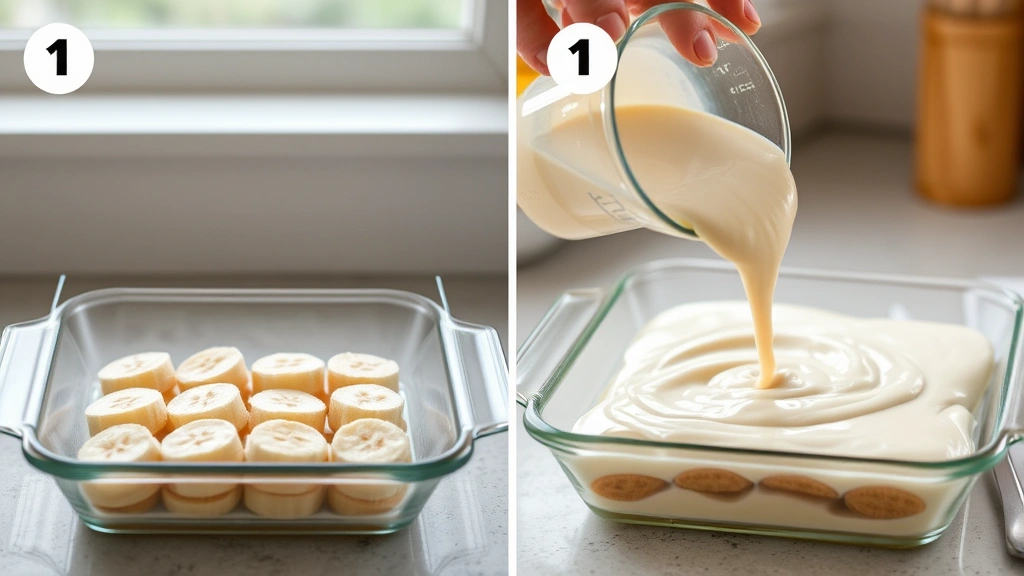
- Choose a 9×13 inch baking dish or similar size dish for layering your banana pudding.
- Create the first layer by arranging vanilla wafers in a single layer on the bottom of your baking dish, breaking wafers as needed to fill any gaps.
- Slice your bananas into 1/4 inch thick rounds and arrange them in an even layer over the vanilla wafers.
- Spread approximately one-third of the pudding mixture evenly over the banana layer, being careful not to disturb the fruit below.
- Repeat the layering process: vanilla wafers, banana slices, and pudding, creating three distinct layers total. Your final layer should be pudding.
- Cover the dish with plastic wrap and refrigerate for at least 3-4 hours, or until you’re ready to serve. This allows the layers to set and the flavors to meld beautifully.
- Just before serving, prepare the whipped cream topping by pouring 2 cups of heavy whipping cream into a clean mixing bowl.
- Add 3 tablespoons of granulated sugar, 1/2 teaspoon of vanilla extract, and a pinch of salt to the heavy cream.
- Using an electric mixer on medium-high speed, beat the mixture for 2-3 minutes until stiff peaks form and the whipped cream is light and fluffy.
- Remove the banana pudding from the refrigerator and spread or dollop the freshly whipped cream evenly over the top layer.
- Optional: garnish with crushed vanilla wafers, banana slices, or a light dusting of cinnamon for extra elegance.
- Serve immediately and enjoy this beloved classic dessert!