
There’s something absolutely magical about Magnolia Bakery’s famous banana pudding that has made it an iconic New York dessert for decades. This creamy, indulgent dessert has inspired countless home bakers to recreate the magic in their own kitchens, and today I’m sharing my version of what makes this recipe truly the BEST.
The secret to an authentic Magnolia-style banana pudding lies in understanding the balance of its components. This isn’t just any banana pudding – it’s a carefully constructed dessert that combines layers of nostalgia, comfort, and pure elegance. The beauty of this recipe is that while it might seem complicated at first glance, it’s actually quite approachable for home bakers of all skill levels.
What makes this banana pudding different from other recipes you’ll find online is the attention to detail in each component. The custard must be silky and rich, the whipped cream perfectly fluffy, and the vanilla wafers chosen carefully for their ability to soften just enough without becoming mushy. When you combine these elements with perfectly ripe but still firm bananas, you create layers of texture and flavor that dance together beautifully.
I’ve been making this recipe for years, and every time I prepare it, I’m reminded why Magnolia’s version became such a beloved classic. Whether you’re making this for a special dinner party, a holiday gathering, or simply because you’re craving something spectacular, this recipe delivers every single time. The combination of homemade custard, fresh whipped cream, perfectly sliced bananas, and crispy vanilla wafers creates a dessert that’s both comforting and impressive.
One of the best things about making banana pudding at home is that you can control the quality of every ingredient. Use real vanilla bean if you can find it, choose the best bananas available, and don’t skip on the heavy cream – these choices matter. This is a dessert that rewards attention to detail, and your guests will absolutely notice the difference.
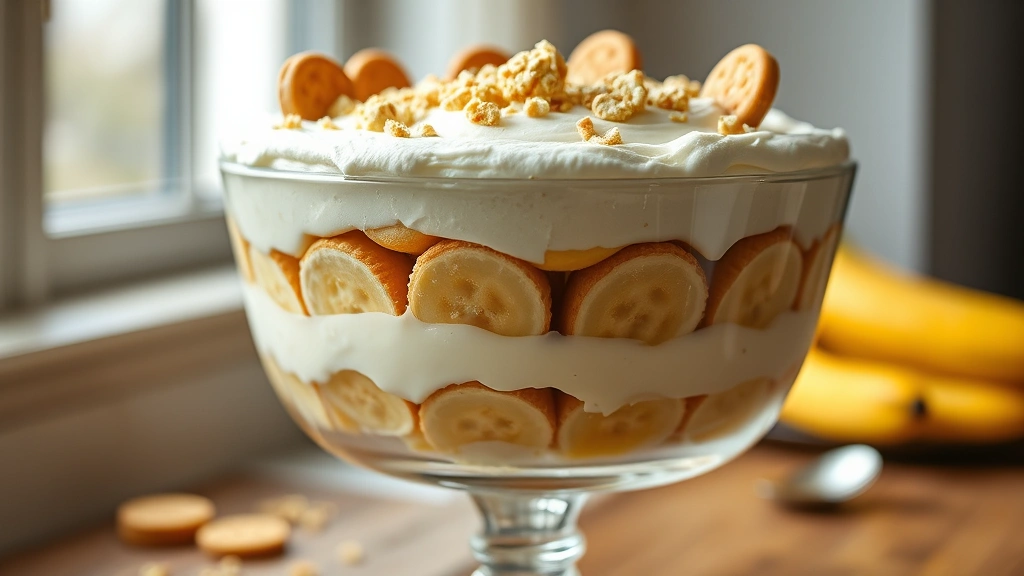
The technique for layering is important too. You want to create distinct, beautiful layers that you can see when you serve it. Start with a thin layer of custard on the bottom of your serving dish, then add a layer of vanilla wafers, then bananas, then more custard. Repeat until you reach the top, finishing with whipped cream and a few crushed wafers for garnish. This creates the signature presentation that makes Magnolia’s version so visually stunning.
Timing is another crucial element to master. You’ll want to assemble this dessert a few hours before serving – ideally 4-6 hours ahead, or even better, the day before. This allows the flavors to meld together beautifully and gives the wafers time to soften slightly while still maintaining some texture. It’s the perfect make-ahead dessert for entertaining because you can have it completely prepared before your guests arrive.
I’ve included detailed instructions for making the custard from scratch, but if you’re short on time, you can reference this custard guide for tips on achieving the perfect consistency. The key is cooking it to exactly the right temperature – not too hot, or you’ll scramble the eggs, but hot enough to create a thick, luxurious custard.
For variations and inspiration, check out our collection of vanilla pudding recipes which offers creative twists on classic desserts. You might also enjoy exploring make-ahead desserts perfect for entertaining to find other options that pair well with this banana pudding.
If you’re interested in understanding more about the science behind custard-based desserts, Bon Appétit’s vanilla custard recipe provides excellent technical information. Additionally, our guide on whipping cream to perfect peaks will help you master that component, and The New York Times has a wonderful banana pudding variation worth exploring.
This Magnolia Banana Pudding recipe is truly special, and I hope you’ll make it soon. Your family and friends will be absolutely delighted by this elegant, delicious dessert that tastes like a professional bakery creation but comes straight from your own kitchen.
Ingredients
- 1 cup whole milk
- 1 cup heavy cream, divided
- 1 vanilla bean, split and scraped (or 1 teaspoon vanilla extract)
- 5 large egg yolks
- 1/2 cup granulated sugar
- 3 tablespoons cornstarch
- 1/4 teaspoon salt
- 4 tablespoons unsalted butter
- 45-50 vanilla wafers (about one 12 oz box)
- 6-7 ripe but firm bananas
- 2 tablespoons powdered sugar
- 1 teaspoon vanilla extract (if not using vanilla bean)
Instructions
- Pour the milk and 1/2 cup of heavy cream into a heavy-bottomed saucepan. Add the split vanilla bean pod and seeds (if using). Heat over medium heat, stirring occasionally, until it reaches a gentle simmer. Remove from heat and let it steep for 15 minutes to infuse the vanilla flavor.
- While the cream mixture steeps, whisk together the egg yolks and granulated sugar in a medium bowl. Whisk vigorously for about 2-3 minutes until the mixture becomes pale and thick. This step is important for achieving a smooth custard.
- In a small bowl, whisk together the cornstarch and salt. Add this mixture to the egg yolk mixture and whisk until completely combined and smooth.
- Slowly add the hot milk and cream mixture to the egg yolk mixture while whisking constantly. This prevents the eggs from scrambling. Pour through a fine-mesh strainer if desired for an extra-smooth custard.
- Return the custard to the saucepan and cook over medium heat, stirring constantly with a wooden spoon or whisk. Cook for 8-10 minutes until the custard thickens and reaches 165°F on an instant-read thermometer.
- Remove from heat and stir in the butter until melted and fully incorporated. If you’re using vanilla extract instead of a vanilla bean, add it now. Strain the custard through a fine-mesh sieve into a bowl.
- Press plastic wrap directly onto the surface of the custard to prevent a skin from forming. Refrigerate for at least 2 hours, or until completely chilled.
- When ready to assemble, remove the custard from the refrigerator. In a separate bowl, pour the remaining 1/2 cup of heavy cream, add the powdered sugar and vanilla extract, and whip with an electric mixer until stiff peaks form.
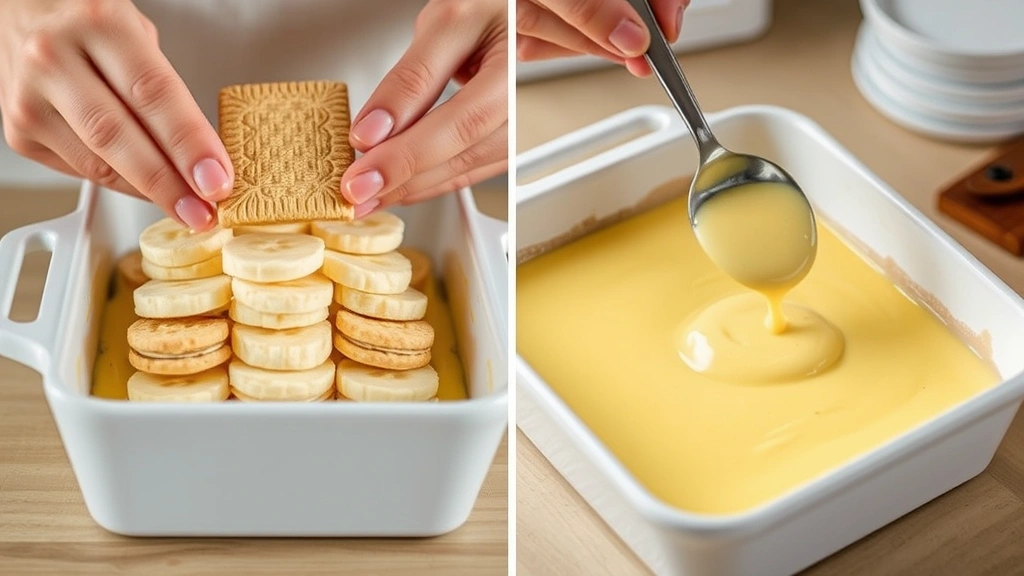
- Peel and slice the bananas into 1/4-inch thick rounds. Have your vanilla wafers and serving dish ready.
- Spread a thin layer of custard (about 1/4 inch) on the bottom of a 9×13-inch baking dish or large trifle bowl.
- Arrange a single layer of vanilla wafers over the custard, breaking them as needed to fit.
- Arrange a layer of banana slices over the wafers, overlapping them slightly for a beautiful presentation.
- Spread another layer of custard over the bananas.
- Repeat the layers of wafers, bananas, and custard until you reach near the top of your dish, typically 2-3 sets of layers depending on your dish size and depth.
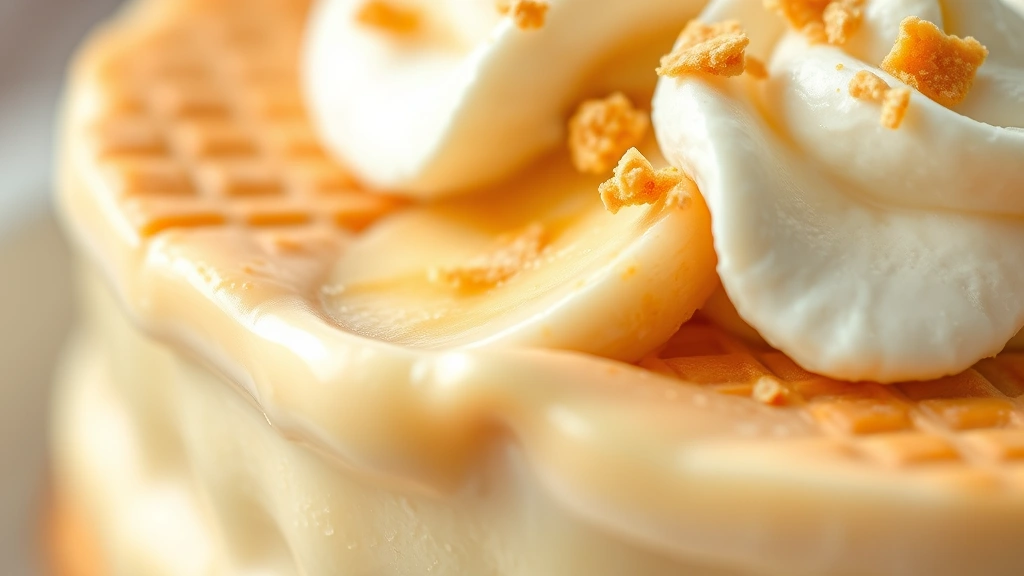
- Top the final layer with the whipped cream, spreading it evenly to the edges.
- Crush a handful of vanilla wafers into coarse pieces and sprinkle over the top for garnish and added texture.
- Cover loosely with plastic wrap and refrigerate for at least 4-6 hours, preferably overnight, before serving. This allows the flavors to meld and the wafers to soften slightly.
Pro Tips
Banana Selection: Choose bananas that are ripe but still slightly firm with some yellow showing and only a few brown speckles. Bananas that are too green won’t have enough flavor, while overripe ones will turn mushy in the pudding. If your bananas are very ripe, slice them just before assembling to prevent browning.
Vanilla Wafer Substitutes: While traditional vanilla wafers are classic, you can experiment with different cookies. Nilla Wafers are the most authentic choice, but you could also try thin butter cookies or even homemade vanilla wafers for a truly from-scratch version.
Custard Perfection: The custard is the heart of this dessert, so don’t rush it. Cooking it slowly and to the proper temperature ensures it will be smooth and luscious. An instant-read thermometer is invaluable here. If you accidentally cook it too hot and it breaks, strain it through fine mesh and whisk in a tablespoon of cold cream to smooth it out.
Whipped Cream Tips: Chill your bowl and beaters before whipping the cream – this helps it reach stiff peaks faster and hold its shape longer. Don’t overbeat or you’ll end up with butter! Stop when you see stiff peaks form when you lift the beaters.
Serving Suggestions: Banana pudding is best served chilled, directly from the refrigerator. You can serve it in individual glasses for an elegant presentation, or let guests serve themselves from a large dish. It’s delicious on its own but pairs beautifully with a cup of coffee or tea.
Storage: Cover leftover banana pudding with plastic wrap and refrigerate for up to 2 days. The wafers will continue to soften as time goes on, which many people actually prefer. Don’t freeze this dessert as the texture of the custard and whipped cream will be compromised.
Scaling: This recipe can be easily doubled for a larger gathering. Simply multiply all ingredients by two and use a larger serving dish or two smaller dishes.
Customization: Feel free to add a splash of bourbon, rum, or banana liqueur to the custard for an adult version. Some people also like to add a tablespoon of lemon juice to brighten the banana flavor.
Emulsification Help: If your custard seems thin, you may not have cooked it long enough. The cornstarch helps thicken it, and proper cooking time is crucial. Cook low and slow for the best results.