
There’s something absolutely magical about homemade maple fudge – it’s the kind of candy that tastes like it took hours to make, when really it’s one of the easiest, most foolproof recipes in your kitchen arsenal. This isn’t your grandmother’s complicated fudge recipe that requires a candy thermometer and precise temperatures; this is a simple, elegant version that celebrates pure maple flavor without any fussy techniques.
I grew up watching my mother make fudge during the holidays, and honestly, I was intimidated by it for years. But then I discovered this straightforward method, and everything changed. The secret is using the right ratio of ingredients and not overthinking the process. This maple fudge recipe combines just a handful of pantry staples – real maple syrup, butter, cream, and a touch of vanilla – to create silky, melt-in-your-mouth pieces of pure indulgence.
What I love most about this recipe is its versatility. You can enjoy it plain and simple, or dress it up with toppings like sea salt for a sophisticated twist. It’s the perfect homemade gift, a show-stopping addition to a dessert board, or simply a little treat to enjoy with your afternoon coffee. The best part? Making it feels like you’re doing something fancy, but it’s actually so easy that even beginner candy makers will have success.
Unlike complicated cream-based recipes that require constant attention, this maple fudge comes together beautifully with minimal effort. Once you master this basic technique, you’ll find yourself making batch after batch. For more detailed candy-making tips, check out this comprehensive guide to confectionery.
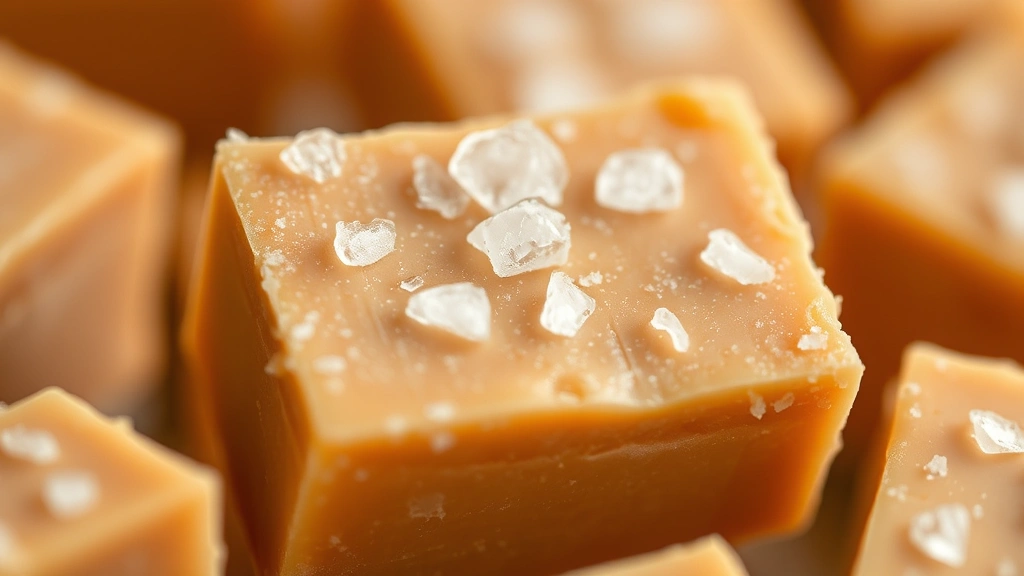
The texture is absolutely divine – not too hard, not too soft, just that perfect fudgy consistency that melts on your tongue. I’ve tested this recipe dozens of times, adjusting ratios and techniques until it was absolutely perfect. Now I’m thrilled to share it with you, along with all my tips and tricks for making foolproof maple fudge every single time.
Whether you’re a seasoned candy maker or picking up a whisk for the first time, this recipe will become a staple in your collection. It’s that good, and that easy. Let’s make some fudge!
Ingredients
- 1 cup pure maple syrup (Grade A or B)
- 1/2 cup heavy cream
- 6 tablespoons unsalted butter
- 1/4 teaspoon sea salt
- 1 teaspoon vanilla extract
- Pinch of maple extract (optional, but recommended)
- Sea salt for topping (optional)

Instructions
- Line an 8×8 inch square baking pan with parchment paper, making sure the paper extends over the edges for easy removal. Set aside.
- In a medium heavy-bottomed saucepan, combine the maple syrup, heavy cream, and butter over medium heat.
- Stir occasionally until the butter is fully melted and the mixture is well combined, about 2-3 minutes.
- Insert a candy thermometer into the mixture and continue cooking, stirring occasionally to prevent scorching on the bottom.
- Cook until the mixture reaches 238°F (soft ball stage), which should take approximately 8-10 minutes. Do not rush this step – temperature is crucial for proper fudge consistency.
- Once the mixture reaches the correct temperature, remove the saucepan from heat and let it cool for exactly 5 minutes without stirring.
- Stir in the vanilla extract, maple extract (if using), and sea salt. Mix gently but thoroughly until well combined.
- Pour the mixture into the prepared baking pan, spreading it evenly with a spatula. Try not to stir or agitate it too much at this stage.
- Allow the fudge to cool completely at room temperature for at least 2 hours, or until it’s firm enough to cut cleanly.
- Once set, use the parchment paper overhang to lift the fudge out of the pan and onto a cutting board.
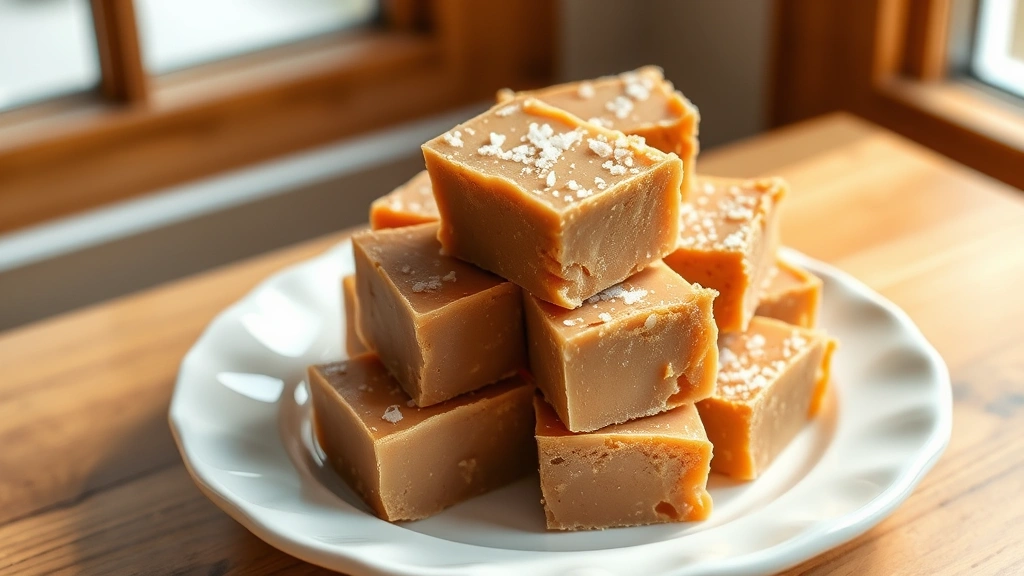
- Using a sharp knife (wipe it clean between cuts for neat edges), cut the fudge into 24 equal pieces, creating a 6×4 grid.
- If desired, sprinkle each piece with a tiny pinch of sea salt while the fudge is still slightly soft.
- Store in an airtight container at room temperature for up to two weeks, or refrigerate for longer storage.
Pro Tips
A candy thermometer is essential for success with this recipe. Investing in a reliable one will give you consistent results every time. Attach it securely to the side of your saucepan before you begin cooking.
The soft ball stage at 238°F is the magic number for this fudge. If you cook it to a higher temperature, your fudge will be too hard; if you undercook it, it will be too soft and won’t set properly.
Do not skip the cooling period before stirring. This resting time allows the fudge to begin setting slightly, which contributes to the final creamy texture.
If your fudge turns out too soft, you can refrigerate it to firm it up. If it’s too hard, you likely cooked it to too high a temperature – next time, aim for 236-237°F instead.
For a salted maple fudge variation, sprinkle fleur de sel or high-quality sea salt on top immediately after pouring into the pan, before it sets.
This recipe makes perfect gifts when wrapped in parchment paper and tied with twine. Include a note about storage and that it should be kept at room temperature or refrigerated.
You can add chopped pecans, walnuts, or candied maple leaves to the fudge mixture right before pouring if you want to get creative.
If you don’t have maple extract, the recipe works perfectly with just vanilla extract – maple syrup provides plenty of maple flavor on its own.
The fudge may look slightly oily on top as it cools – this is normal and indicates that it’s setting properly. This layer will incorporate back in as it fully sets.