
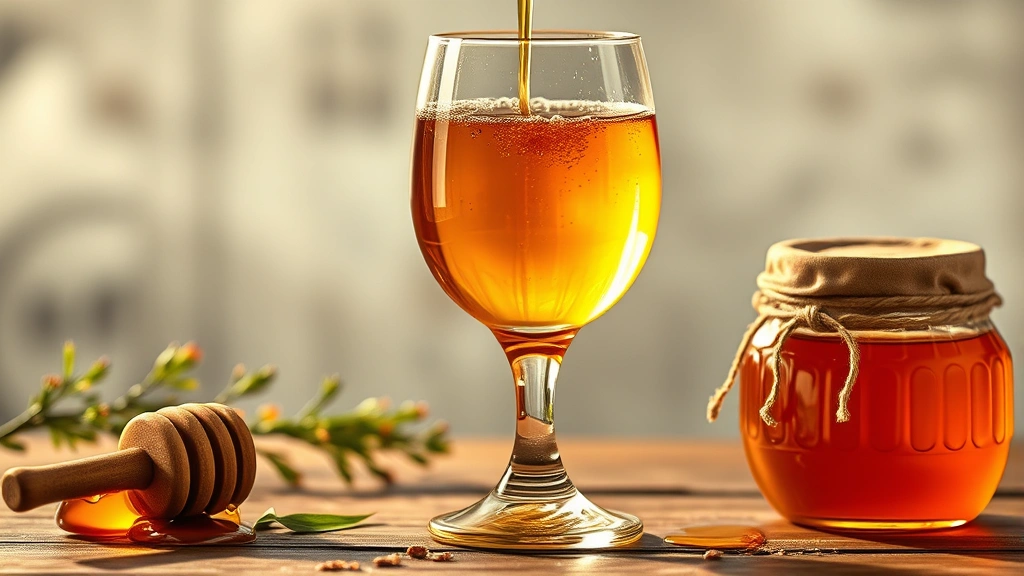
Making mead at home is easier than you might think! This simple and delicious mead recipe creates a smooth, honey-forward beverage that’s perfect for sipping on a cozy evening. Mead, often called “honey wine,” has been enjoyed for centuries and is experiencing a wonderful revival among home beverage enthusiasts.
While those internal links to cream-based pasta dishes might seem unrelated, the patience and precision required in cooking parallels the careful attention mead-making demands. Just as you’d craft a Best Heavy Cream Alfredo Sauce Recipe with quality ingredients, mead-making starts with premium honey and proper technique.
This beginner-friendly mead recipe requires minimal equipment and ingredients, yet yields sophisticated results. The fermentation process takes patience—typically 3-6 months—but the hands-on work is minimal. You’ll learn about yeast management, temperature control, and the beautiful alchemy of fermentation.
What makes this mead recipe stand out is its simplicity and reliability. Unlike some traditional recipes that call for obscure ingredients or complicated processes, this approach focuses on fundamentals: quality honey, clean water, proper yeast, and patience. The result is a versatile mead that can be enjoyed young and fruity or aged for greater complexity.
Many people compare mead-making to crafting other fine beverages—it requires the same dedication to quality as preparing Delicious Heavy Cream Pasta Recipe from scratch. Both involve understanding ingredient ratios, timing, and technique.
For those interested in exploring flavor variations, consider how you might add fruits, spices, or herbs midway through fermentation. This basic recipe serves as your foundation, similar to how a Easy Chicken Alfredo Recipe provides a template for countless variations.
Whether you’re a seasoned homebrewer or complete beginner, this mead recipe demystifies the process and proves that creating sophisticated, complex beverages at home is absolutely achievable. The investment in equipment is minimal, and the satisfaction is immeasurable. Let’s dive into creating your first batch of this delightful honey wine!
For additional inspiration on fermentation and flavor-building techniques, explore resources on Serious Eats and Bon Appétit for their beverage science articles. You might also enjoy learning about Best Creamy Pesto Recipe as a complementary skill in ingredient preparation. Check out New York Times Cooking for their comprehensive fermentation guides and Best Shishito Peppers Recipe for other preservation techniques.
Ingredients
- 3 pounds raw, unfiltered honey (wildflower, clover, or your preferred varietal)
- 1 gallon filtered or distilled water
- 1 teaspoon yeast nutrient
- 1/2 teaspoon yeast energizer (optional but recommended)
- 1 packet (5 grams) of wine yeast, preferably Lalvin D-47 or Redstar Premier Cuvée
- 1/4 teaspoon ground ginger (optional)
- 1 whole clove (optional)
- 1 small cinnamon stick (optional)
- 1/2 cup additional filtered water for yeast hydration

Instructions
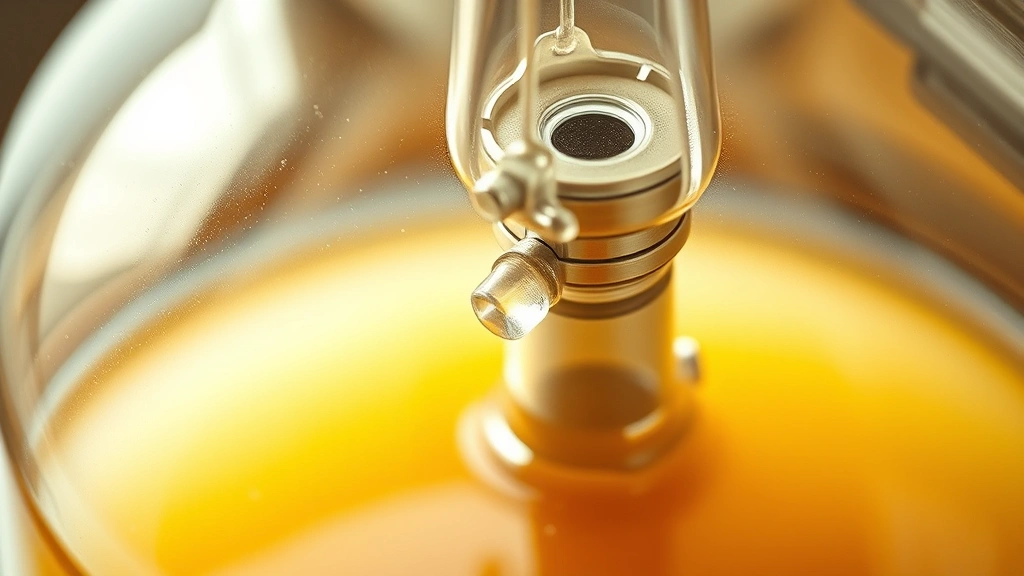
- Sterilize all equipment thoroughly, including your one-gallon glass carboy, airlock, rubber stopper, siphon tube, hydrometer, and any funnels or stirring tools. Use a sterilizing solution like Star San or sulfite-based sanitizer, following package directions carefully. Allow everything to air dry completely before use.
- Pour the 1/2 cup filtered water into a small saucepan and heat to approximately 90-100°F. This water will be used to rehydrate your yeast and should never exceed 110°F, as excessive heat kills yeast cells.
- Once the water reaches the proper temperature, sprinkle your wine yeast packet evenly over the surface. Do not stir immediately. Allow the yeast to sit and absorb moisture for 15 minutes—this process is called ‘blooming’ and dramatically improves yeast viability.
- Gently stir the bloomed yeast with a sterilized spoon until you achieve a smooth, creamy slurry with no clumps. Set this yeast mixture aside at room temperature (65-75°F) until you’re ready to pitch it into your must.
- In your sterilized carboy, combine the one gallon of filtered water with all three pounds of honey. The honey may not dissolve immediately—this is perfectly normal. Stir gently but thoroughly for several minutes, incorporating as much honey as possible.
- If using optional spices (ginger, clove, or cinnamon), add them now. These spices will infuse subtly during fermentation, creating complexity without overpowering the honey’s natural flavors.
- Measure the specific gravity of your honey-water mixture using a sterilized hydrometer. Record this initial gravity reading in a fermentation log—this number helps you track fermentation progress and calculate final alcohol content.
- Add the yeast nutrient and yeast energizer (if using) to the carboy. Stir gently to distribute evenly. These additions provide essential nitrogen and minerals that yeast requires for healthy, vigorous fermentation.
- Allow the mixture to rest for 30-60 minutes at room temperature. This resting period allows honey particles to fully dissolve and the must to reach optimal temperature for yeast pitching.
- Pour your prepared yeast slurry into the carboy. Stir gently but thoroughly to distribute yeast cells evenly throughout the must. Avoid introducing excessive oxygen at this stage.
- Secure the rubber stopper fitted with an airlock into the carboy opening. Fill the airlock halfway with either distilled water or a sanitizing solution, depending on manufacturer instructions. The airlock allows carbon dioxide to escape during fermentation while preventing contaminants from entering.
- Place your carboy in a cool, dark location with a consistent temperature between 65-75°F. Temperature stability is crucial—fluctuations can stress yeast and produce off-flavors. Avoid direct sunlight and heat sources.
- Monitor your mead over the next 24-48 hours. You should observe visible signs of fermentation: bubbling in the airlock, slight cloudiness in the liquid, and possibly some sediment forming at the bottom. If fermentation doesn’t begin within 48 hours, your yeast may be compromised.
- Over the following two to three weeks, fermentation will proceed actively. Bubbles will rise continuously through the airlock. Resist the urge to open the carboy during this period, as this introduces oxygen and risks contamination.
- After three weeks, check fermentation progress using your hydrometer. The specific gravity should have dropped significantly. If fermentation is still vigorous (many bubbles), wait another week before checking again.
- Once fermentation slows considerably (bubbling occurs only every few minutes), allow the mead to sit undisturbed for another 2-3 weeks. This resting period allows yeast to settle and clarify begins naturally.
- Approximately 4-6 weeks after initial pitching, take another specific gravity reading. When readings remain stable over 5-7 days, fermentation is complete.
- Carefully siphon your finished mead into sanitized wine bottles, leaving sediment behind in the carboy. Siphoning prevents unnecessary aeration and oxidation during transfer. Fill bottles to within 1/2 inch of the rim.
- Cap bottles with sanitized corks or wine caps. Store upright in a cool, dark place for at least 4-6 weeks before tasting, though patience for 6-12 months yields noticeably improved complexity and smoothness.
- After 6 months of aging, open a bottle and evaluate your creation. Note the color, aroma, and taste. Properly made mead should be clear or slightly hazy, with pleasant honey aromatics and balanced sweetness or dryness depending on fermentation completion.
Pro Tips
- Quality honey selection dramatically impacts your final product. Raw, unfiltered honey contains beneficial wild yeasts and micronutrients that enhance complexity. Avoid ultra-pasteurized or blended honey products when possible.
- Temperature control is your most critical success factor. Mead ferments best between 65-75°F. Temperatures below 60°F slow fermentation dramatically, while temperatures above 80°F produce off-flavors and may kill yeast cells.
- The specific gravity measurement reveals fermentation progress and alcohol content. Initial gravity of 1.110 suggests approximately 14-15% ABV when fermentation completes at 0.995-1.000.
- Yeast nutrient and energizer are not optional for beginners. These additions prevent stuck fermentation and ensure yeast has necessary resources for vigorous activity throughout the process.
- Your first batch may appear murky or develop a “dust” layer at the bottom—this is normal yeast sediment called lees. This settles naturally over time and doesn’t indicate failure.
- Patience is rewarded in mead-making. While young mead can be drinkable after 4-6 weeks, aging for 6-12 months allows volatile compounds to dissipate and flavors to integrate beautifully.
- Common variations include adding fruit during secondary fermentation (after initial vigorous fermentation slows), adjusting honey ratios for drier or sweeter results, or experimenting with different yeast strains for unique flavor profiles.
- Storage matters significantly. Keep bottles upright in cool (50-60°F), dark conditions. Avoid temperature fluctuations, direct sunlight, and vibration. Properly stored mead improves for 2-5 years.
- Equipment investment is minimal but important. A basic setup includes carboy, airlock, siphon, hydrometer, and bottles—total cost under $50 for reusable items that serve for years.
- Troubleshooting: if fermentation never starts, your yeast was likely dead (check expiration dates). If fermentation stalls mid-process, raise temperature slightly (no more than 5°F) and add fresh yeast nutrient.
- Document everything. Record honey variety, yeast strain, initial gravity, temperature, and tasting notes. This data becomes invaluable for improving subsequent batches and developing your personal mead signature.