
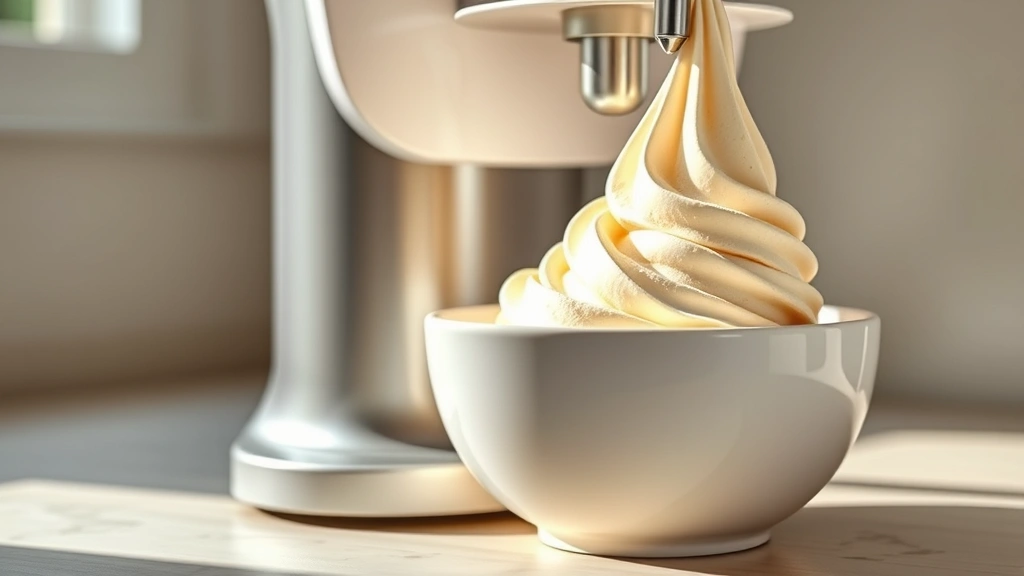
There’s nothing quite like homemade vanilla ice cream on a hot summer day, and when you make it in a Ninja Creami, you get that perfect slushy-to-creamy texture that’s absolutely divine. I’m obsessed with this recipe because it’s so simple, yet produces restaurant-quality results every single time. The beauty of using a Ninja Creami is that you can have soft-serve style ice cream in minutes without needing an ice cream maker.
This vanilla ice cream recipe is made with just a few basic ingredients: heavy cream, sweetened condensed milk, vanilla extract, and a pinch of salt. That’s it! The sweetened condensed milk acts as both a sweetener and a stabilizer, which means you get that silky smooth texture without any ice crystals. I’ve been making this recipe for years now, and it never disappoints.
What I absolutely love about this method is how foolproof it is. You simply mix your ingredients together, pour them into a Ninja Creami sorbet cup, freeze for about 24 hours, and then let the machine do all the work. In just a few minutes, you’ll have the creamiest, dreamiest vanilla ice cream that tastes just like it came from your favorite ice cream parlor.
If you’re looking for other delicious cream-based recipes, you might want to check out my Best Heavy Cream Alfredo Sauce Recipe or this Delicious Heavy Cream Pasta Recipe. I also have an Easy Chicken Alfredo Recipe that’s perfect for weeknight dinners.
This Ninja Creami vanilla ice cream is perfect on its own, but it’s also wonderful paired with desserts. Try serving it with a slice of homemade cake or alongside some pickled red onions for a unique flavor contrast. You could even drizzle it with homemade chocolate sauce or caramel for extra indulgence.
The best part about this recipe is that once you master the basic vanilla, you can customize it so many ways. Add cocoa powder for chocolate, mix in fresh fruit purée for berry flavors, or swirl in some cookie butter. The possibilities are truly endless!
For those who love cooking and creating frozen treats, I recommend checking out Serious Eats for more advanced ice cream techniques and Bon Appétit for creative flavor inspiration. You can also explore New York Times Cooking for chef-approved ice cream recipes that will take your skills to the next level.
Ingredients
- 2 cups heavy whipping cream
- 1 can (14 ounces) sweetened condensed milk
- 2 tablespoons pure vanilla extract
- 1/4 teaspoon sea salt
- 1 tablespoon granulated sugar (optional, for extra sweetness)
Instructions
- Gather all your ingredients and make sure your Ninja Creami sorbet cup is clean and ready to use. Having everything prepared will make this process incredibly smooth and easy.
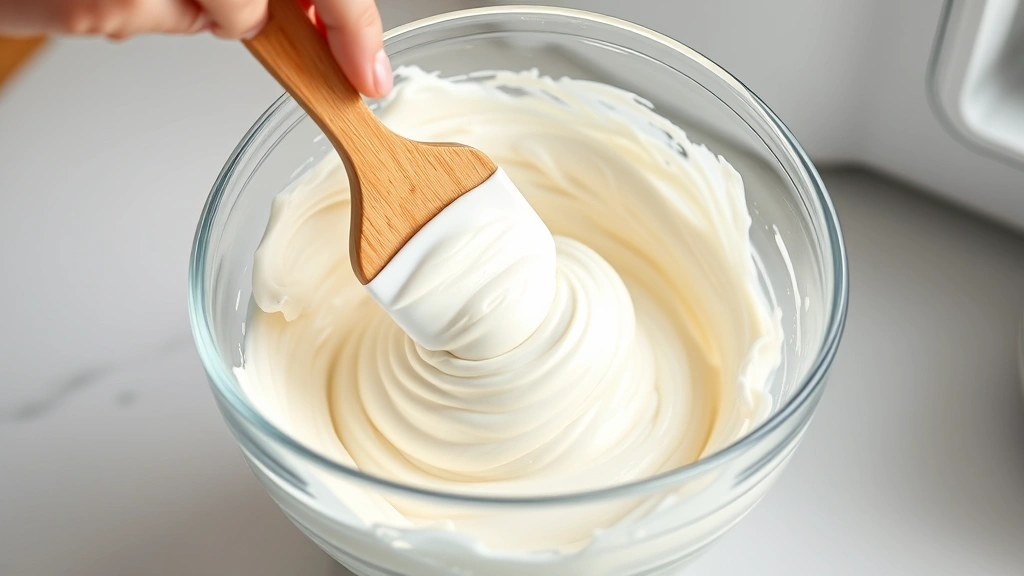
- Pour the heavy whipping cream into a large mixing bowl. Using an electric mixer or a whisk, whip the cream until it forms soft peaks, about 2-3 minutes. Be careful not to over-whip, as you want it to be creamy but not butter-like.
- In a separate bowl, combine the sweetened condensed milk, vanilla extract, and sea salt. Whisk these ingredients together until well combined and smooth, about 1 minute.
- Gently fold the vanilla mixture into the whipped cream using a spatula or wooden spoon. Use slow, deliberate motions to combine, folding from the bottom up and rotating the bowl as you go. This should take about 2-3 minutes.
- If you’d like extra sweetness, sprinkle the granulated sugar over the mixture and fold it in gently until just incorporated throughout.
- Carefully pour the mixture into your Ninja Creami sorbet cup, filling it to about 3/4 full. You don’t want to fill it completely to the top, as the mixture will expand slightly as it freezes.
- Place the filled cup into the freezer with the lid off or partially off, allowing it to freeze uncovered for at least 24 hours. The longer it freezes, the better the texture will be.
- After 24 hours, remove the cup from the freezer and let it sit at room temperature for about 2-3 minutes. This will make it easier to insert into your Ninja Creami machine.
- Insert the sorbet cup into your Ninja Creami machine, making sure it’s seated properly and securely.
- Select the sorbet or frozen beverage setting on your Ninja Creami, depending on your machine model. Press start and watch as the machine works its magic, creating that beautiful soft-serve texture.
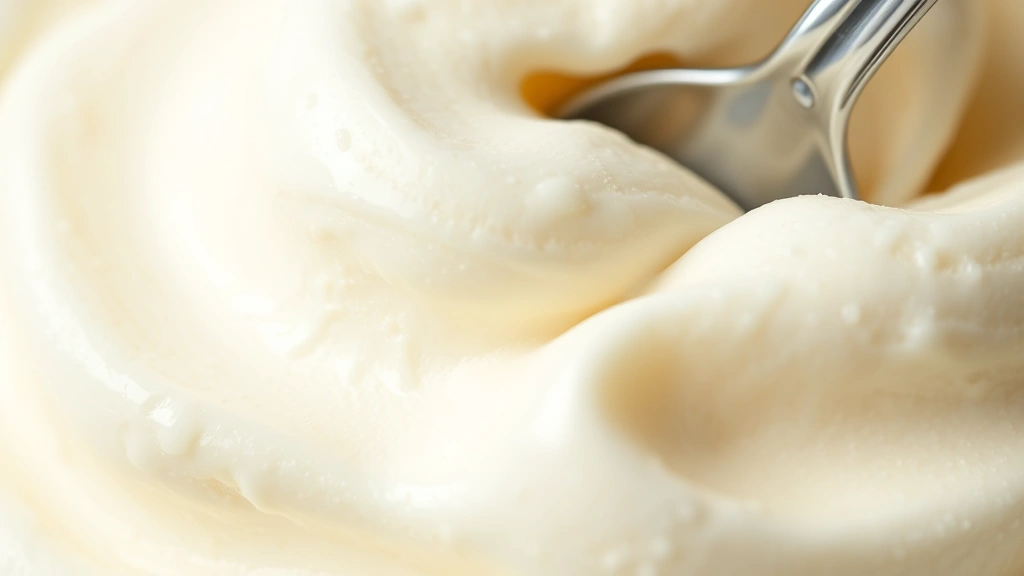
- Once the machine has finished cycling through (usually takes 3-5 minutes), remove the cup and serve immediately into chilled bowls or cones for the best experience.
Pro Tips
TEXTURE TIPS: For a creamier result, use the highest fat content heavy cream you can find. The higher the fat content, the smoother your final product will be.
FLAVOR VARIATIONS: Add 1/2 teaspoon of almond extract along with the vanilla for a more complex flavor profile. You can also add 1 tablespoon of honey or maple syrup for depth.
CHOCOLATE SWIRL: Before freezing, drizzle melted dark chocolate into the mixture and swirl it gently with a knife. This creates beautiful chocolate ribbons throughout.
BERRY VERSION: Blend 1 cup of fresh or frozen berries and fold into the mixture before freezing for a fruity twist on this classic recipe.
NUT BUTTER ADDITION: Swirl in 2-3 tablespoons of smooth peanut butter or almond butter before freezing for added richness and protein.
FREEZING TIME: While 24 hours is the minimum, freezing for up to 48 hours will give you an even more solid freeze and better creami results.
MACHINE CARE: Always clean your Ninja Creami cup immediately after use with warm soapy water to prevent residue buildup and ensure longevity.
SERVING SUGGESTIONS: Serve in chilled bowls or sugar cones for the best presentation. Top with fresh berries, chocolate chips, or homemade whipped cream.