
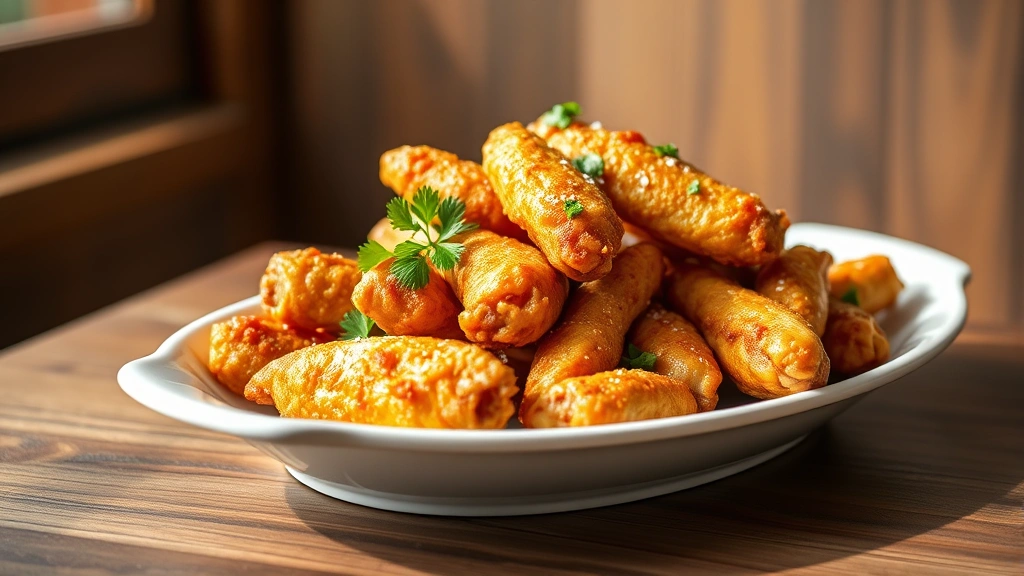
There’s something absolutely magical about making chicken wings in the Ninja Foodi – they emerge impossibly crispy on the outside while staying juicy and tender on the inside, all without deep frying! This isn’t just another wing recipe; this is the method that will have everyone asking for your secret.
The Ninja Foodi’s dual cooking technology is absolutely perfect for wings. You get the benefit of pressure cooking to keep them moist and flavorful, followed by the air crisping function that creates that coveted golden, crunchy exterior. I’ve tested this recipe countless times, tweaking variables until I landed on the exact timing and technique that produces restaurant-quality results every single time.
What makes this recipe so special is the combination of proper seasoning, the right amount of liquid for pressure cooking, and the crucial air crisp finish. Many home cooks either end up with wings that are dry from overcooking or ones that lack that satisfying crunch. With this method, you get both – the best of both worlds, really. The wings cook evenly, develop incredible flavor, and have that addictive texture that makes people reach for just one more.
I love serving these for game day, parties, or even casual weeknight dinners. You can prepare them in about 30 minutes total, which is significantly faster than traditional oven baking or deep frying. Plus, your kitchen stays relatively clean and grease-free, which is a huge bonus when you’re entertaining.
Before we dive into the recipe, I want to share a few pro tips that will elevate your results. First, pat your wings completely dry – this is non-negotiable for crispy skin. Second, don’t skip the seasoning step; this is where you build incredible flavor. Third, arrange the wings in a single layer during the air crisp phase to ensure even cooking. And finally, let them rest for just a minute after cooking – this helps set the crispy exterior.
You can absolutely customize this recipe to your taste preferences. Prefer spicy wings? Add more cayenne or hot sauce to your coating. Love garlic? Double the garlic powder and add fresh minced garlic to the cooking liquid. The beauty of this method is its versatility. Check out our Asian-Inspired Wings recipe for a completely different flavor profile, or try our Classic BBQ Wings for a traditional approach. We also have an amazing Ultimate Wing Sauce Guide that pairs perfectly with this cooking method.
For more inspiration on Ninja Foodi cooking techniques, check out Bon Appétit’s kitchen tips, and for detailed pressure cooking information, Serious Eats has excellent resources. The Pressure Cooking Basics article on our site breaks down exactly how pressure cooking affects meat texture.
This recipe makes enough for about 4-6 people as an appetizer or main course snack. The wings reheat beautifully, though I’ll admit they’re best enjoyed fresh and hot, right out of the Foodi. Once you master this technique, you’ll find yourself making these wings regularly – they’re that good.
Ingredients
- 3 pounds chicken wings, separated into drumettes and flats, tips reserved
- 1 cup chicken broth
- 2 tablespoons olive oil
- 2 teaspoons garlic powder
- 1 teaspoon onion powder
- 1 teaspoon smoked paprika
- 1 teaspoon kosher salt
- ½ teaspoon black pepper
- ¼ teaspoon cayenne pepper
- 1 tablespoon cornstarch
- 1 teaspoon Italian seasoning
- Juice of ½ lemon
- 3 cloves garlic, minced
- 1 tablespoon butter
- Fresh parsley for garnish
- Fleur de sel for finishing (optional but recommended)
Instructions
- Pat your chicken wings completely dry with paper towels, pressing gently but firmly to remove all surface moisture. This step is absolutely critical for achieving crispy skin – any remaining moisture will steam rather than crisp.
- In a small bowl, combine garlic powder, onion powder, smoked paprika, kosher salt, black pepper, cayenne pepper, cornstarch, and Italian seasoning, mixing thoroughly with a fork to break up any clumps.
- Place the dried wings in a large bowl and drizzle with olive oil, tossing gently to coat evenly. Sprinkle the seasoning mixture over the oiled wings and toss again until every piece is well coated. Don’t be shy with the seasoning – this is where your flavor comes from.
- Pour the chicken broth into the bottom of your Ninja Foodi pot. Add the minced garlic and lemon juice to the broth, stirring to combine.
- Insert the reversible rack into the pot, making sure it’s in the lower position for pressure cooking. Arrange the seasoned wings on the rack in a single layer, piling them as necessary but trying to minimize stacking.
- Close the Foodi lid and make sure the pressure release valve is set to seal. Select pressure cook on high and set the timer for 12 minutes.
- Once the cooking cycle completes, allow the pressure to release naturally for 5 minutes, then carefully perform a quick release of any remaining pressure by turning the valve to vent.
- Carefully open the lid (watch out for steam!) and remove the rack with the wings. At this point, the wings will look pale and won’t have much color – don’t worry, this is exactly what should happen.
- Pour out the cooking liquid from the pot and pat the wings dry again with clean paper towels. Any remaining moisture needs to be removed before air crisping.
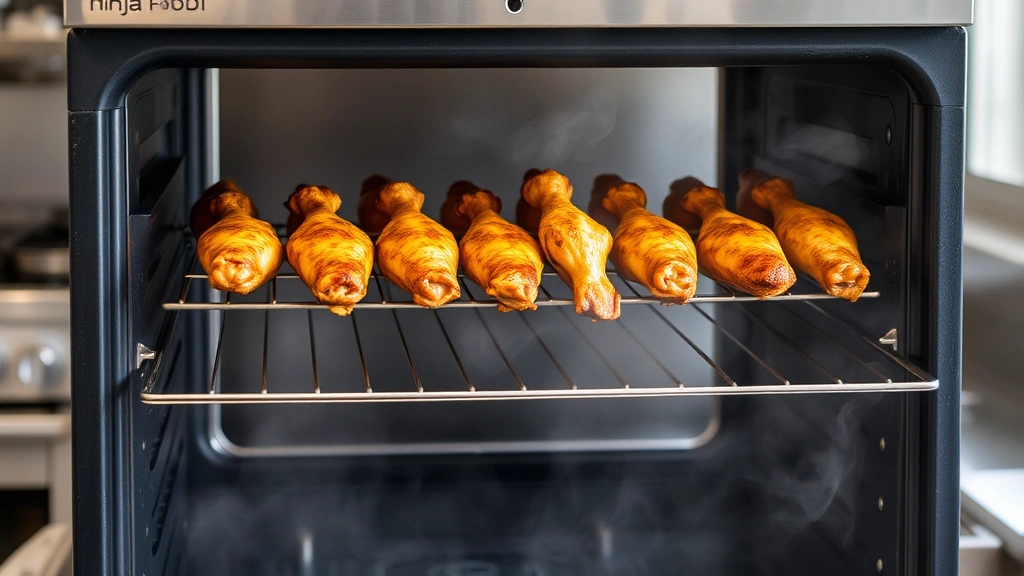
- Flip the Foodi to air crisp mode and set the temperature to 400°F. Place the wings back on the rack in a single layer, arranged so they’re not touching if possible.
- Set the air crisp timer for 10 minutes and press start. About halfway through, carefully shake the basket or use tongs to move the wings around for even browning.
- When the air crisp cycle completes, open the lid and check the wings for desired crispiness and golden-brown color. If you’d like them even crispier, run another 2-3 minutes at 400°F.
- Transfer the crispy wings to a serving platter. In a small saucepan over low heat, melt the butter and add any remaining minced garlic, cooking for just 30 seconds until fragrant.
- Drizzle the garlic butter over the hot wings and toss gently to coat. Finish with fresh chopped parsley and a sprinkle of fleur de sel.
- Serve immediately while the wings are hot and at peak crispiness. Offer your favorite dipping sauce on the side for dunking.

Pro Tips
- **Make-Ahead Strategy**: You can prep the wings and seasoning mixture the night before. Store the seasoned wings in a sealed container in the refrigerator, then bring them to room temperature for 15 minutes before cooking. This actually helps them cook more evenly.
- **Sauce Options**: These wings are delicious plain, but you can absolutely toss them in sauce after cooking. Try buffalo sauce, BBQ sauce, honey garlic glaze, or Korean-style gochujang sauce. Add sauces after the air crisp step so they get sticky without interfering with crispiness.
- **Storage and Reheating**: Leftover wings store in an airtight container in the refrigerator for up to 4 days. To reheat and maintain crispiness, place them on the air crisp rack at 350°F for 5 minutes rather than using a microwave.
- **Wing Sizing**: Try to select wings of similar size so they cook evenly. If you have a mix of sizes, consider cooking the larger ones for an extra minute or two, or breaking the batch into two smaller batches.
- **Pressure Cooking Liquid**: Don’t skip the broth – it keeps the wings moist during pressure cooking and prevents them from drying out. The short 12-minute cook time is specifically calibrated for wing thickness.
- **Crispy Skin Science**: The combination of pressure cooking and air crisping works because pressure cooking breaks down collagen in the skin, making it tender, while air crisping renders out fat and creates a crispy exterior through Maillard browning.
- **Customization Ideas**: Add Italian herbs, Cajun seasoning, lemon pepper, or Asian-inspired seasonings. You can also brush wings with honey or maple syrup right after air crisping for a sweet and savory finish.
- **Batch Cooking**: If making for a crowd, this recipe doubles easily. Just increase pressure cooking time to 15 minutes and air crisp time to 12-13 minutes. You may need to work in batches depending on your Foodi model’s capacity.
- **Temperature Accuracy**: Every Ninja Foodi model varies slightly. If your wings aren’t as crispy as desired, increase the air crisp temperature to 425°F or extend the time by 2-3 minutes. Make notes of what works best in your specific model.
- **Drying Step Importance**: The final drying step before air crisping is crucial. Any residual moisture will create steam pockets that prevent browning. Use fresh paper towels and don’t rush this step.
- **Serving Suggestions**: Serve with celery and carrot sticks, blue cheese dressing, ranch dip, or your favorite accompaniments. These wings are perfect for game day, parties, or casual entertaining.