

Onigiri, the beloved Japanese rice ball, is one of the most satisfying and versatile dishes you can make at home. These little parcels of perfectly seasoned rice wrapped around delicious fillings are ideal for lunch boxes, picnics, or a quick snack. What makes onigiri so special is their simplicity—just a few quality ingredients and proper technique transform ordinary rice into something truly magical. The beauty of homemade onigiri is that you control every element, from the rice texture to the fillings, making them far superior to store-bought versions.
The foundation of exceptional onigiri starts with understanding the importance of proper rice preparation. Sushi rice or Japanese short-grain rice is essential because of its sticky texture, which holds the onigiri together beautifully. The rice must be seasoned while still warm with a mixture of rice vinegar, sugar, and salt—this is what gives onigiri their distinctive subtle tang and flavor depth. Many home cooks skip this step or use plain rice, which results in bland, unappetizing rice balls. Trust us, taking the extra five minutes to properly season your rice makes an enormous difference.
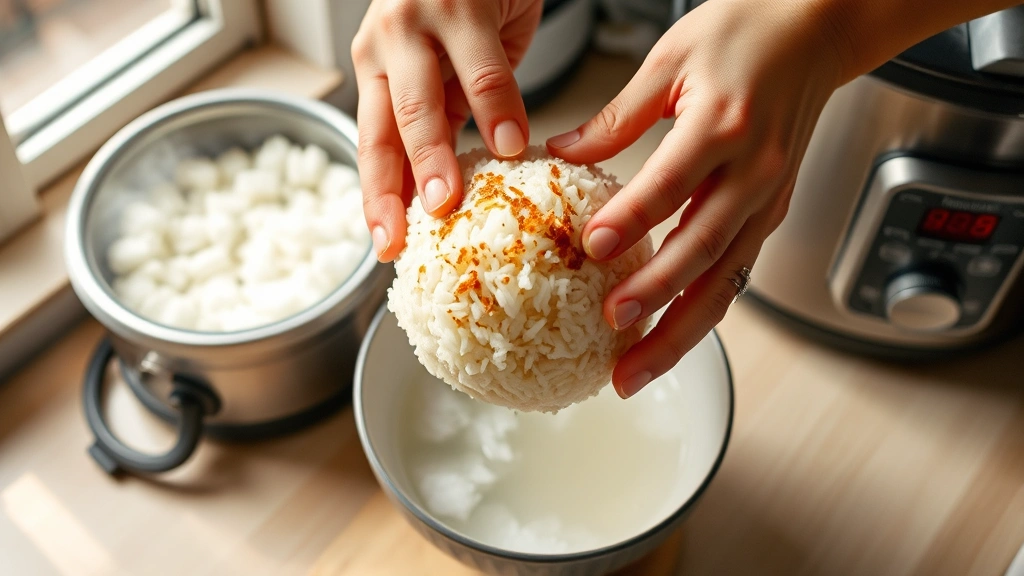
The shaping technique is where many beginners struggle, but it’s actually quite intuitive once you understand the method. You’ll want to work with rice that’s still warm (but not scorching hot), using slightly damp hands to prevent sticking. The traditional triangular shape is most iconic, though rounded balls are equally delicious and sometimes easier for beginners. What’s crucial is creating a small indent in the center where your filling sits, then carefully molding the rice around it so the filling is completely enclosed. This prevents the filling from leaking out and ensures every bite contains that delightful surprise of flavor in the center.
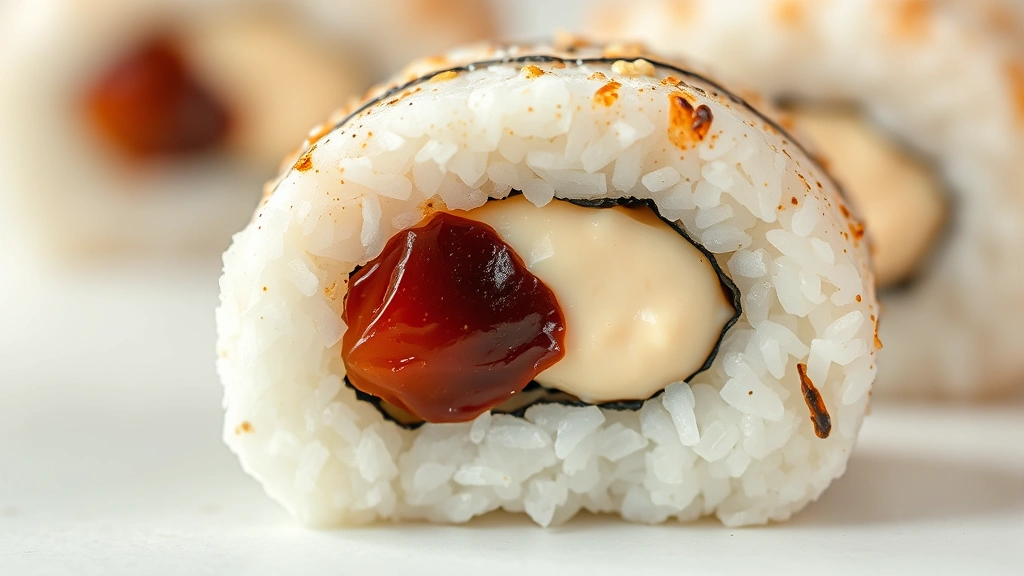
Filling options are where your creativity truly shines with onigiri recipes. Classic umeboshi (pickled plum) is traditional and provides a wonderfully salty, tangy counterpoint to the mild rice. Grilled salmon is another beloved option—the combination of flaky, savory fish with seasoned rice is absolutely irresistible. Kombu seaweed, tuna mayo, seasoned kelp, and even spicy mayo make excellent fillings. For something special, try furikake seasoning, which adds texture and umami depth. The key with any filling is using it sparingly—about a teaspoon is perfect, as you want the rice to be the star, with the filling as a complementary accent.
For detailed techniques and variations, check out Serious Eats’ comprehensive onigiri guide and Bon Appétit’s modern take on traditional onigiri. These resources offer excellent visual guidance and creative filling ideas. For more Japanese rice techniques, The New York Times has a detailed tutorial that walks through the entire process step-by-step.
Storage and serving are important aspects that ensure your onigiri stay delicious. These rice balls are best enjoyed within a few hours of making them, though they’ll keep in an airtight container at room temperature for up to a day. If you’re meal prepping, you can refrigerate them for up to three days, but allow them to come to room temperature before eating for the best texture and flavor. Many Japanese schoolchildren eat room-temperature onigiri straight from their lunch boxes, and there’s something absolutely perfect about that experience. The rice firms up slightly as it cools, making it easier to handle and giving it a more satisfying bite.
The nori (seaweed) wrapping deserves special attention in any quality onigiri recipe. Traditional onigiri feature a thin band of nori around the base, which serves both practical and aesthetic purposes. It provides a handy grip so your hands stay clean while eating, and it adds a subtle umami flavor and crispy texture that complements the soft rice beautifully. Some people prefer to wrap the nori just before eating to keep it crispy, while others enjoy it slightly softened from contact with the rice. Both approaches are completely valid—it’s about personal preference.
Making onigiri is a wonderful activity to do with family or friends. There’s something meditative and joyful about shaping these little rice balls, and children especially love getting involved in the process. It’s a perfect introduction to Japanese cooking and teaches fundamental techniques like rice seasoning and proper handling of ingredients. Once you master the basic method, you’ll find yourself making onigiri regularly—they’re that satisfying and addictive.
Ingredients
- 2 cups Japanese short-grain rice (sushi rice)
- 2¼ cups water
- 3 tablespoons rice vinegar
- 2 tablespoons sugar
- 1½ teaspoons salt
- Fillings of choice: umeboshi (pickled plum), grilled salmon, tuna mayo, kombu seaweed, or furikake seasoning
- Nori (seaweed) sheets, cut into strips
- Salt for your hands (in a small bowl)
Instructions
- Rinse the Japanese short-grain rice thoroughly under cold running water, stirring gently with your hand until the water runs mostly clear. This removes excess starch and ensures fluffy, well-separated grains. Drain completely in a fine-mesh strainer.
- Add the rinsed rice and 2¼ cups water to a rice cooker and cook according to your rice cooker’s instructions, typically 15-20 minutes. Alternatively, bring water to a boil in a heavy-bottomed pot, add rice, return to a boil, then reduce heat to low, cover, and simmer for 18 minutes. Remove from heat and let steam, covered, for 10 minutes.
- While the rice cooks, prepare your seasoning mixture: combine rice vinegar, sugar, and salt in a small bowl, stirring until the sugar and salt dissolve completely.
- Transfer the hot cooked rice to a large wooden or glass bowl (avoid metal, which can react with the vinegar). Drizzle the vinegar mixture over the warm rice and gently fold it in using a wooden spoon or shamoji (rice paddle), cutting down through the rice rather than stirring to avoid breaking the grains.
- Continue folding the rice gently until the vinegar mixture is evenly distributed and the rice is glossy and slightly cooled, about 3-5 minutes. The rice should be warm but cool enough to handle comfortably.
- Fill a small bowl with water and add a pinch of salt—this is your hand-dampening station. Dip your hands in the salt water and gently shake off excess so your hands are damp but not dripping.
- Place about ¼ cup of seasoned rice in the palm of one hand and gently press it with your fingers to create a small indent in the center.
- Place approximately 1 teaspoon of your chosen filling into the indent in the rice.
- Take another ¼ cup of seasoned rice and gently place it on top of the filling, then carefully mold all the rice around the filling using both hands, creating a triangular or rounded ball shape. Work gently to avoid compressing the rice too much.
- Once shaped, gently squeeze the onigiri once or twice in your palms to help it hold together, but don’t over-compress. The onigiri should be firm enough to hold its shape but still light and fluffy, not dense.
- Wrap a strip of nori around the base of each onigiri, or serve the nori strips on the side for diners to add just before eating if they prefer crispier seaweed.
- Arrange the finished onigiri on a serving platter and enjoy immediately at room temperature, or wrap in plastic wrap and refrigerate until lunchtime. Serve within a few hours for best texture and flavor.
Pro Tips
- The key to perfect onigiri is working with rice that’s warm but not too hot—if it’s steaming, let it cool for a minute or two first
- Always season your rice while it’s still warm; cold rice won’t absorb the vinegar mixture properly and will taste bland
- Don’t overfill your onigiri—a teaspoon of filling is plenty; more will cause it to leak out during shaping
- Damp hands are essential for shaping; re-dip in your salt water after every onigiri or as needed to prevent sticking
- For triangular shapes, press the rice into a triangle mold (available inexpensively online), or simply shape by hand into a pyramid form
- Umeboshi (pickled plum) is extremely salty and pungent—a little goes a long way, so use just a small piece
- Tuna mayo filling should be made by mixing canned tuna with a small amount of Japanese mayonnaise; drain the tuna well first
- Furikake seasoning provides wonderful umami and texture—sprinkle about ½ teaspoon in the center as your filling
- Store finished onigiri in an airtight container at room temperature for up to 8 hours, or refrigerate for up to 3 days
- Allow refrigerated onigiri to come to room temperature before eating for the best texture and flavor
- The nori wrapper can be added immediately for softer seaweed, or just before eating for crispier texture—both are equally authentic
- Onigiri are perfect for meal prep and lunch boxes; they’re portable, delicious, and far superior to store-bought versions
- For a fun twist, try filling with seasoned ground beef, shrimp, or even cheese (modern Japanese fusion style)